Start with Databricks
A hands-on walkthrough: model a data product on Databricks Unity Catalog, put its output port under a data contract, and test and enforce that contract against your warehouse. To automate access grants, see the Databricks integration.
Best Practices: Data Products in Databricks
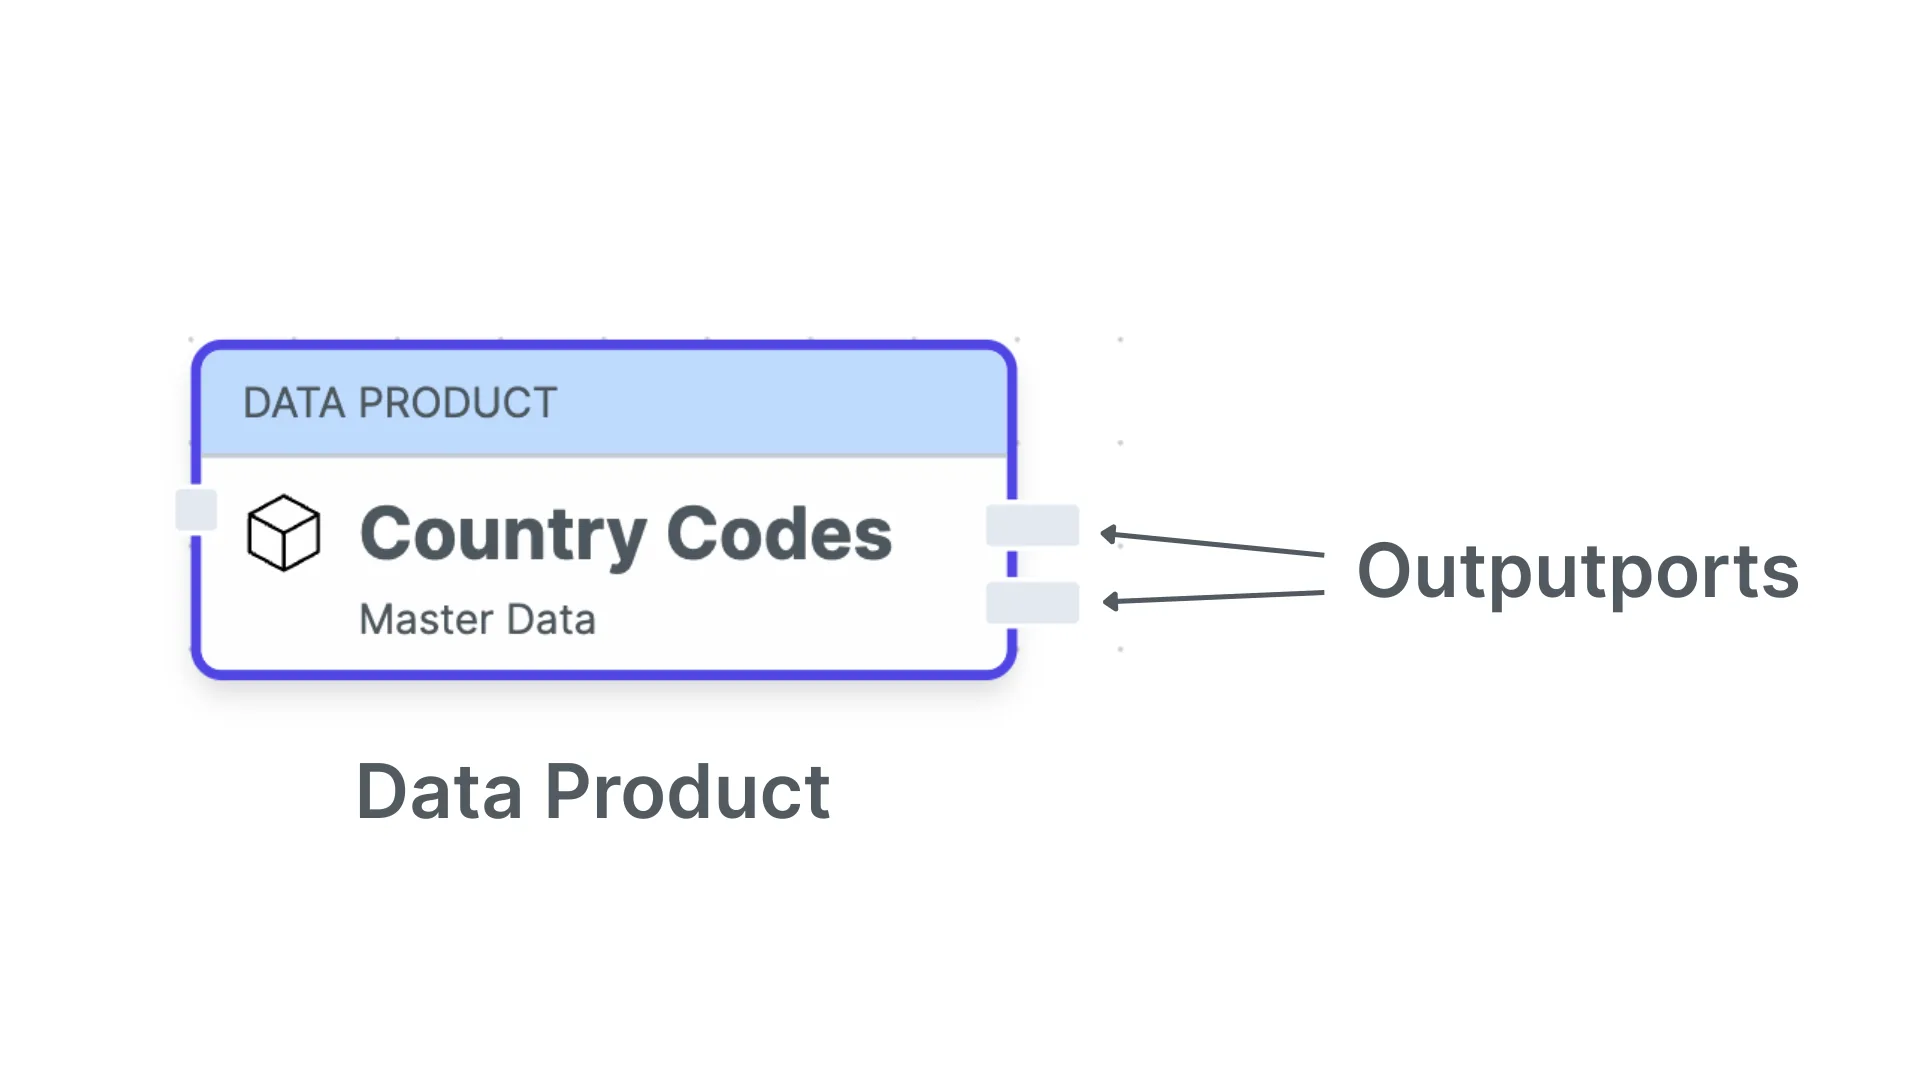
A data product is a logical container of managed data that you want to share with other teams. The data product can have multiple output ports representing the specific datasets with data model, version, environment, and technology.
With Databricks Unity Catalog, we have three layers to organize data. When working with data products, we need a convention to define what are the internal data and what are the tables that are part of the output ports.
A typical convention could look like this:
- Catalog:
<domain_name>_<team_name>_<environment>- Schema:
dp_<data_product_name>_op_<output_port_name>_v<output_port_version>- Tables and views that are part of the output port
- Schema:
dp_<data_product_name>_internal- Internal source, intermediate, and staging tables that are necessary to create the output port tables
- Schema:
Adopt this to your needs and make sure to document it as Global Policy.
A Unity Catalog is often created for a specific organization, business unit, domain, or team. Some organizations also have one catalog per data product.
A schema should be created for each output port with a clear naming convention. The output_port_name can be omitted if the output port name is equal to the data product name.
Follow your organization's naming conventions for table names.
Example
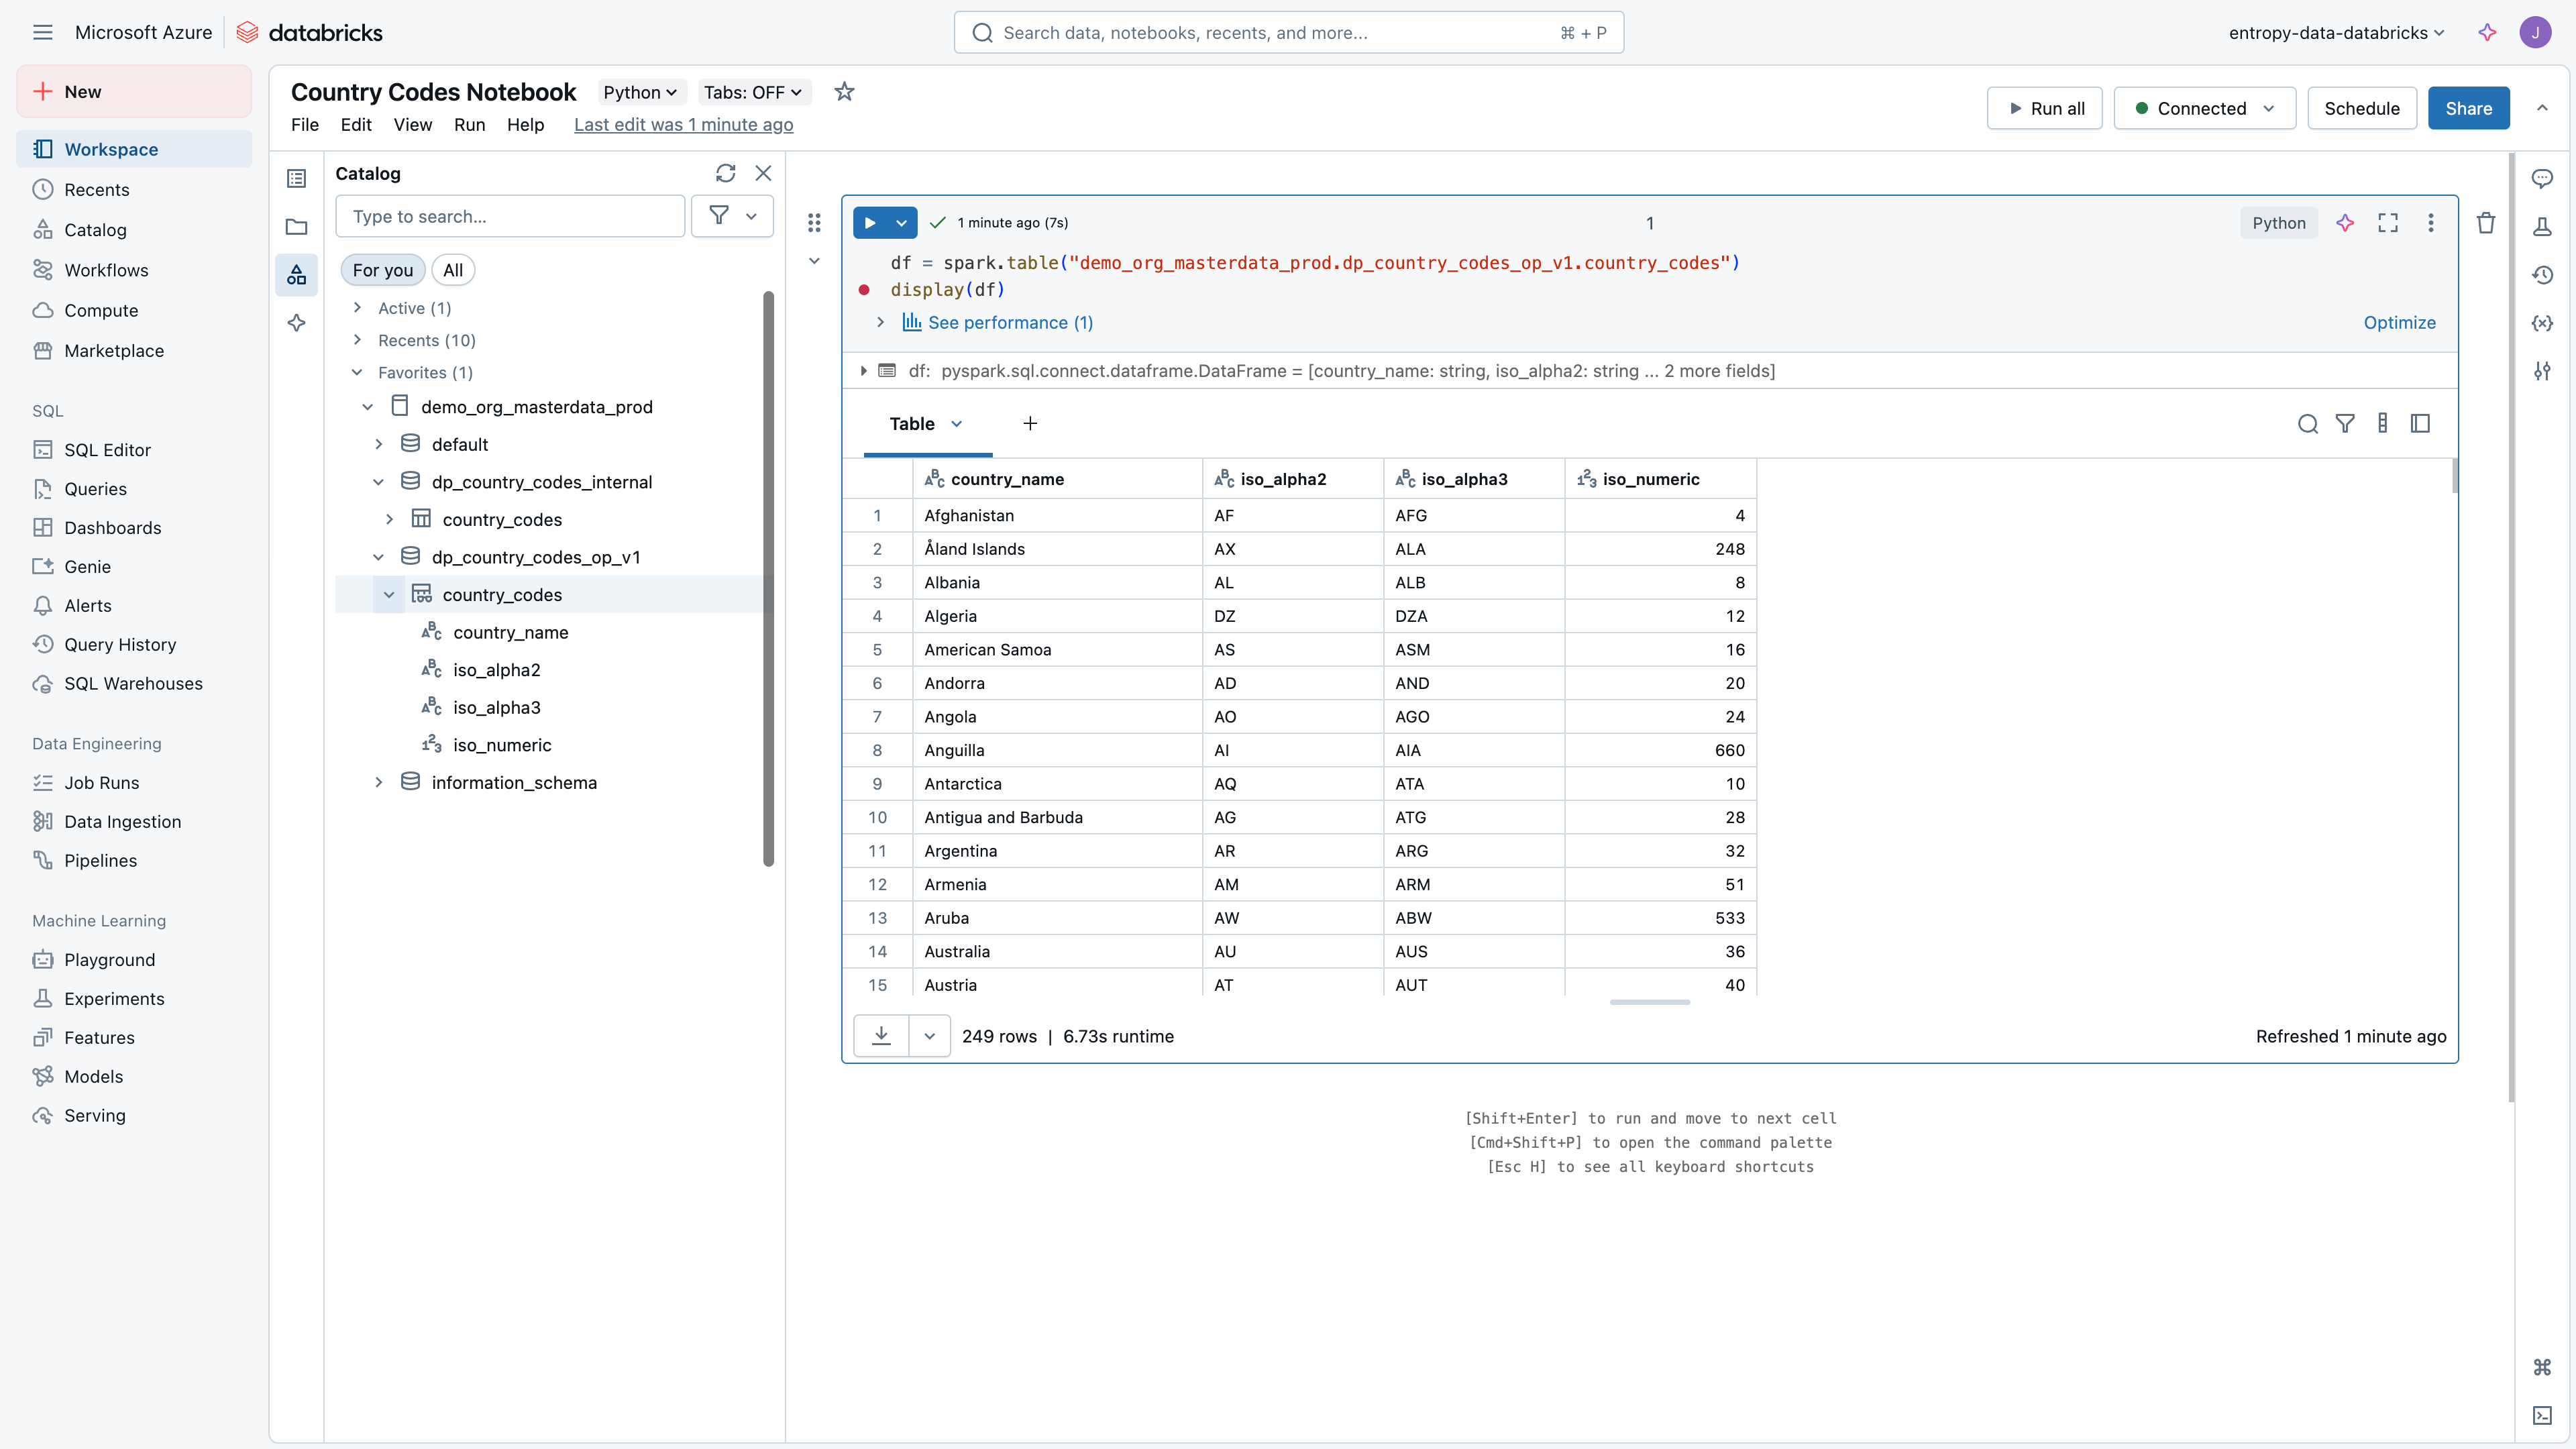
Let's imagine, we have a table country_codes in databricks Unity Catalog, and we want to create a data product for it.
In our example, we would have this structure:
- Catalog:
demo_org_masterdata_prod- Schema:
dp_country_codes_op_v1- Table:
country_codes
- Table:
- Schema:
dp_country_codes_internal- Table:
country_codes
- Table:
- Schema:
Conventions might be different, the core idea is to have one schema per output port. Having a schema per output port allows to share one or multiple tables, while keeping the permission model simple, and keeping the internal tables private.
Add Data Product to Entropy Data
Now, let's register the data product in Entropy Data. We start using the Web UI, and we will later look at how this process can be automated with API.
Log in to Entropy Data, go to Studio → Data Products, and select Add Data Product → Add in Web UI.
Our Data Product is source-aligned, as we don't have business-specific transformations, so we select "Source-aligned" as the type.
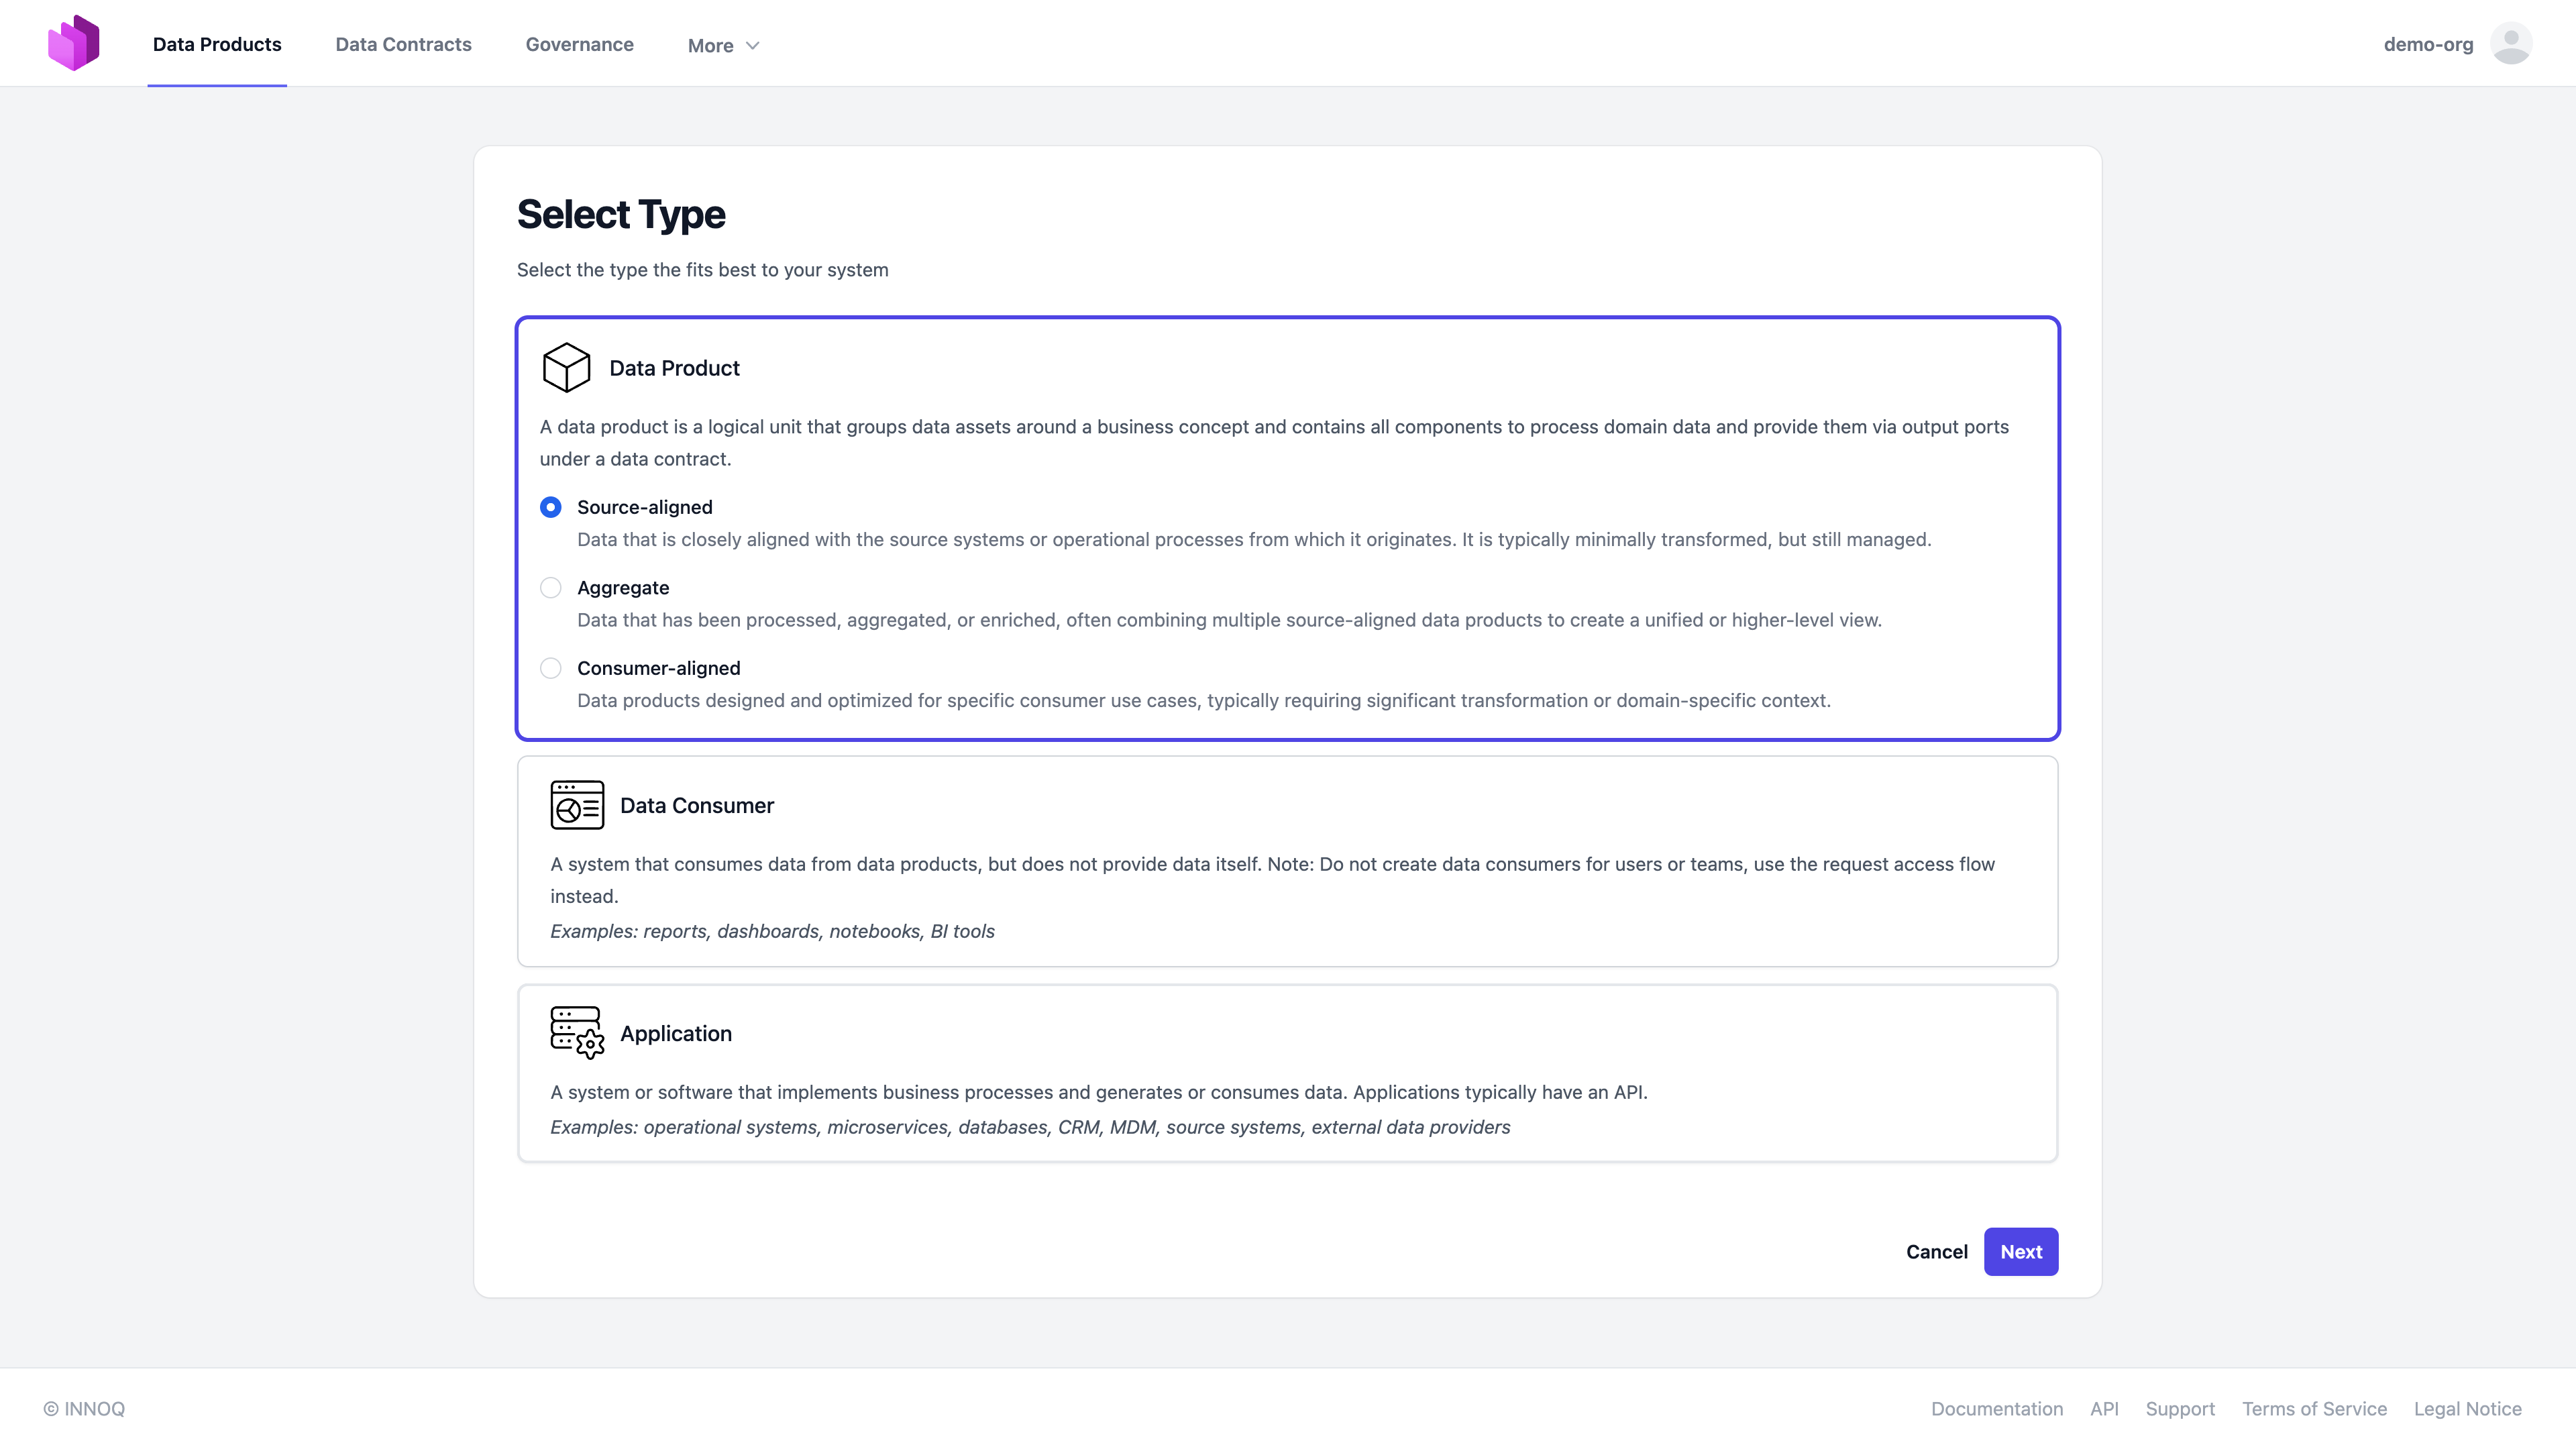
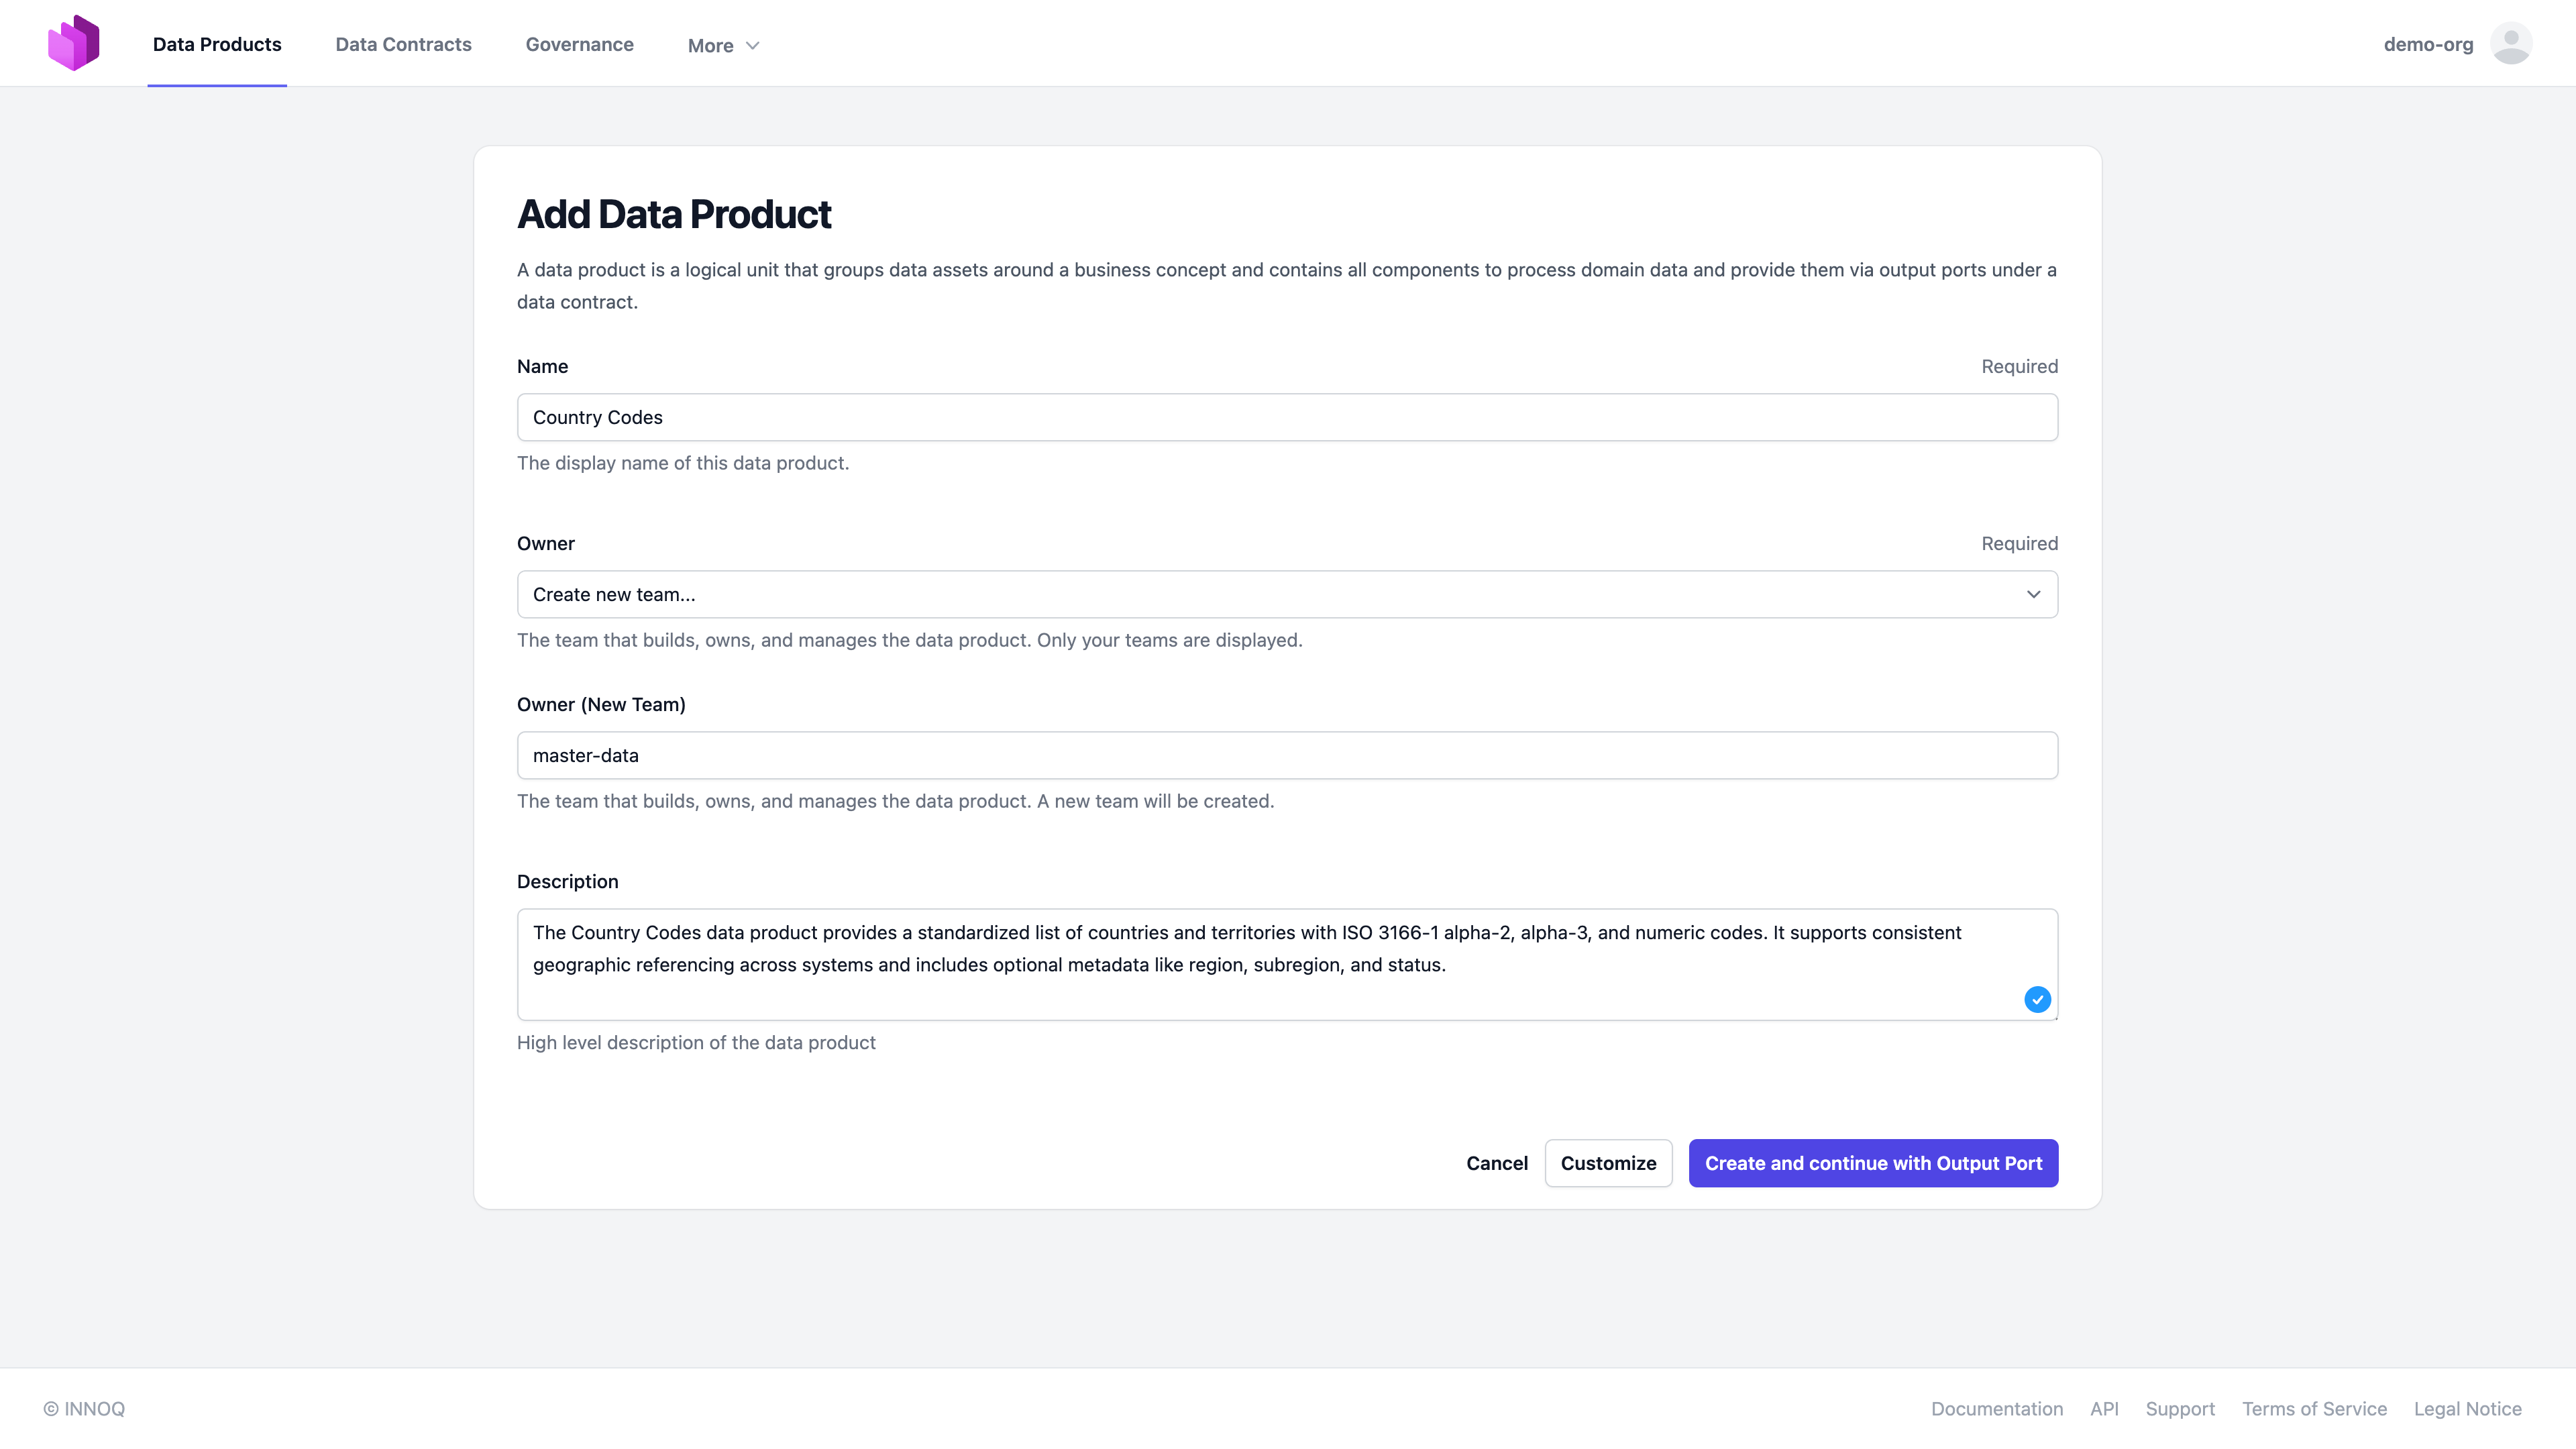
In the next step, we need to select the data product name and a team that owns the data product. We can create a new team or select an existing one.
And we select the output port type and point to our databricks catalog and schema.
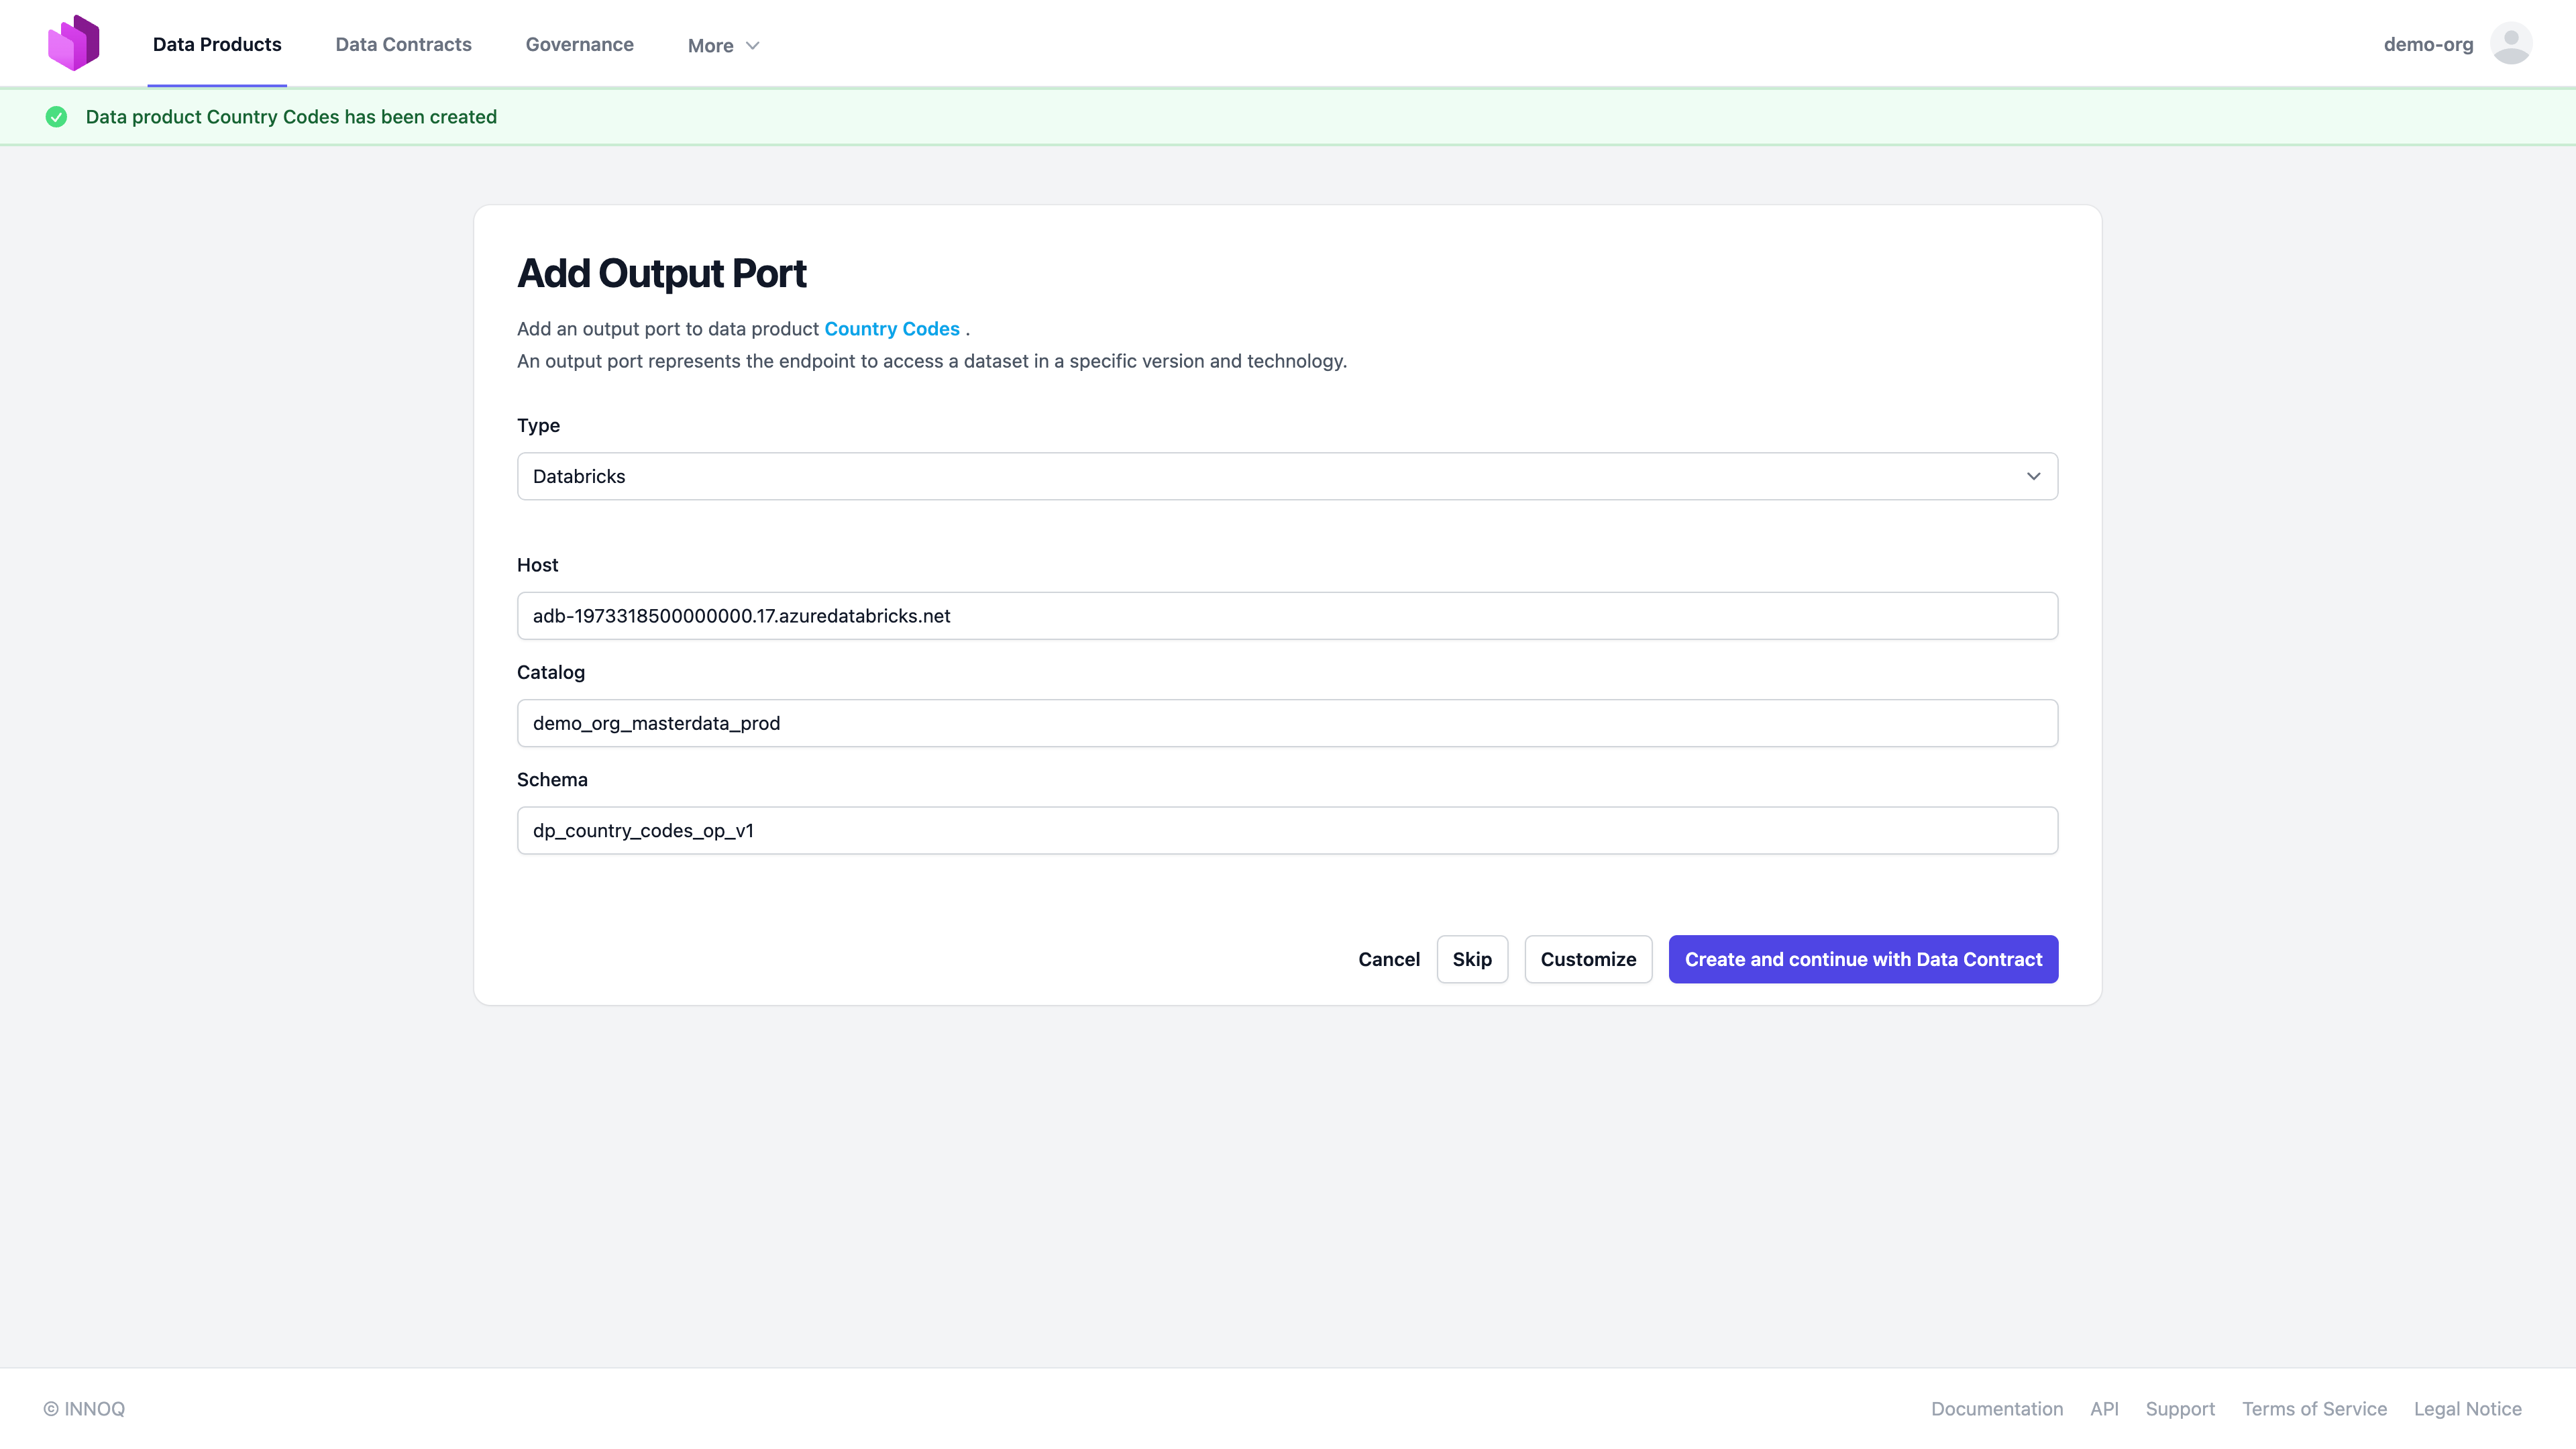
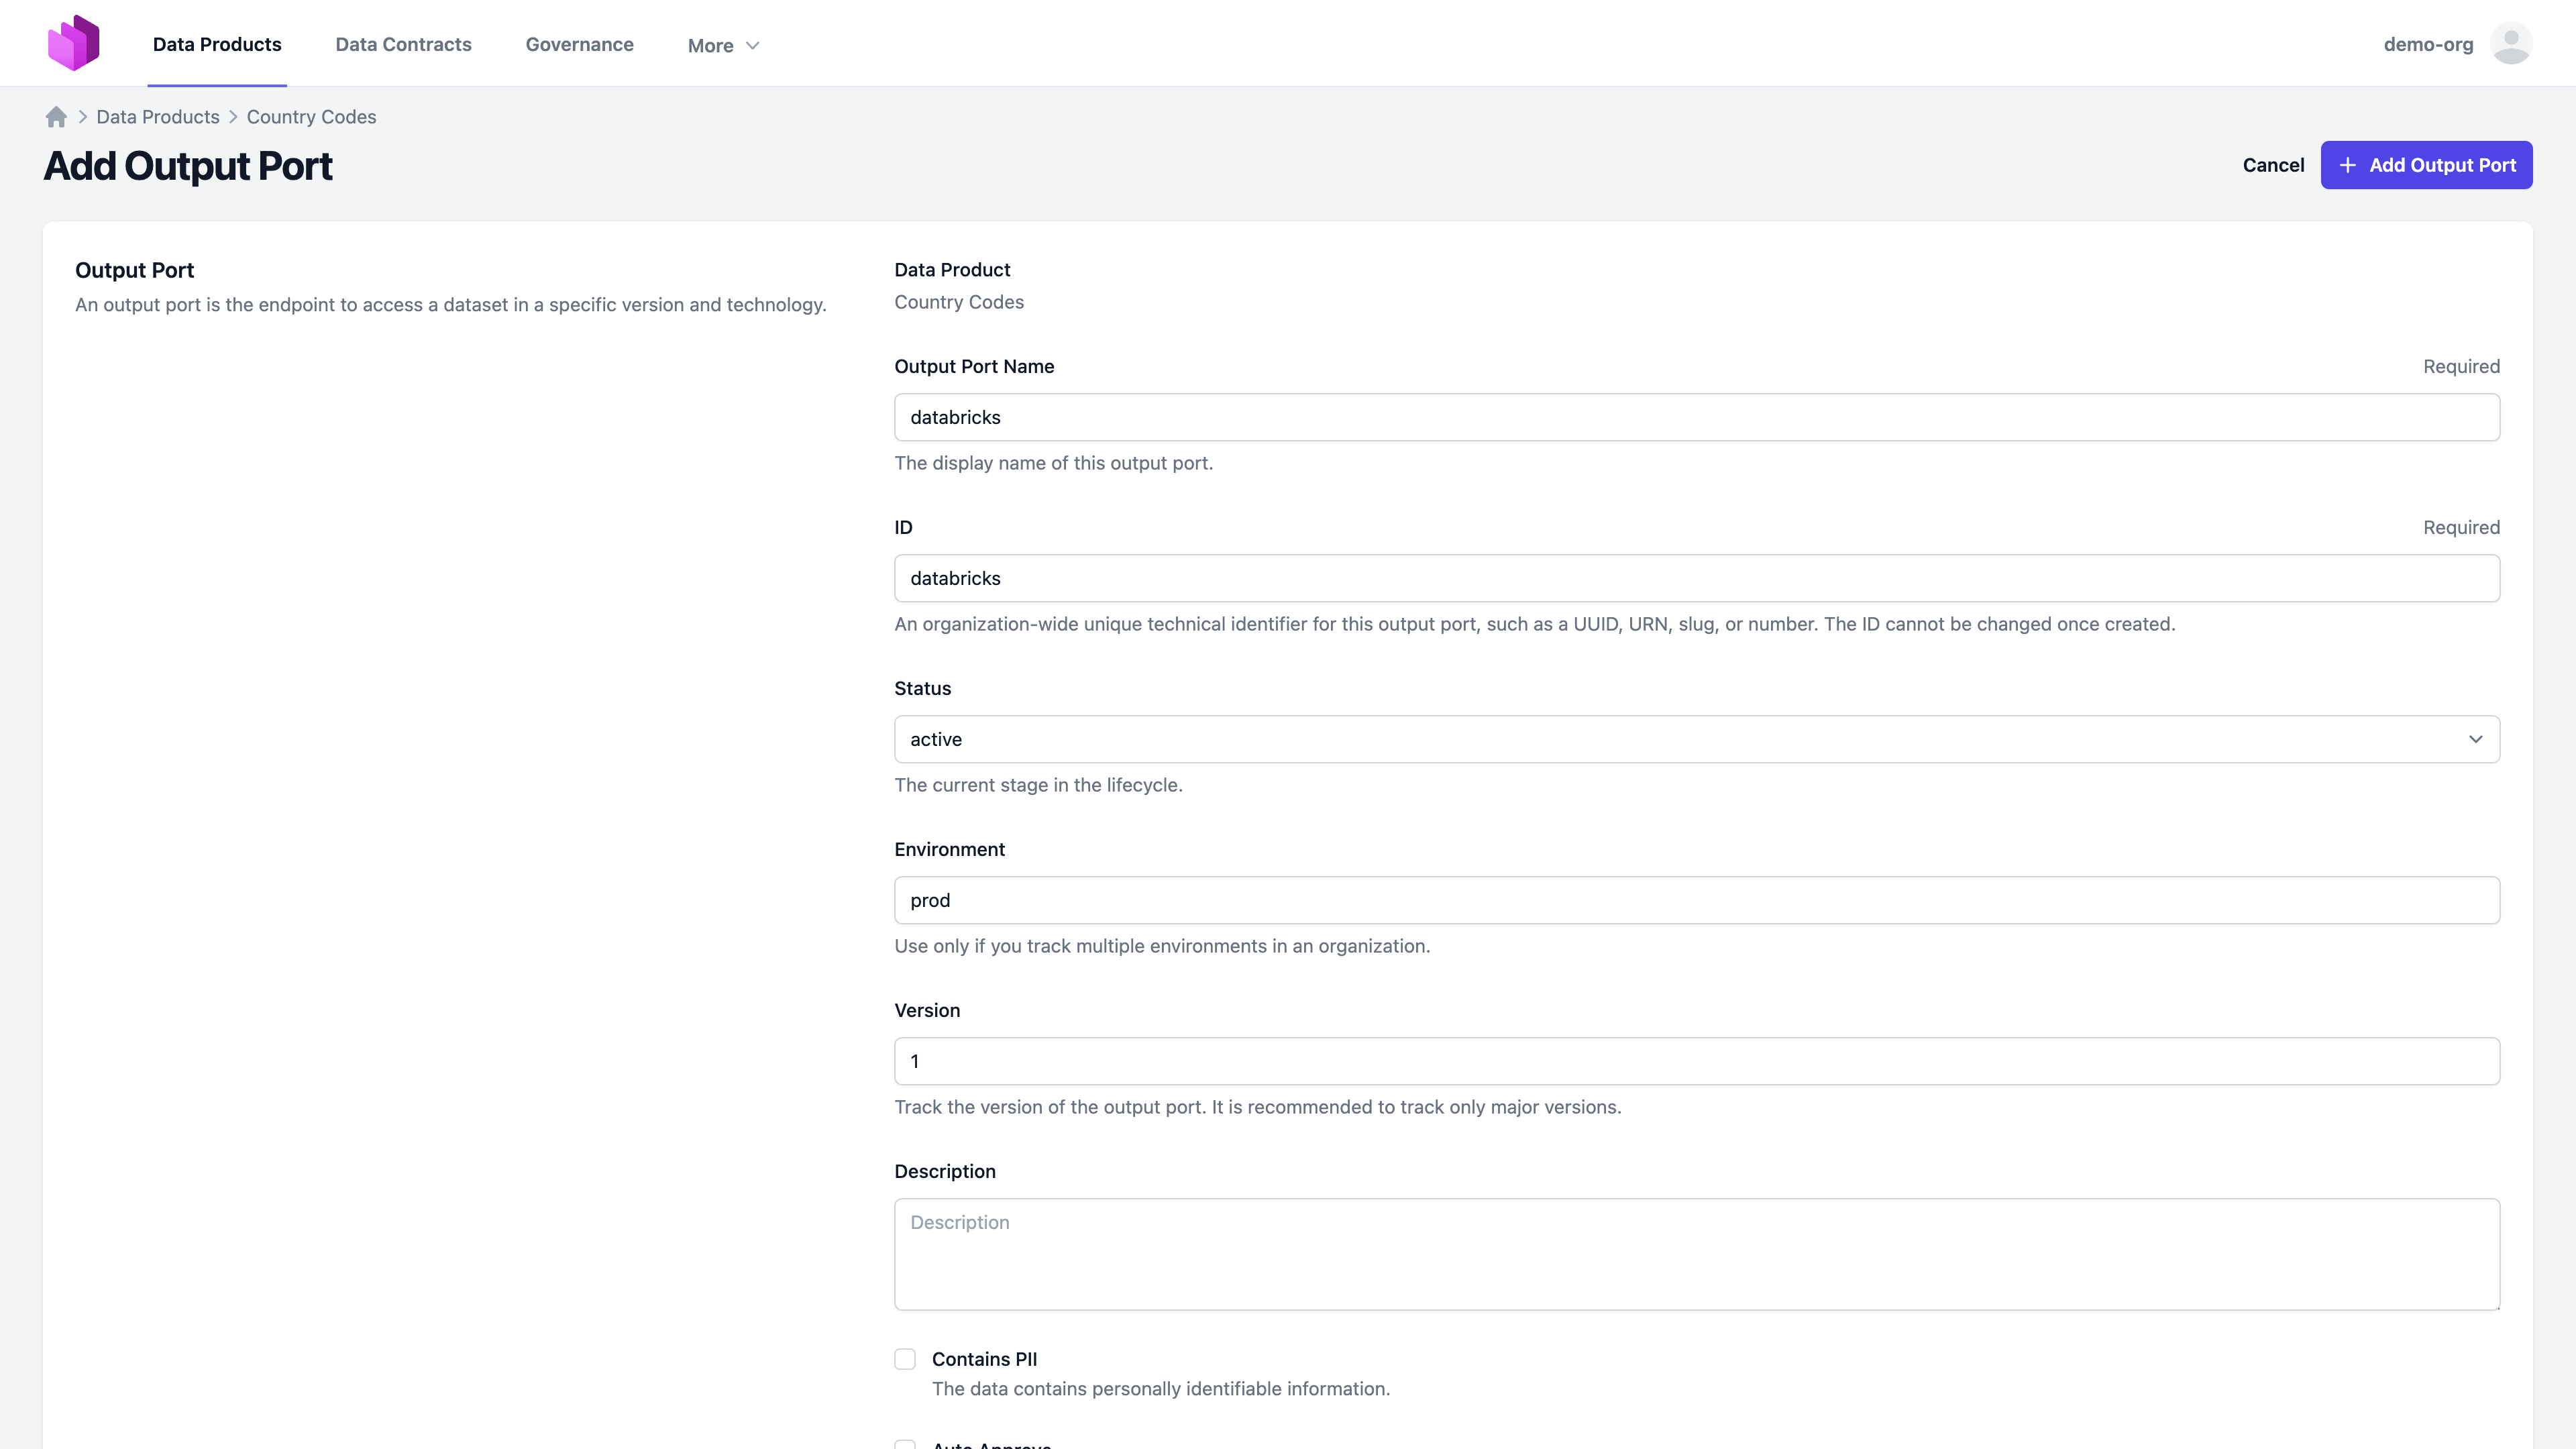
Select "Customize", and configure the output port status, environment, and version. Also, it is good practice to add a link to the Databricks Unity Catalog Web UI for the schema to have a quick navigation option.
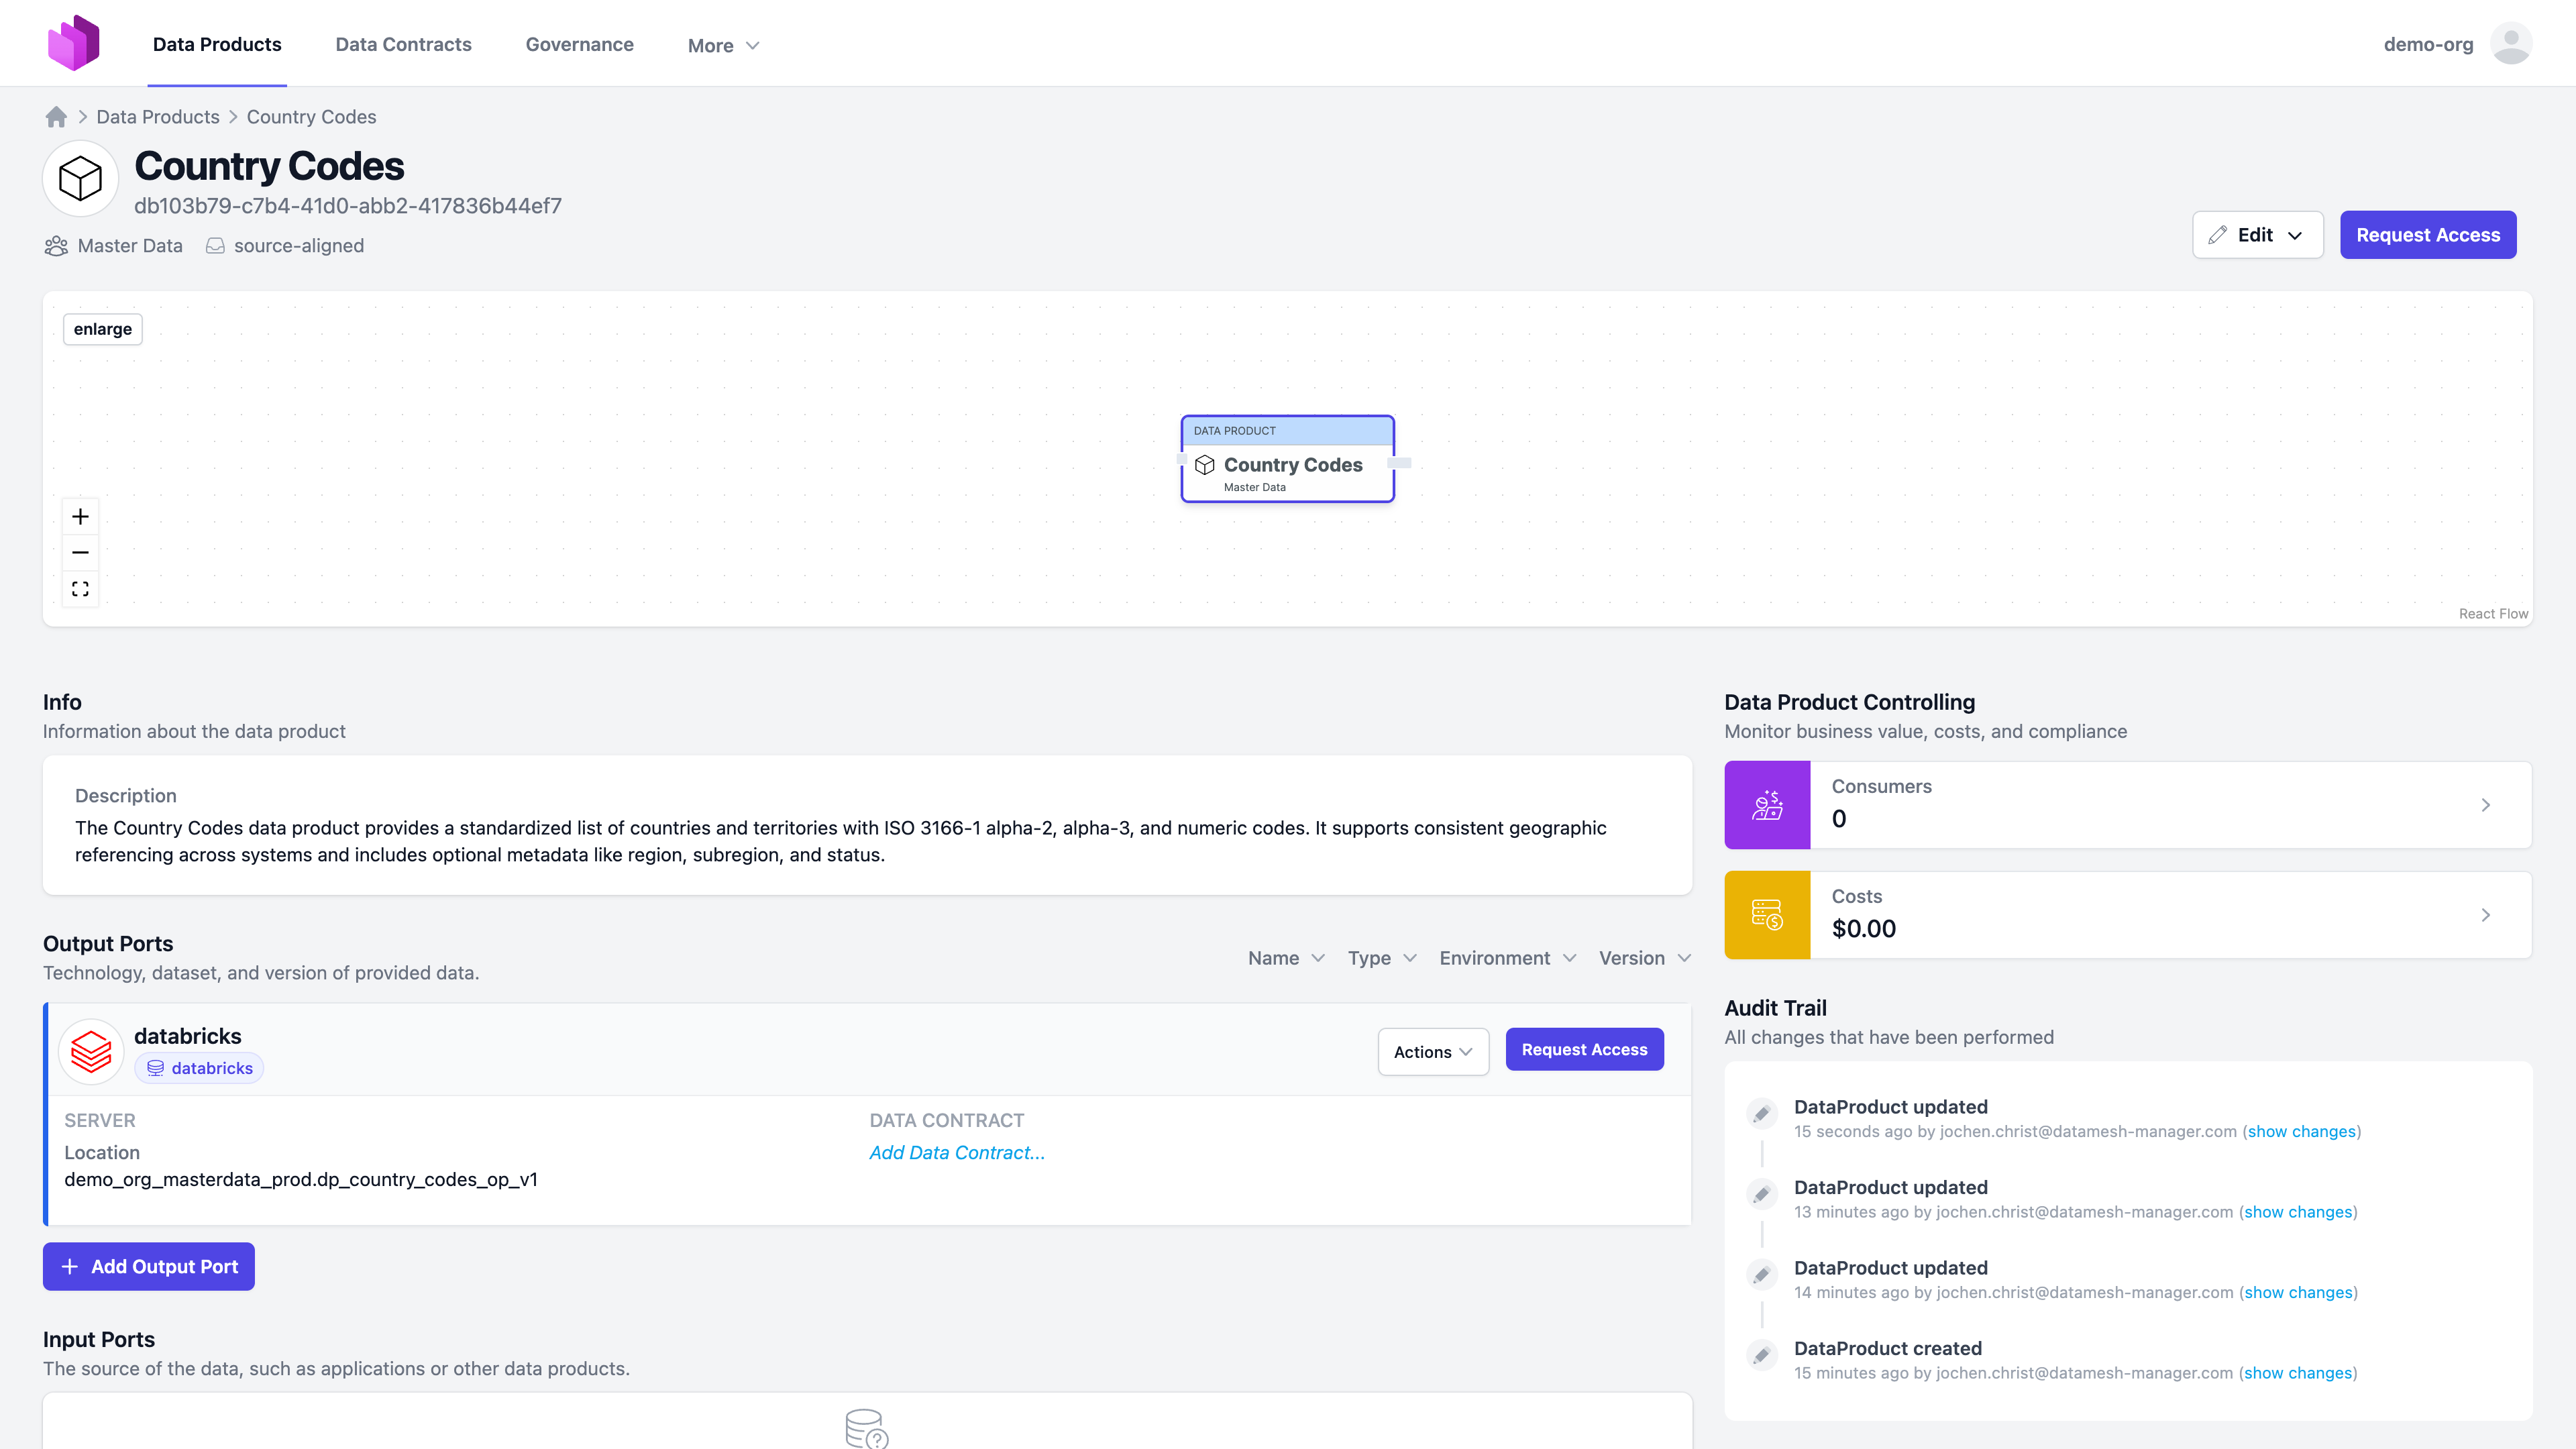
We have now created our first data product:
Create a Data Contract
Next step is to create a data contract.
There are several ways to create a data contract:
- YAML editor
- Entropy Data Web UI
- Data Contract CLI
- Data Contract CLI in a Notebook as Python Library
- Assets Synchronization
- Excel Template
As we already have the table in Databricks, in this tutorial, we use the Data Contract CLI to create a base data contract that we can modify and use.
Installation
Follow the instructions to install Data Contract CLI: https://cli.datacontract.com/#installation
Access Tokens
Create an API Key for Entropy Data and Access Token for Databricks. Configure these as environment variable in your terminal
export ENTROPY_DATA_API_KEY=ed_live_5itWG8DrT1Eqnmxxxxxxxxxx

# User -> Settings -> Developer -> Access tokens -> Manage -> Generate new token
export DATACONTRACT_DATABRICKS_TOKEN=dapi71c9aef2292708947xxxxxxxxxx
# Compute -> SQL warehouses -> Warehouse Name -> Connection details
export DATACONTRACT_DATABRICKS_SERVER_HOSTNAME=adb-1973318500000000.17.azuredatabricks.net
# Compute -> SQL warehouses -> Warehouse Name -> Connection details
export DATACONTRACT_DATABRICKS_HTTP_PATH=/sql/1.0/warehouses/4d9d85xxxxxxxx
Import with Data Contract CLI
datacontract import unity \
  --table demo_org_masterdata_prod.dp_country_codes_op_v1.country_codes \
  --output datacontract.yaml
Repeat --table to import several tables into one data contract.
Modify
We now have a basic data contract with the data model schema.
Let's update it in an editor to give it a proper ID, name, owner, and some more context information. Note that editors such as VS Code or IntelliJ have auto-completion for the ODCS schema.
apiVersion: "v3.1.0"
kind: "DataContract"
id: "country_codes"
name: "Country Codes"
version: "0.0.1"
status: "active"
description:
  purpose: "ISO codes for every country we work with"
schema:
- name: "country_codes"
  physicalType: "table"
  description: "ISO codes for every country we work with"
  properties:
  - name: "country_name"
    logicalType: "string"
  - name: "iso_alpha2"
    logicalType: "string"
  - name: "iso_alpha3"
    logicalType: "string"
  - name: "iso_numeric"
    logicalType: "integer"
    physicalType: "long"
servers:
- server: "production"
  type: "databricks"
  host: "adb-1973318500000000.17.azuredatabricks.net"
  catalog: "demo_org_masterdata_prod"
  schema: "dp_country_codes_op_v1"
customProperties:
- property: "owner"
  value: "master-data"
The servers section describes where the data lives — it is also what enables automated
access management, e.g. through the Databricks connector.
Push to Entropy Data
Now we can upload the Data Contract to Entropy Data.
datacontract publish datacontract.yaml
This is a one-time operation for the initial import. Now the data contract becomes the source-of-truth for the data model and meta-data.
Later, we will configure a Git synchronization to automatically push the data contract to Entropy Data and fetch changes back.
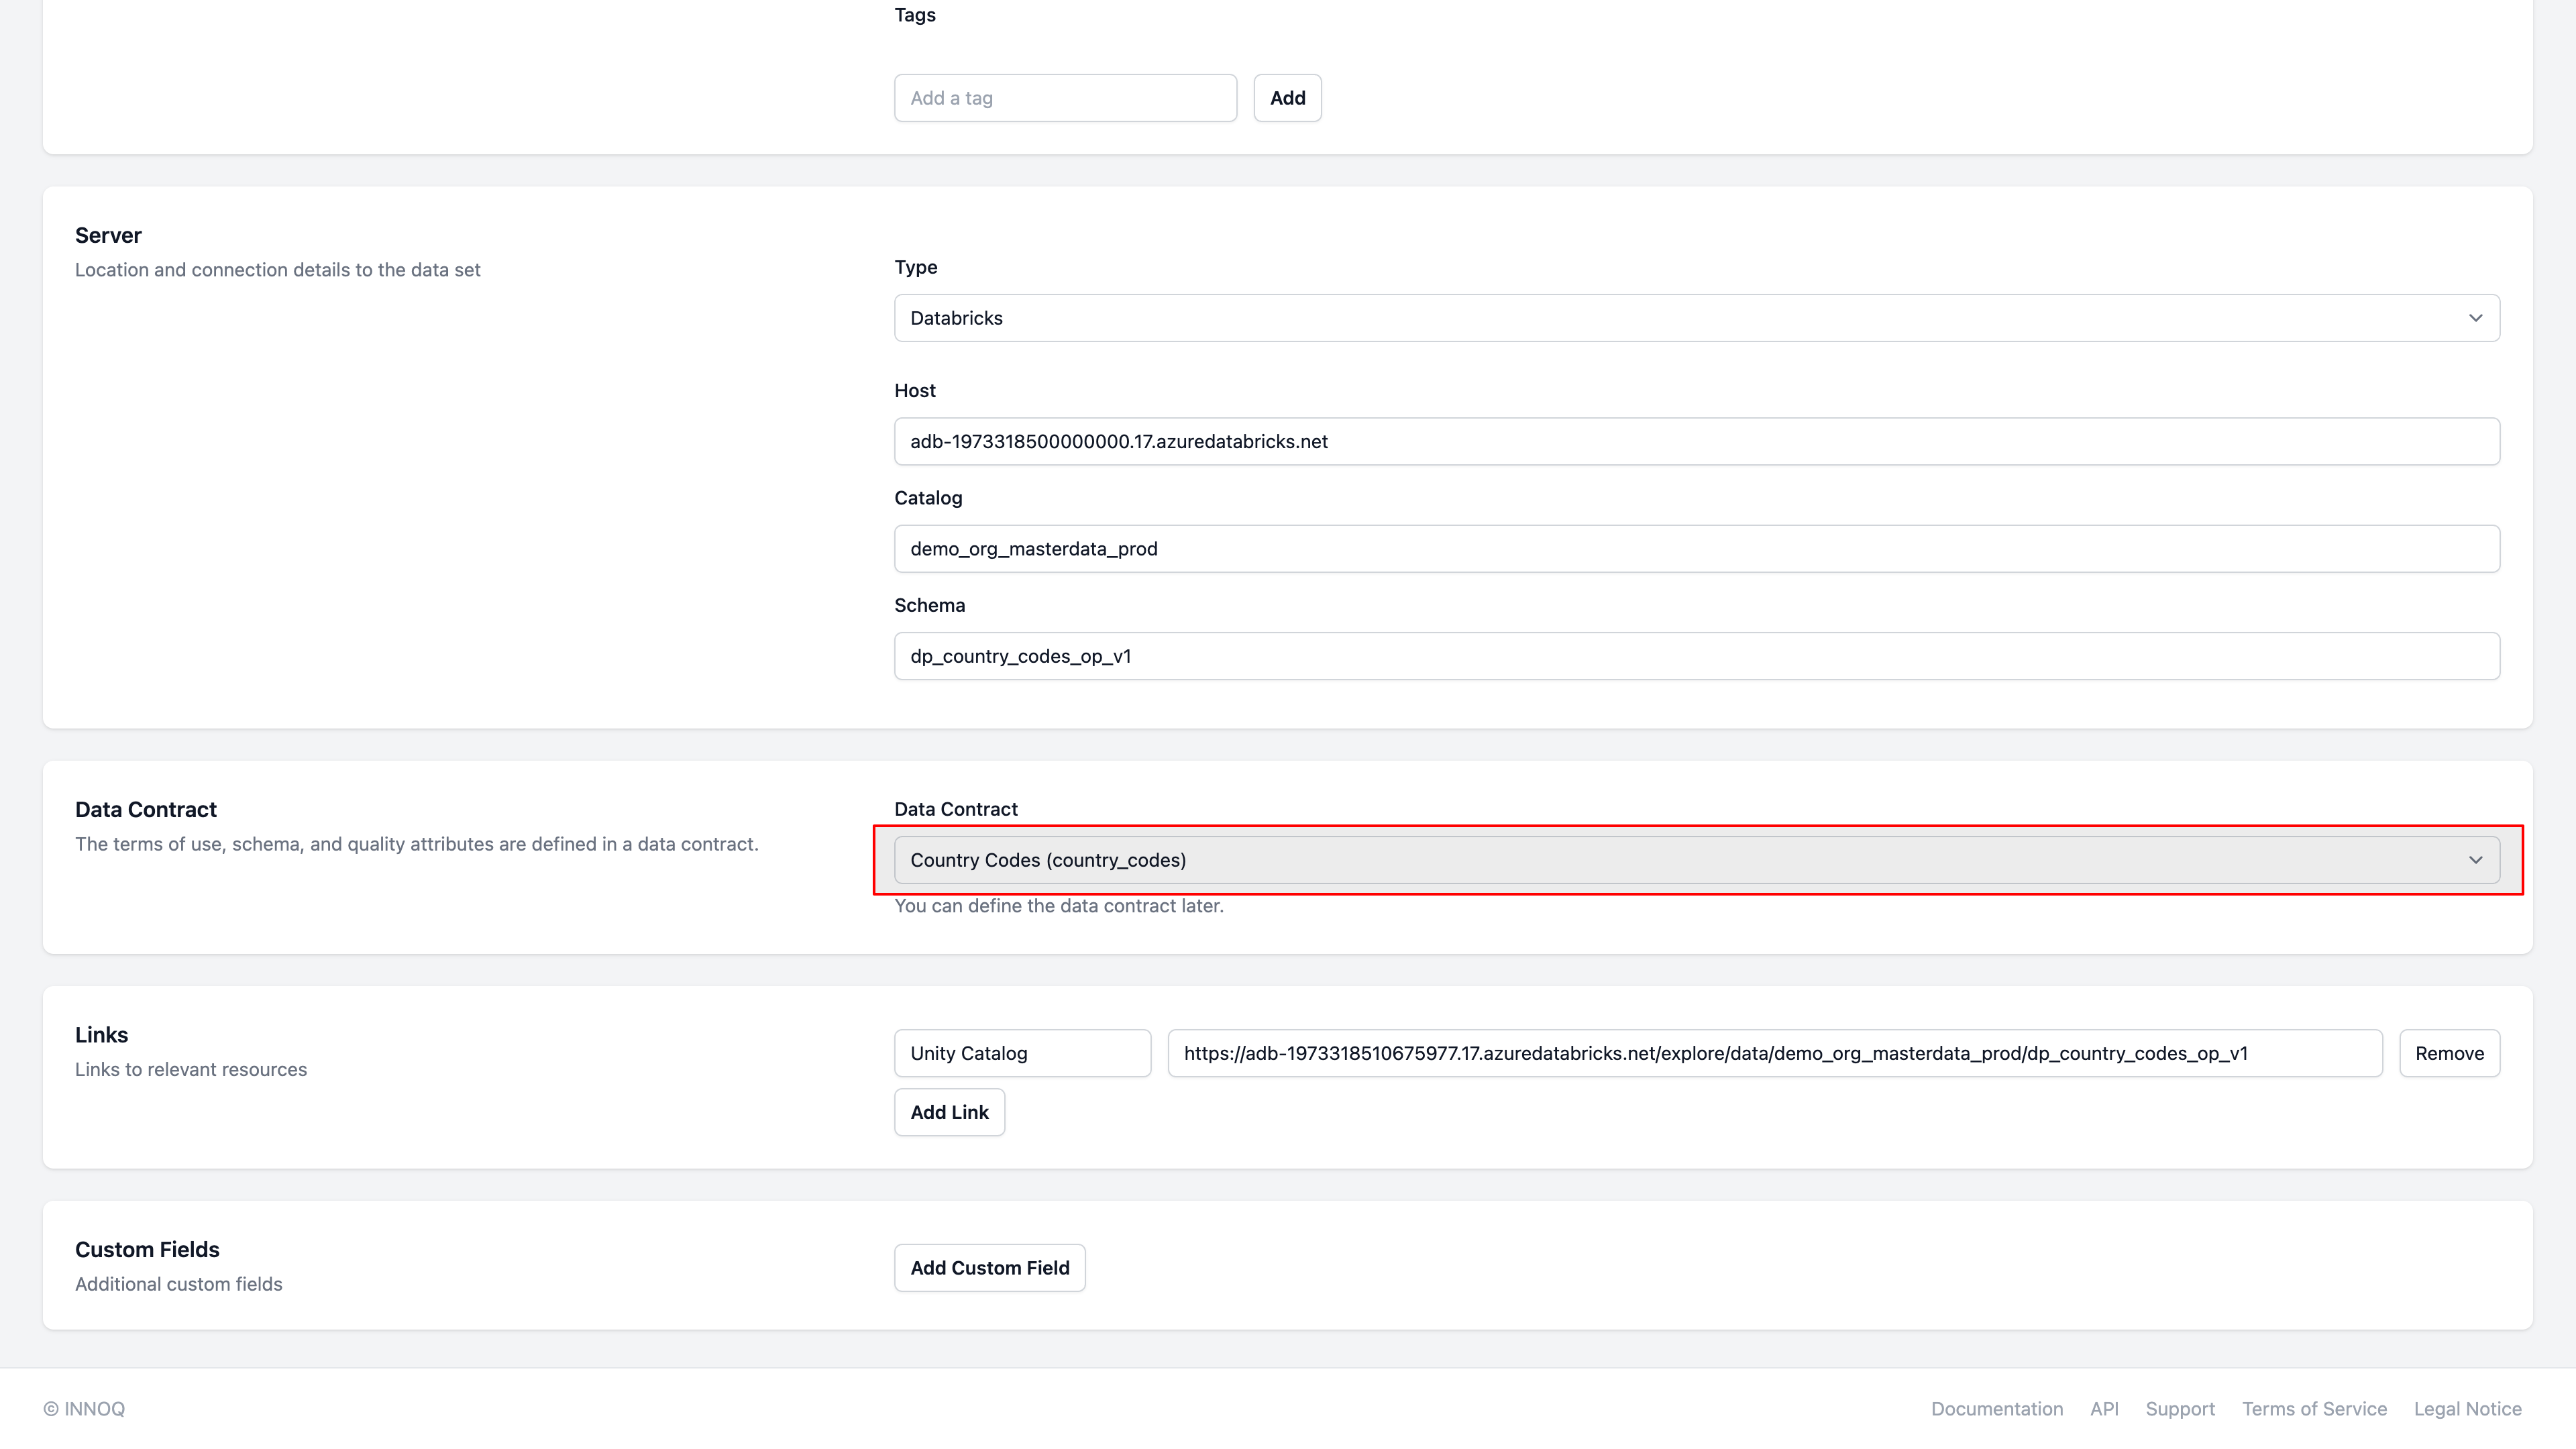
Assign to Output Port
Navigate to the Data Product in Entropy Data, and "Edit Output Port"
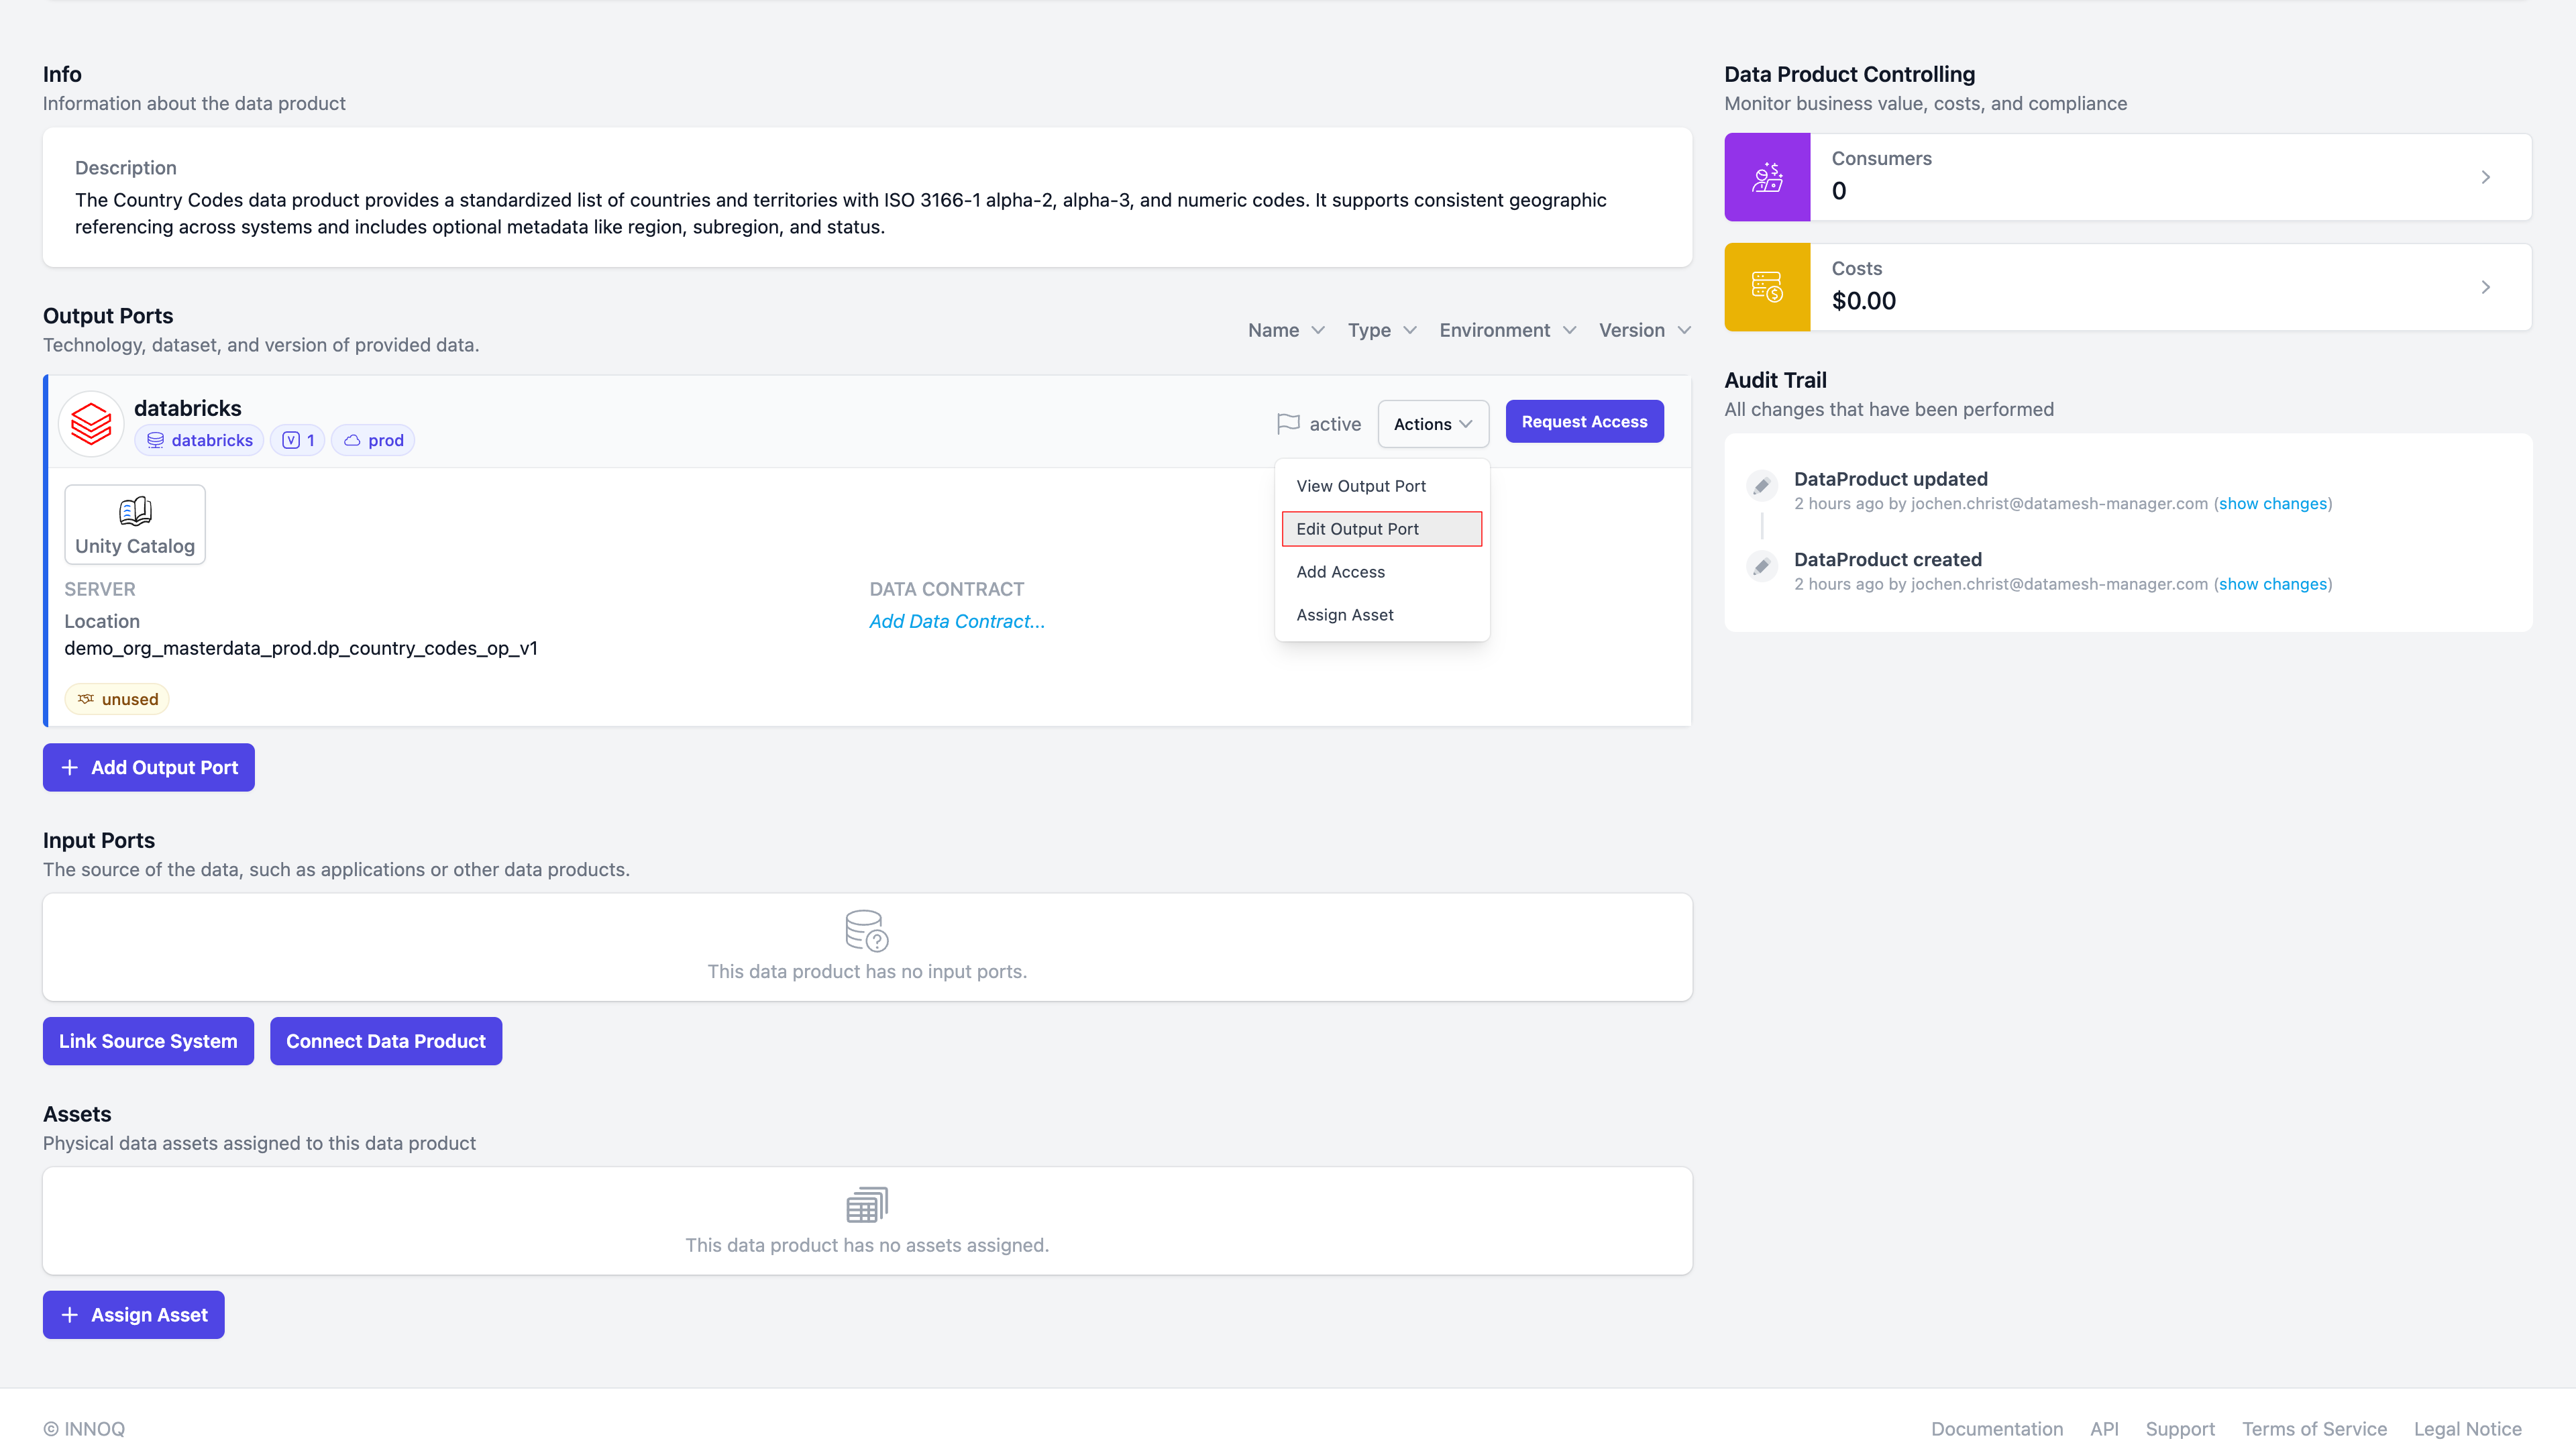
and select the data contract we just created:
Test and Enforce Data Contract (CLI)
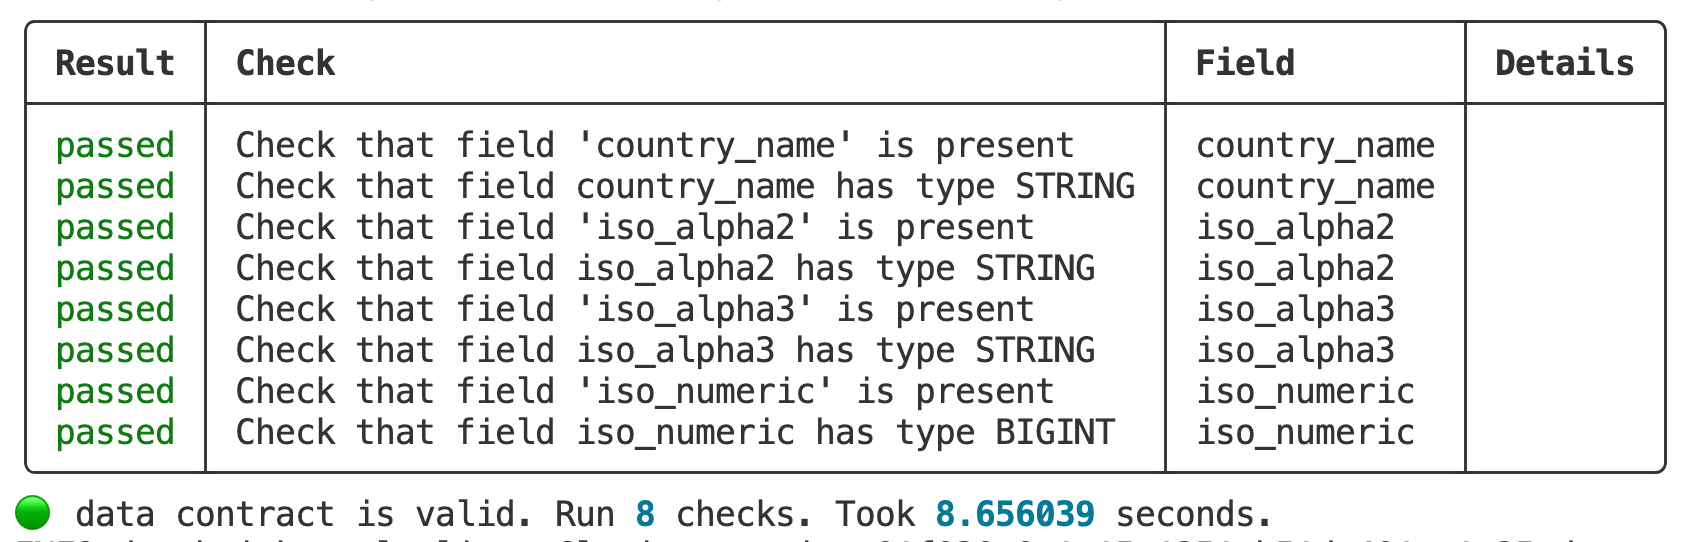
Now, we can test and enforce that the data product is compliant with the data contract specification.
datacontract test https://app.entropy-data.com/demo-org/datacontracts/country_codes \
                    --publish https://api.entropy-data.com/api/test-results
We now can see in the console and on the Entropy Data Web UI that all tests are passing.
Test and Enforce Data Contract (Databricks Job)
Of course, we want to check data contract, whenever the data product is updated. For this, we can integrate the test as a task in your data product pipeline or as a scheduled task.
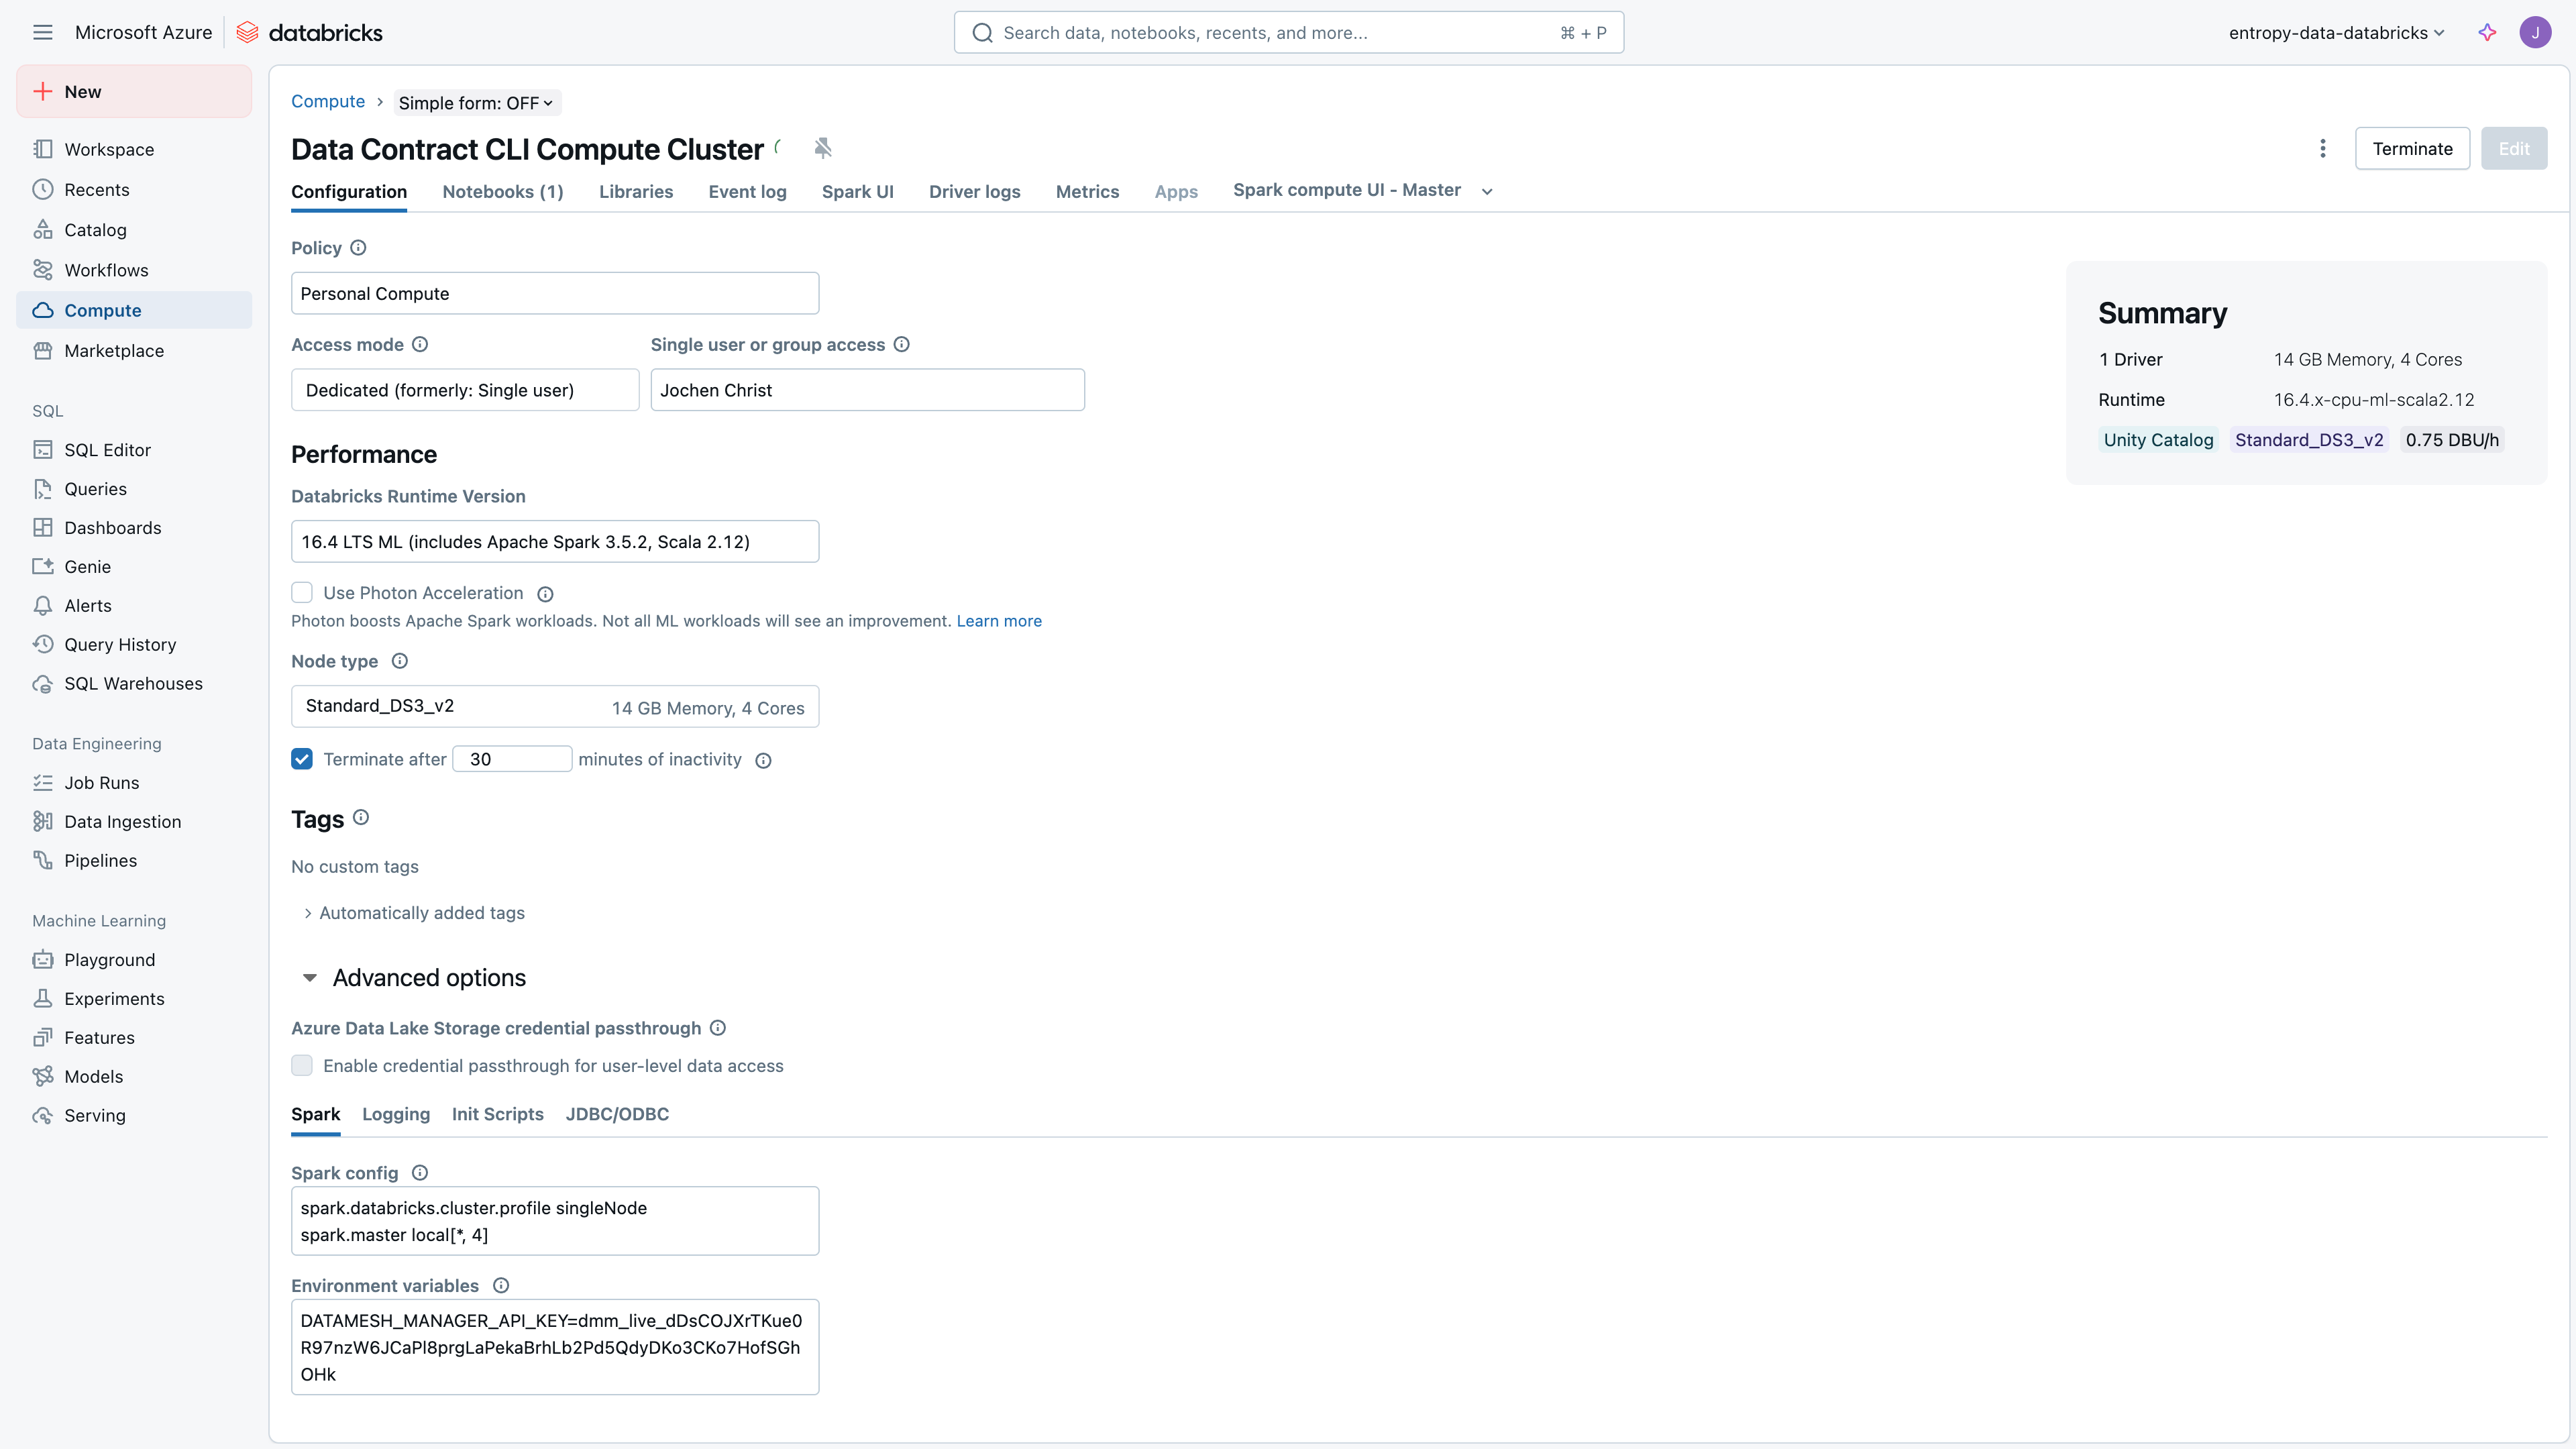
Compute Cluster Configuration
To efficiently use the Data Contract CLI, it is recommended to create a compute resource in Databricks with the Python library installed.
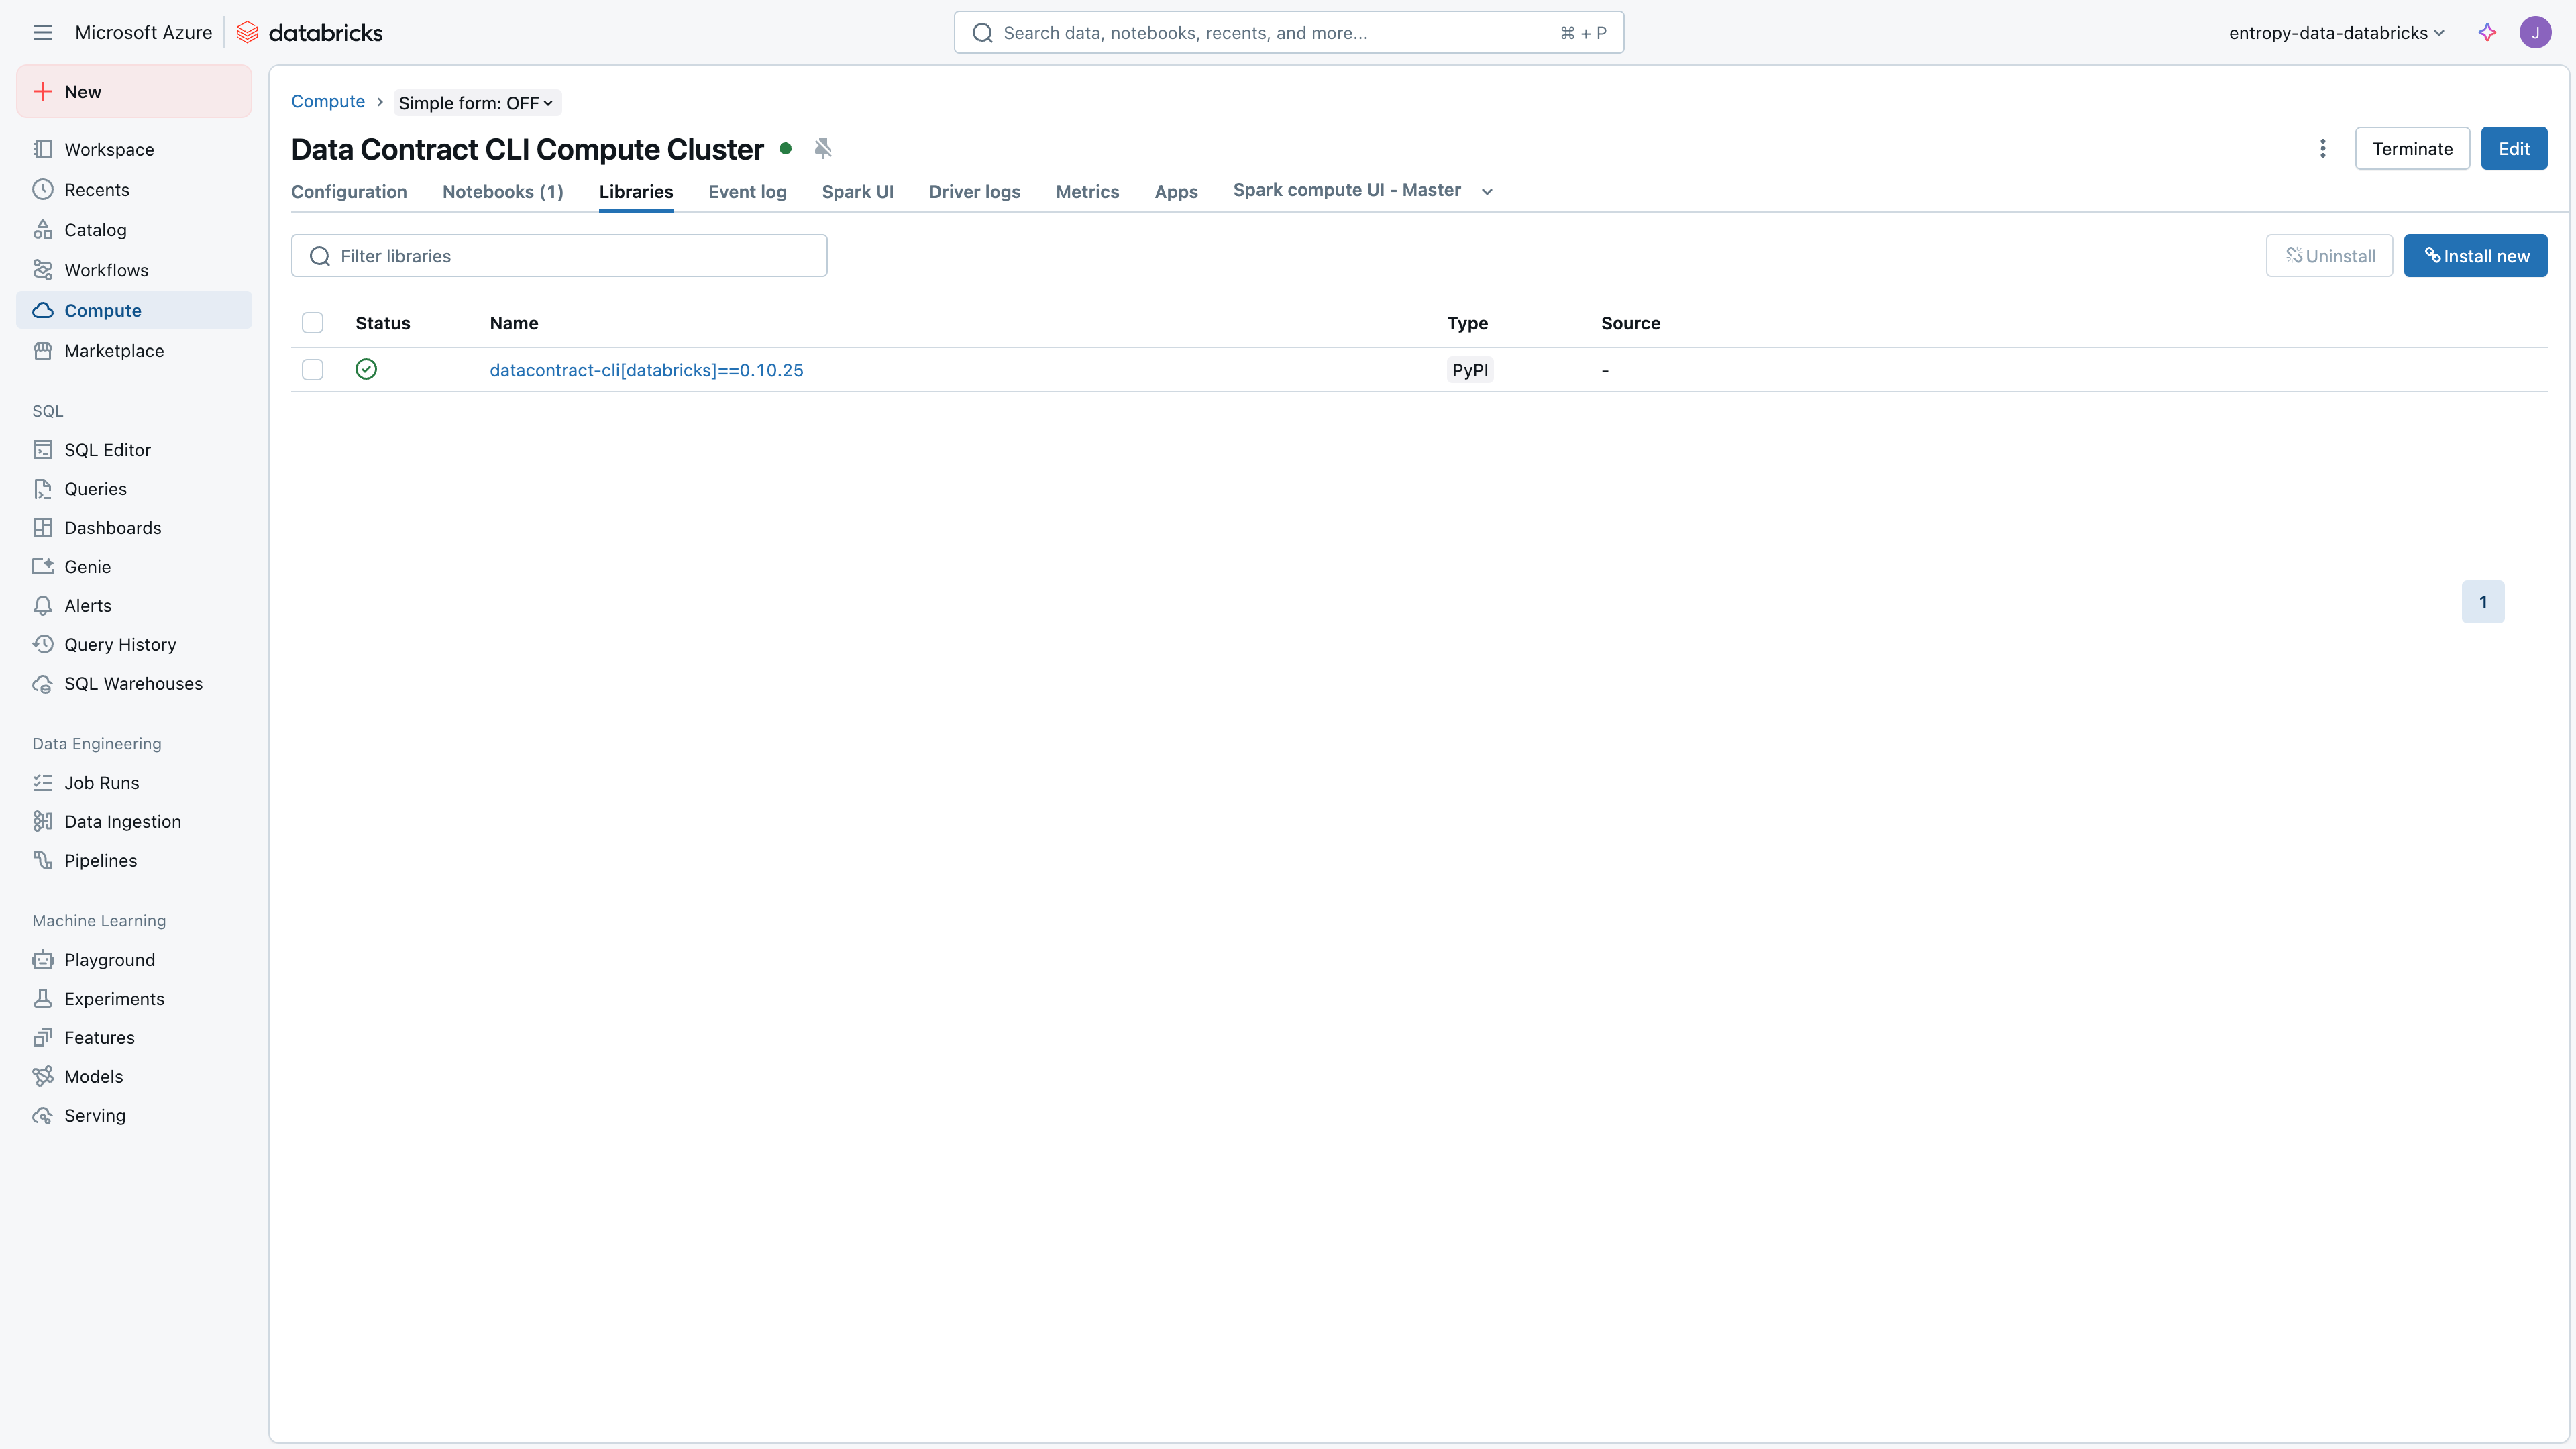
Also, create an API Key and set the environment variable ENTROPY_DATA_API_KEY to the API key value in the compute environment variable configuration.
Python Script
We can use this Python script to run the tests with Databricks' Spark engine. Save this script as test_data_contract.py in your Databricks workspace.
import argparse
from datacontract.data_contract import DataContract

def main():
    # Set up argument parser
    parser = argparse.ArgumentParser(description='Validate data quality using a data contract')
    parser.add_argument('--data-contract', required=True,
                        help='URL or path to the data contract YAML')

    # Parse arguments
    args = parser.parse_args()

    # Initialize data contract
    data_contract = DataContract(
        spark=spark,  # Assuming spark is available in the environment
        data_contract_file=args.data_contract,
        publish_url="https://api.entropy-data.com/api/test-results"
    )

    # Run validation
    run = data_contract.test()

    # Output results
    if run.has_passed():
        print("Data quality validation succeeded.")
        print(run.pretty())
        return 0
    else:
        print("Data quality validation failed.")
        print(run.pretty())
        raise Exception("Data quality validation failed.")
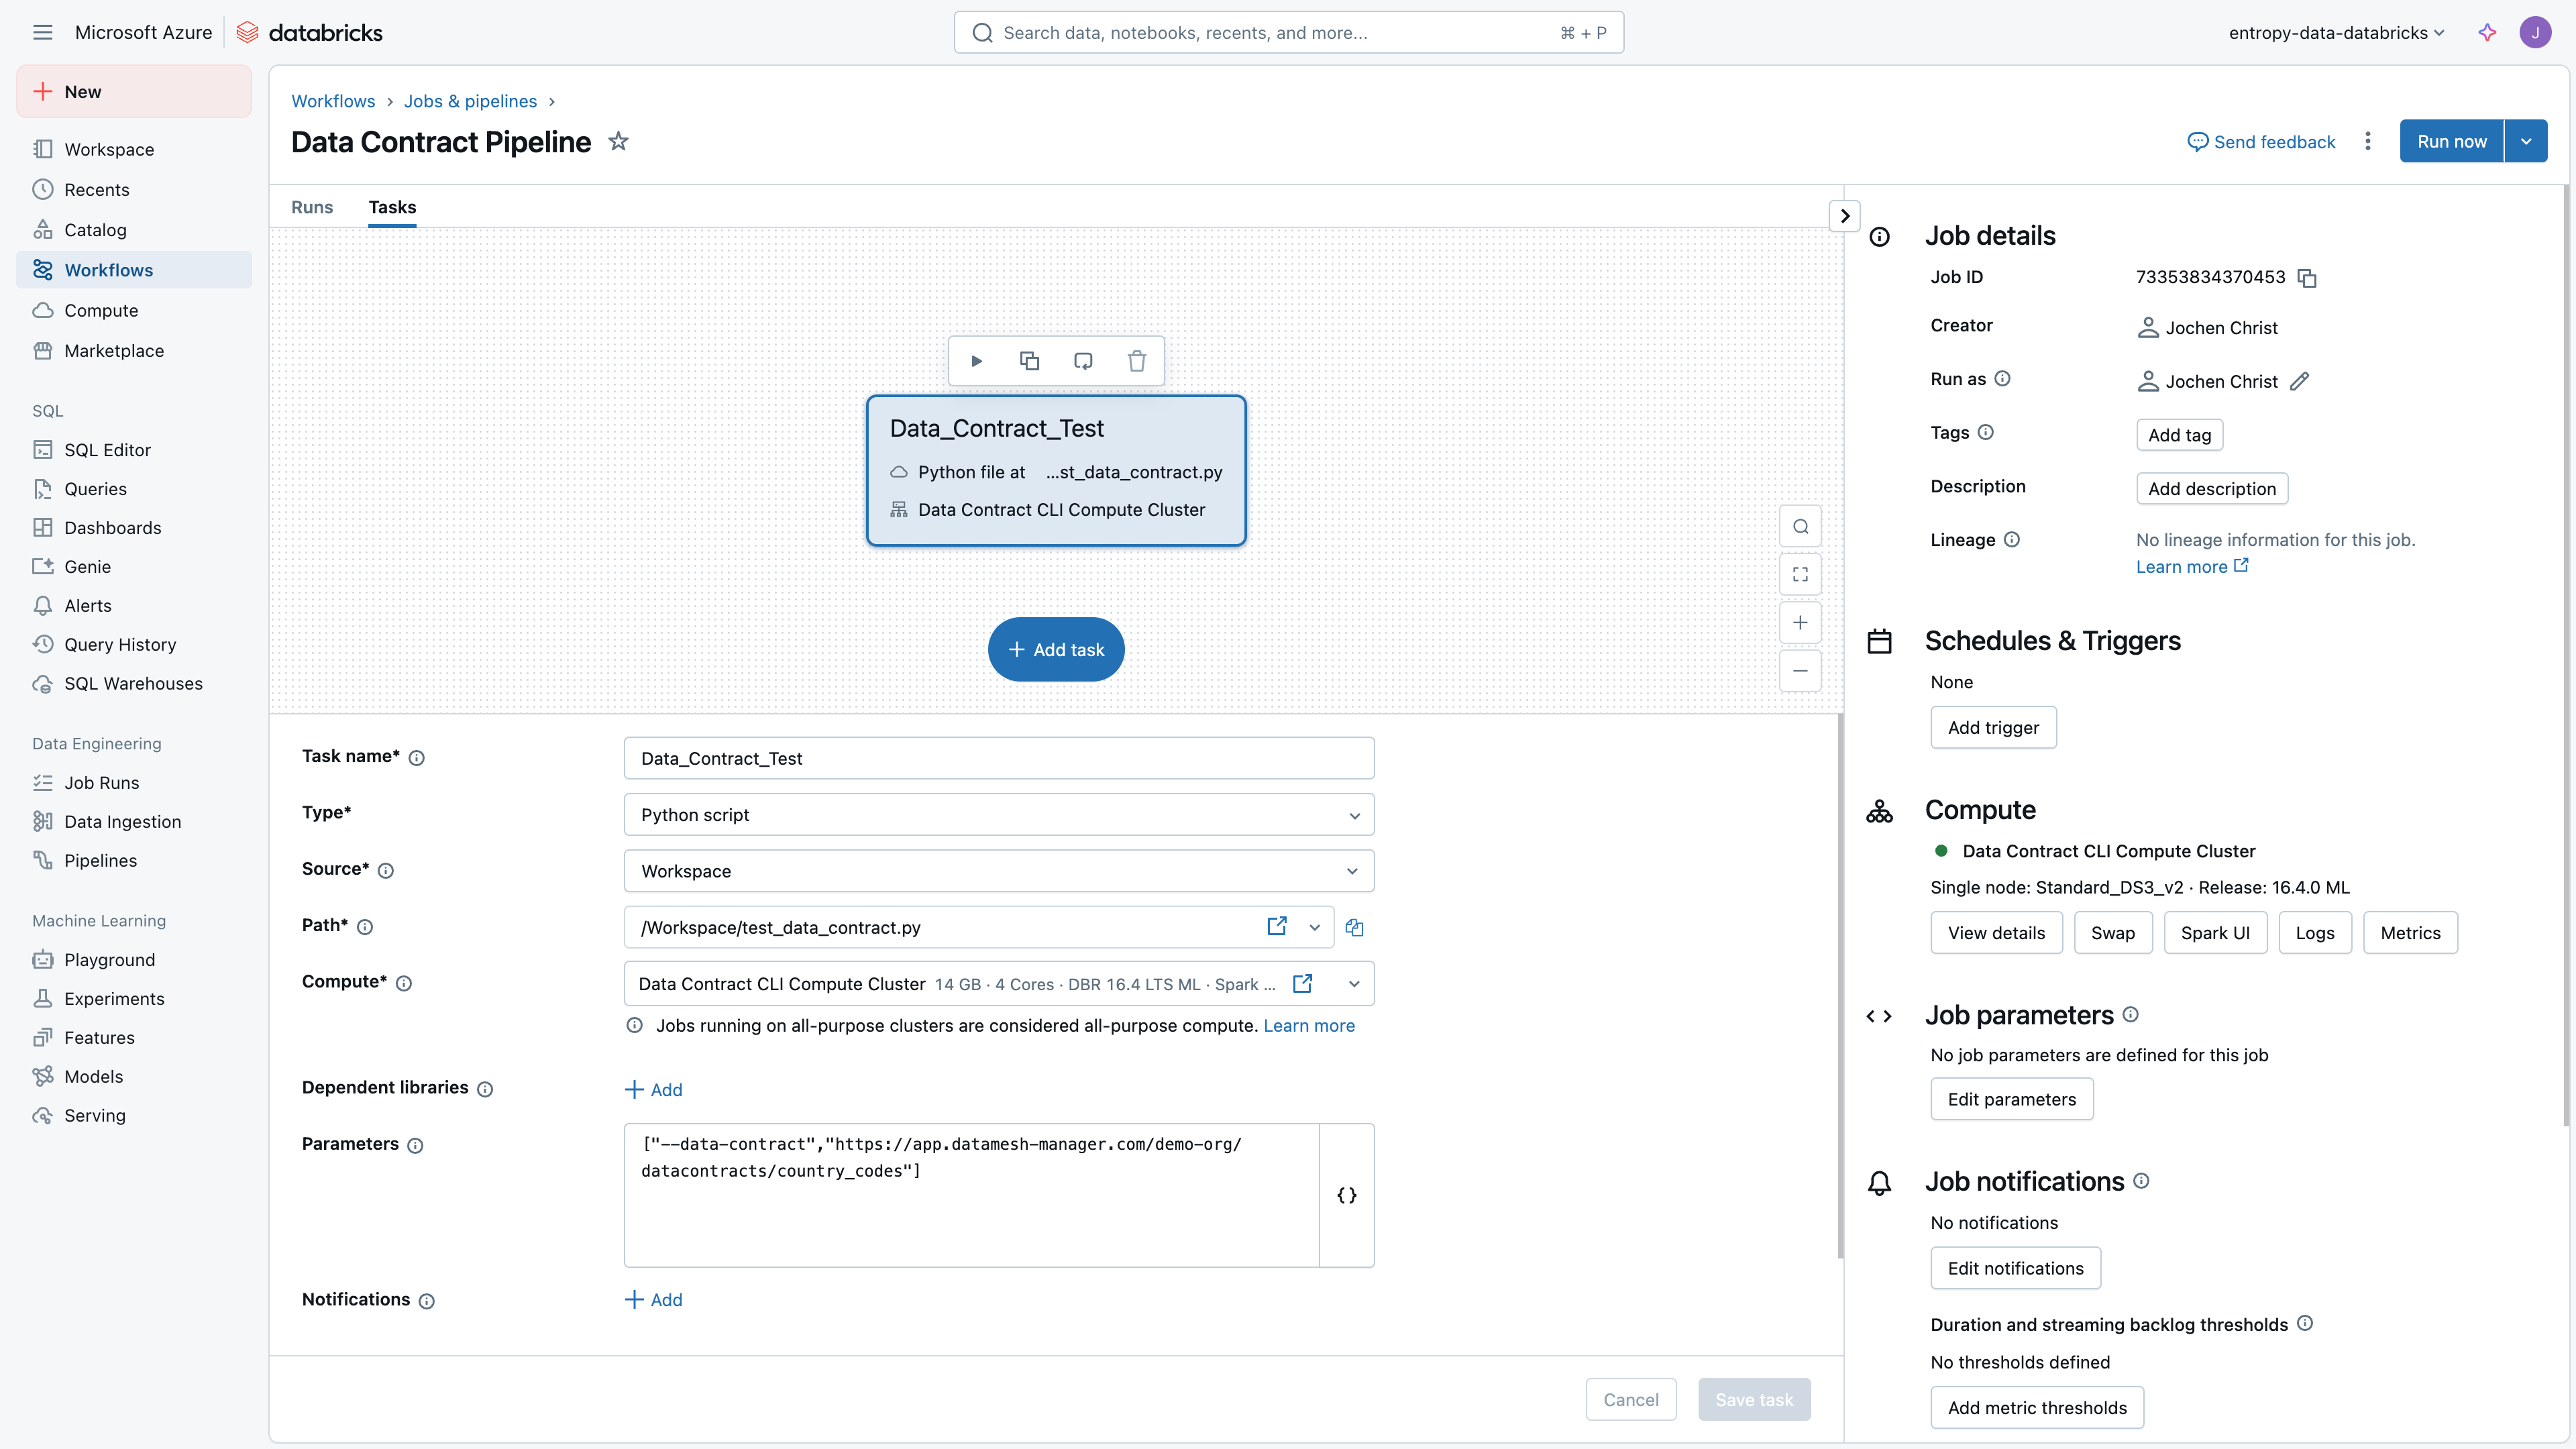
Pipeline Task
Configuration of the pipeline task:
Automate Access Management
To grant access automatically via the Databricks connector, see the Databricks integration.
Recommendation: Databricks Asset Bundle
Databricks Asset Bundles are a great way to build professional data products on Databricks. They include all artefacts, such as code, pipelines, DLT definitions, tests, and metadata to build and deploy data prpducts.
We have another tutorial that shows how to use the Databricks Asset Bundle with Entropy Data. You can find it on: https://www.datamesh-architecture.com/howto/build-a-dataproduct-with-databricks