Microsoft Copilot Configuration
Configure Microsoft Copilot Studio to connect to your MCP server with full OAuth 2.0 authentication.
Setup Instructions
Entropy Data's configuration wizard will guide you through the setup process:
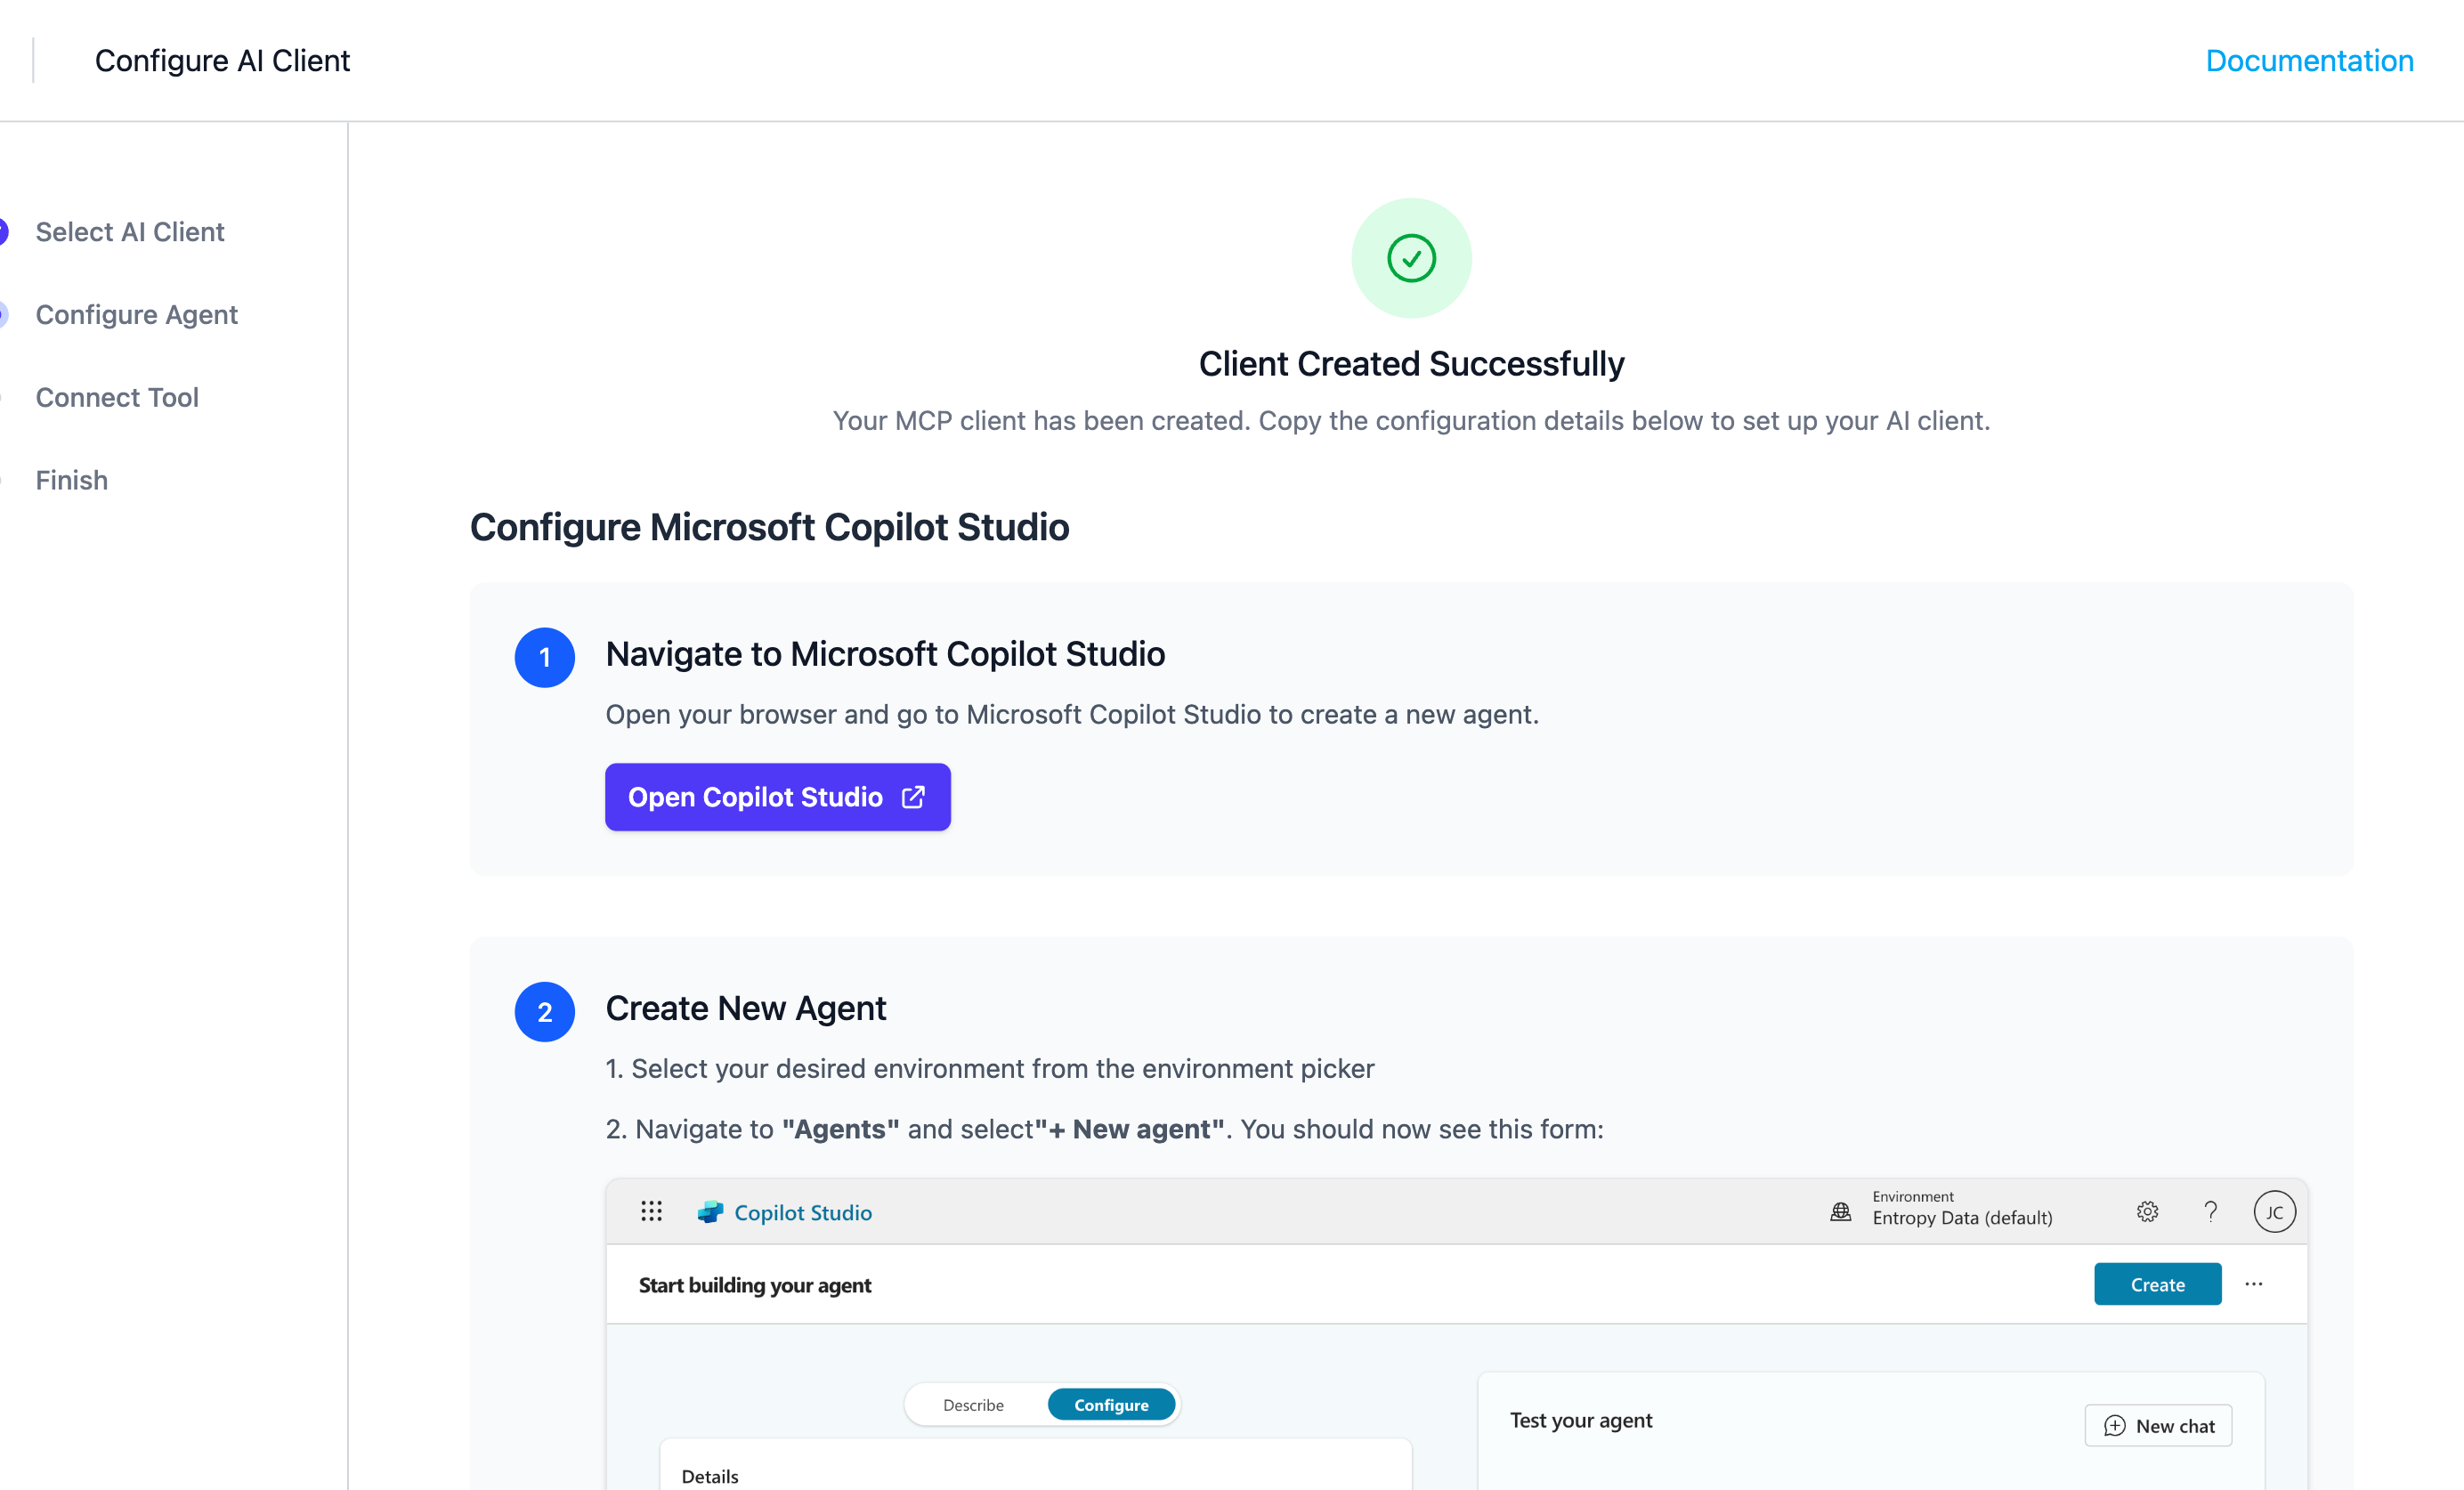
Step 1: Navigate to Microsoft Copilot Studio
Open your browser and go to Microsoft Copilot Studio to create a new agent.
Step 2: Create New Agent
1. Select your desired environment from the environment picker
2. Navigate to "Agents" and select "+ New agent"
You should now see this form:

3. Configure your agent using the following details:
| Field | Value |
|---|---|
| Name | Entropy Data Agent |
| Description | Discover data products, request and approve access, and edit data contracts. |
| Instructions | See Agent Instructions below |
| Web Search | Disabled |
4. Select Create
Agent Instructions
Use the following instructions for your agent:
You are connected to the Entropy Data MCP server, which provides access to business data.
Use this MCP server if you need access to internal business data, such as customers, orders.

## Available Tools

### 1. search
- **Purpose**: Find and explore data products in the organization
- **Parameters**:
  - `query` (optional): Keywords to search for in data product names/descriptions (use `*` to get all)
- **Returns**: List of data products with basic information
- **Use**: First use a generic search term like "sales", "customers", "marketing"
  to find relevant data products. Use more specific terms if the results are too broad.

### 2. fetch
- **Purpose**: Get detailed information about a specific data product
- **Parameters**: `data_product_id` (required)
- **Returns**: Complete data product details including:
  - All output ports with server connection information
  - Access status for each port (active, pending, rejected, etc.)
  - Inlined data contracts with schemas and terms of use
- **Use**: Get this info before requesting access or querying data

### 3. request_access
- **Purpose**: Request access to a specific data product output port
- **Parameters**:
  - `dataProductId` (required)
  - `outputPortId` (required)
  - `purpose` (required): Business justification for access. Use a high-level description
    of the kind of usage.
- **Returns**: Access request status (may be auto-approved or require manual review)

### 4. execute_query
- **Purpose**: Execute SQL queries on data product output ports
- **Requirements**: Must have active access to the output port
- **Parameters**:
  - `dataProductId` (required)
  - `outputPortId` (required)
  - `query` (required): SQL query to execute
- **Supports**: Databricks, PostgreSQL, BigQuery, Snowflake, MySQL, MariaDB, SQL Server (MSSQL), and Trino
- **Returns**: Query results as structured data (limited to 100 rows)

## Typical Workflow

1. **Discover**: Use `search` to find relevant data products
2. **Evaluate**: Use `fetch` to understand structure, access status, and schemas
3. **Request Access**: Use `request_access` if you don't have active access
4. **Query Data**: Use `execute_query` to execute SQL queries once you have access
   for typical server types. For other server types, you may need to use server-specific tools.
Step 3: Add MCP Tool
- Navigate to the "Tools" section in your agent
- Click "+ Add a Tool"
- Click "+ New tool" on the top right
- Select "Model Context Protocol" from the available tool types
You should now see a form like this:
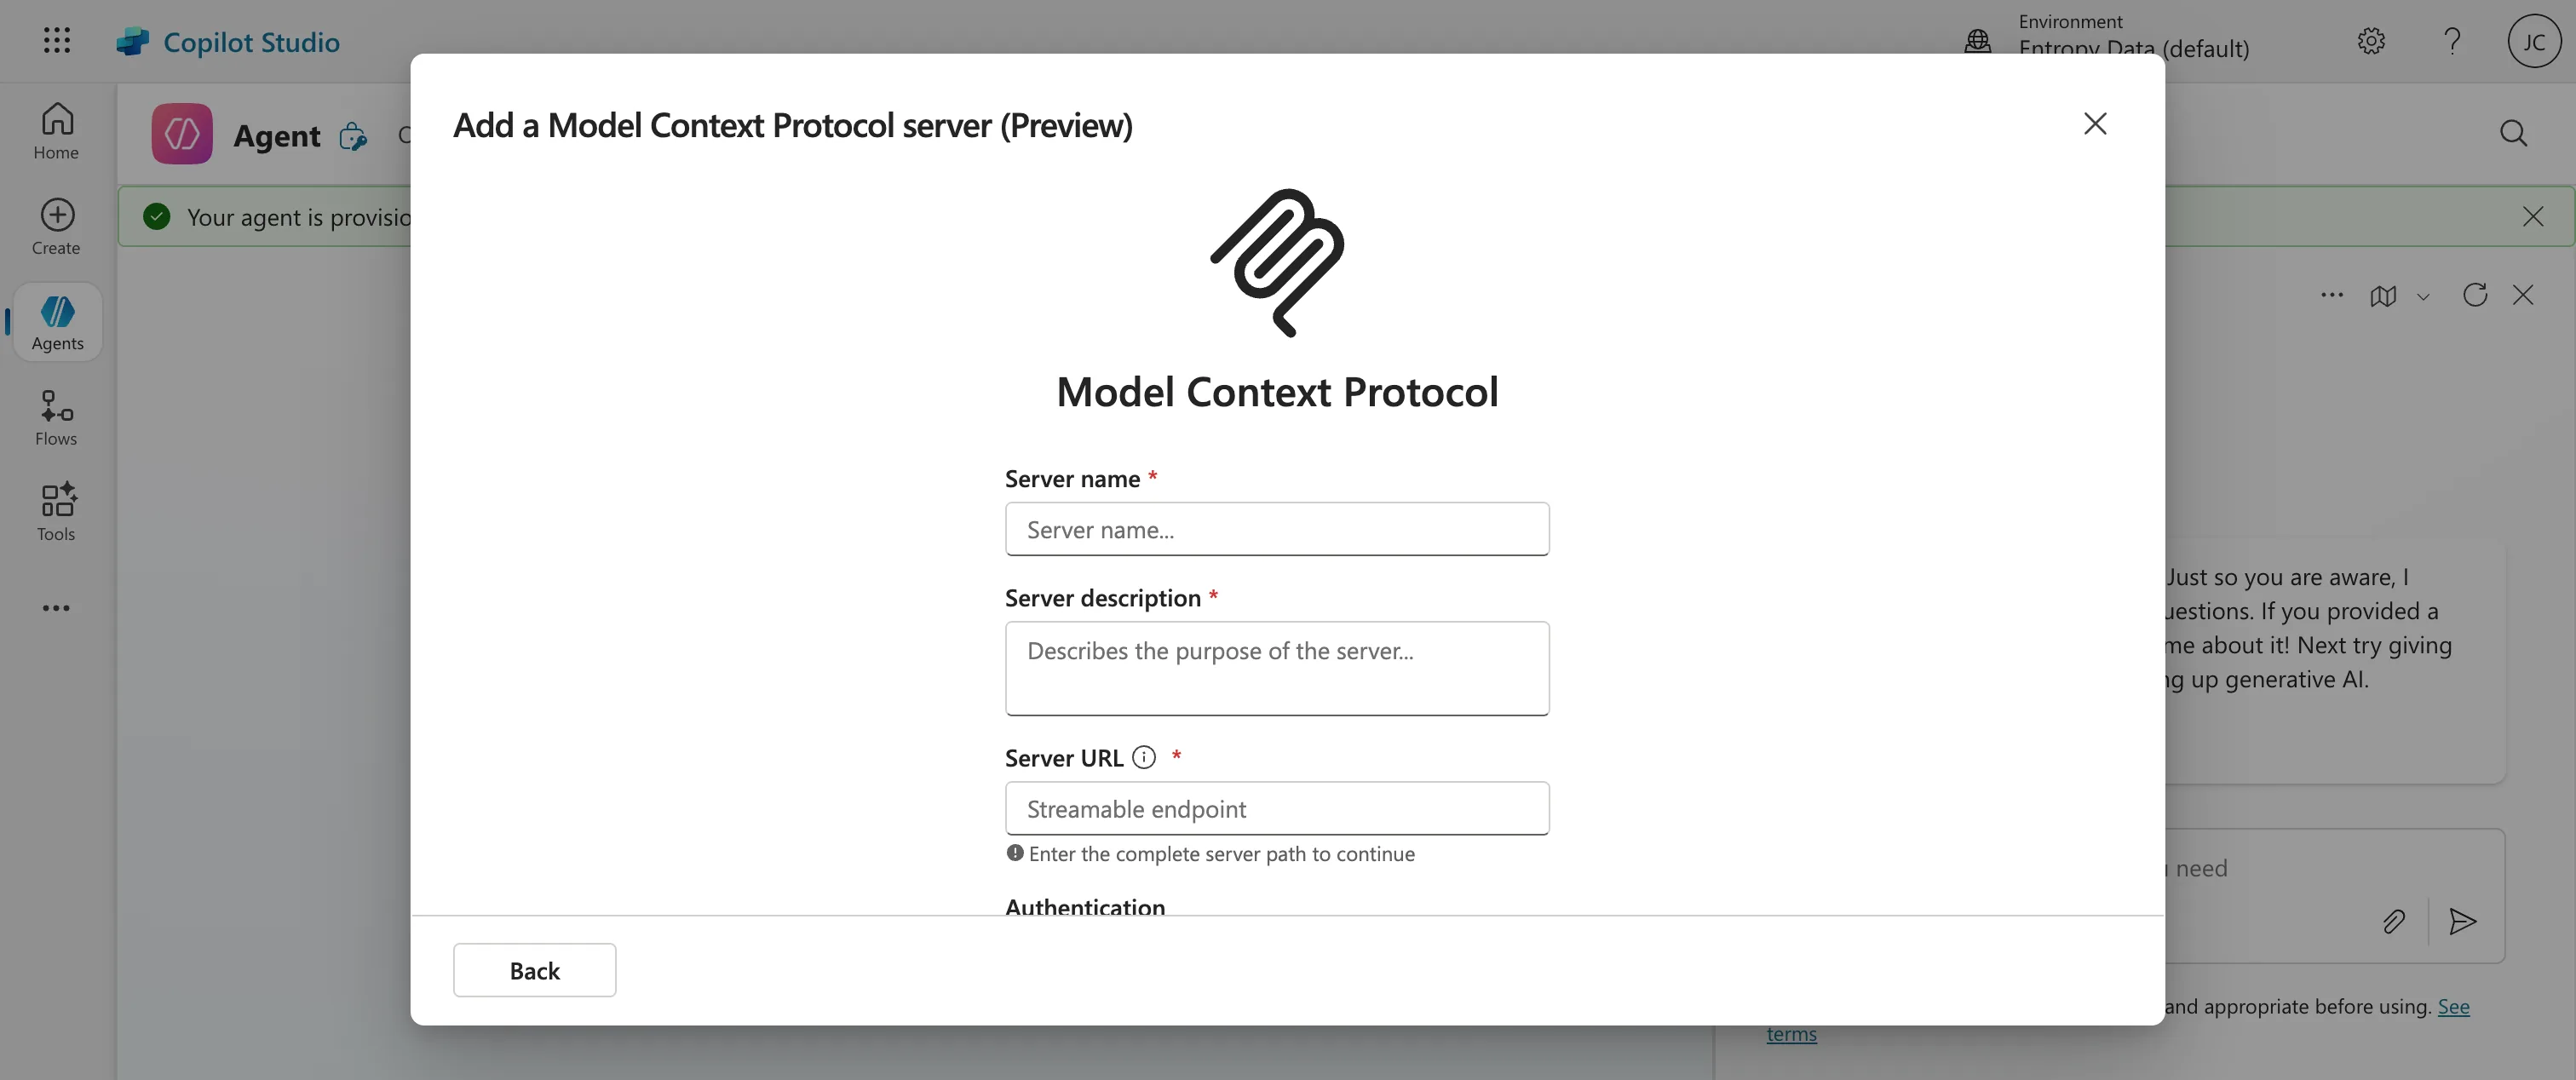
- Enter the following configuration values:
| Field | Value |
|---|---|
| Server Name | Entropy Data |
| Server Description | Access your data catalog and manage data products |
| Server URL | Your organization's MCP endpoint (will be displayed in the configuration wizard) |
| Authentication | OAuth 2.0 |
| Client ID | Provided after client creation |
| Client Secret | Provided after client creation |
| Authorization URL | Provided after client creation |
| Token URL | Provided after client creation |
| Refresh URL | Provided after client creation |
| Scopes | Provided after client creation |
- Click on Create
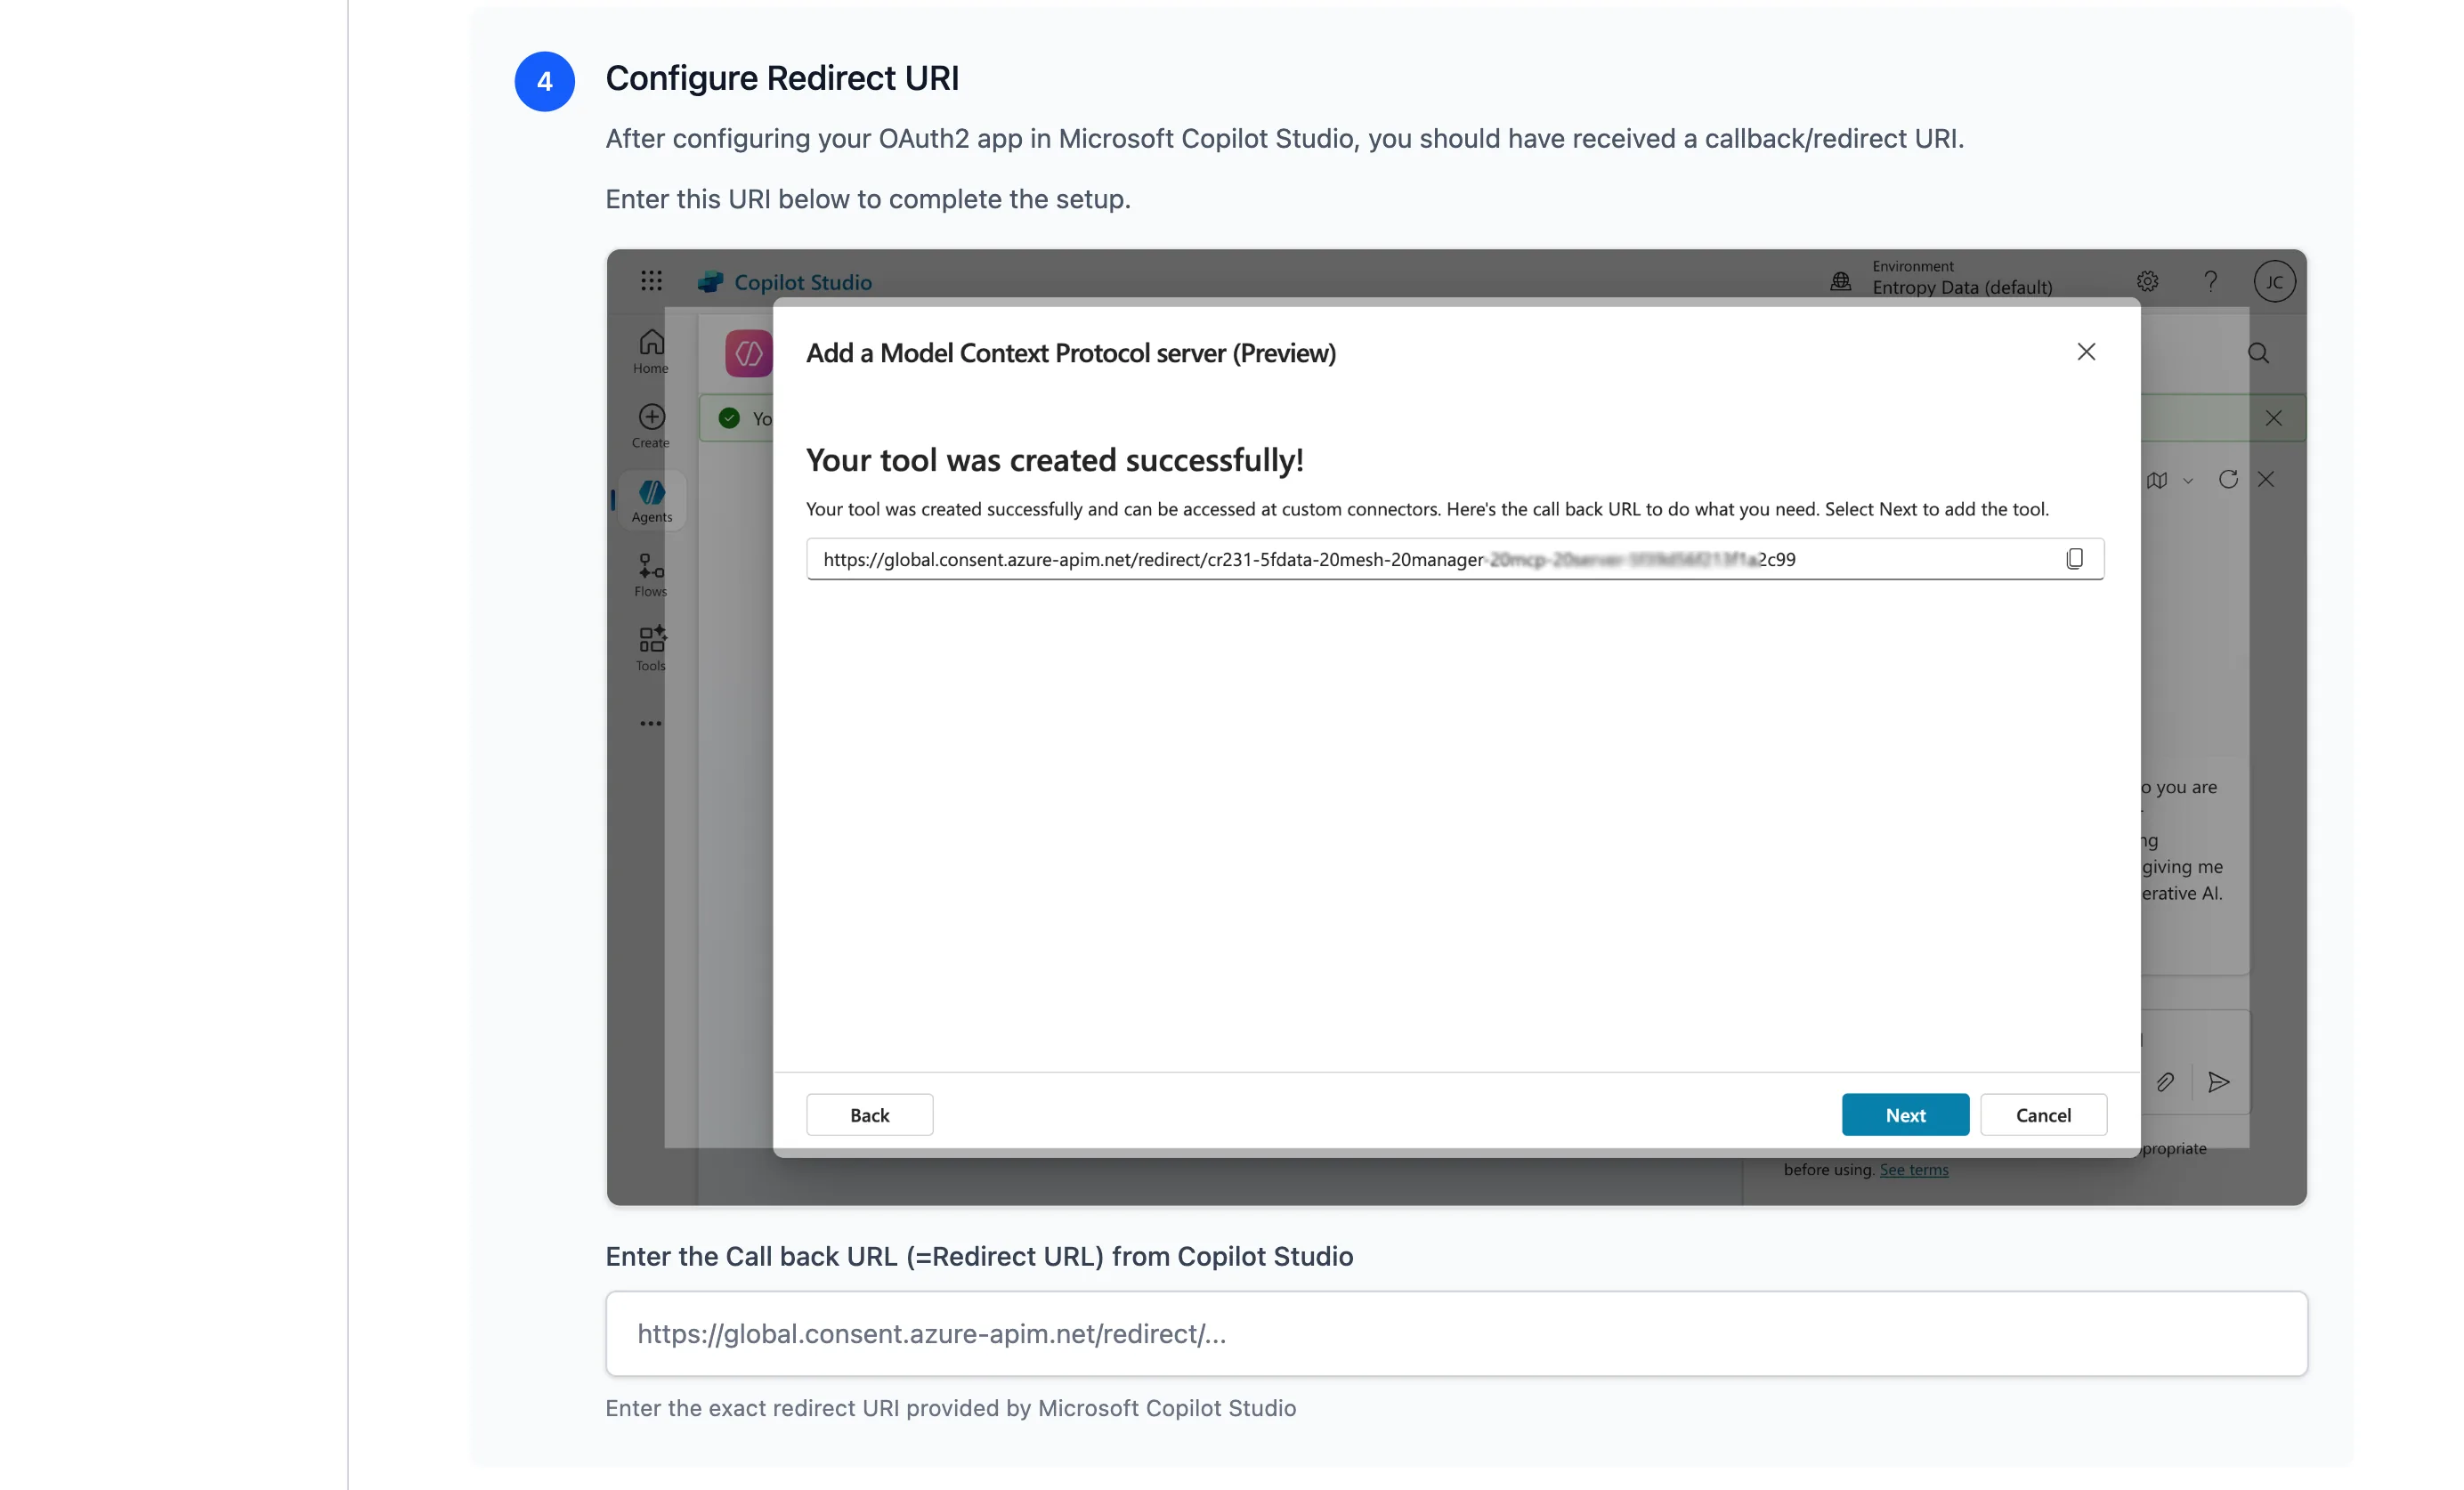
Step 4: Configure Redirect URI
After configuring your OAuth2 app in Microsoft Copilot Studio, you should have received a callback/redirect URI. Enter this Callback URL (=Redirect URL) from Copilot Studio back into the Entropy Data configuration wizard to complete the OAuth 2.0 setup.
Step 5: Connect Tool to Agent
Now create a connection between your MCP tool and the Copilot agent to complete the setup.
1. Create New Connection
After configuring your MCP tool in the previous step, you should see the tool configuration screen.
At the bottom of the tool configuration, you'll see a "Connection" section.
- Click on "Create new connection"
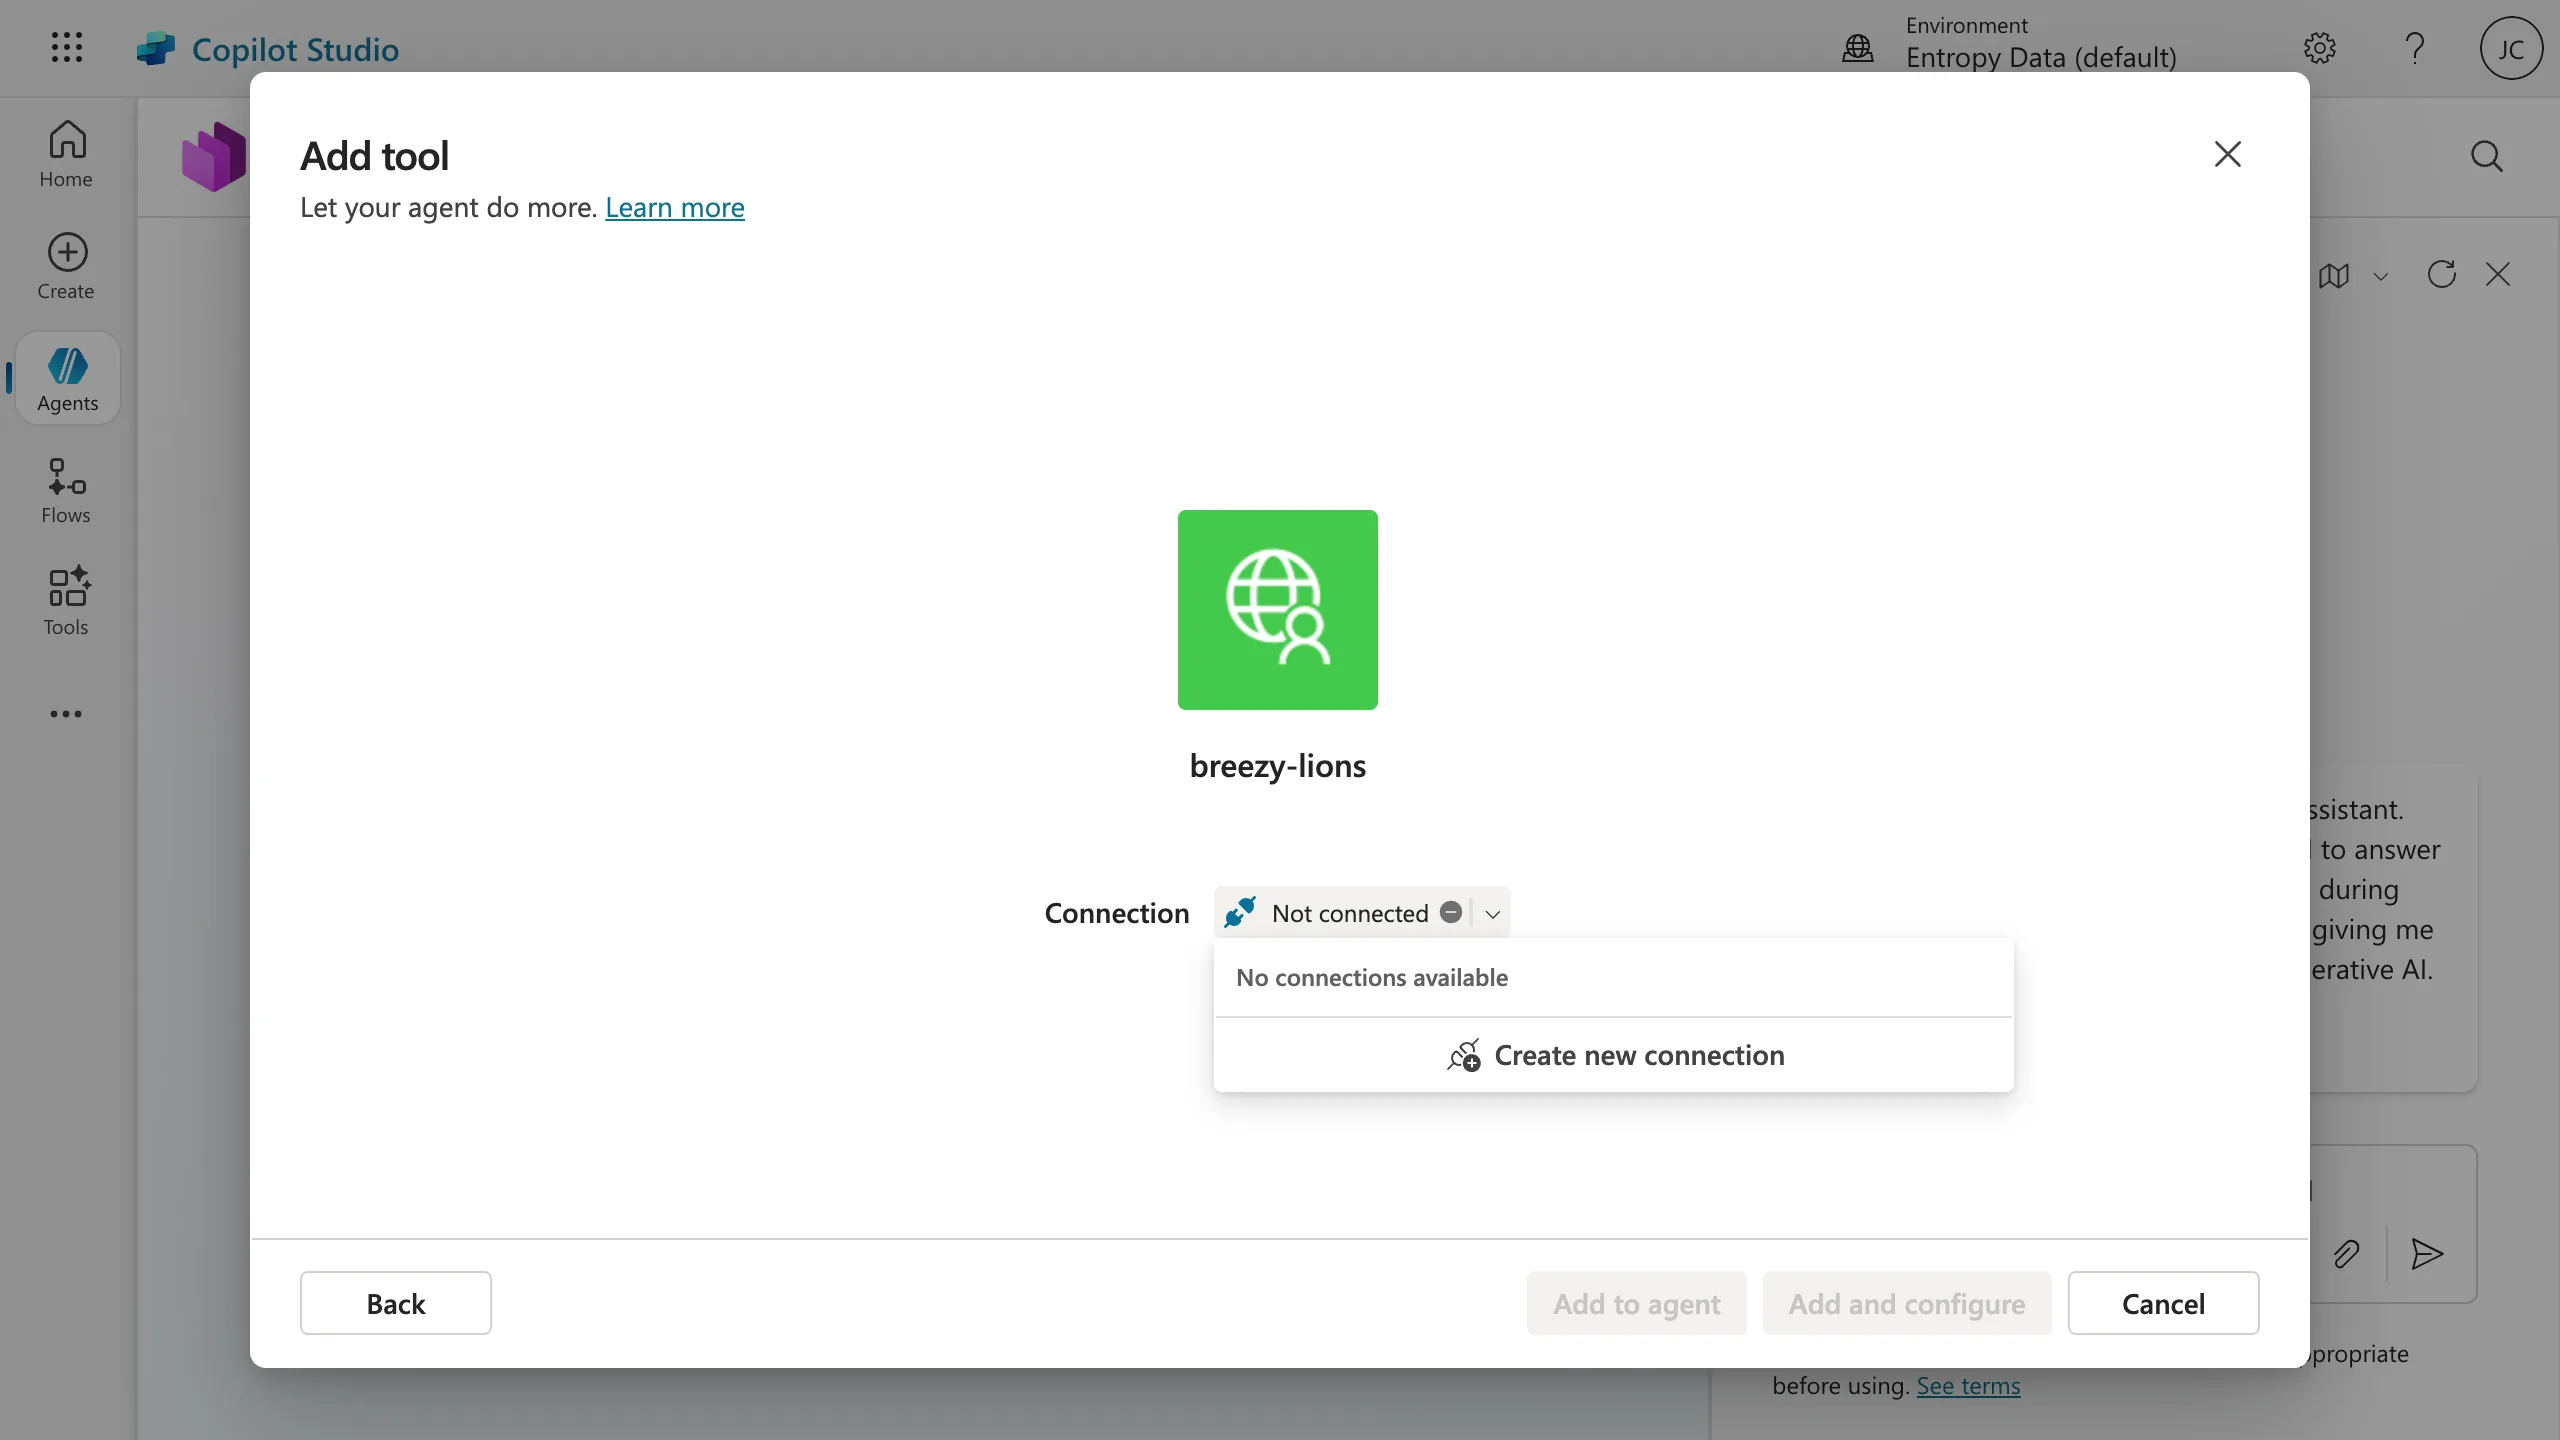
- Click "Create" to proceed with the connection setup
2. Authenticate Connection
You may be prompted to authenticate with the server.
If prompted, sign in using your credentials.
3. Add Tool to Agent
Once the connection is established successfully:
- You should see a confirmation that the connection was created
- Click "Add to agent" to finalize adding the MCP tool to your Copilot agent
4. Configure End User Credentials
After adding the tool to your agent, configure end user authentication:
- In the agent's tool settings, look for Additional details, expand, and look for Credentials to use setting
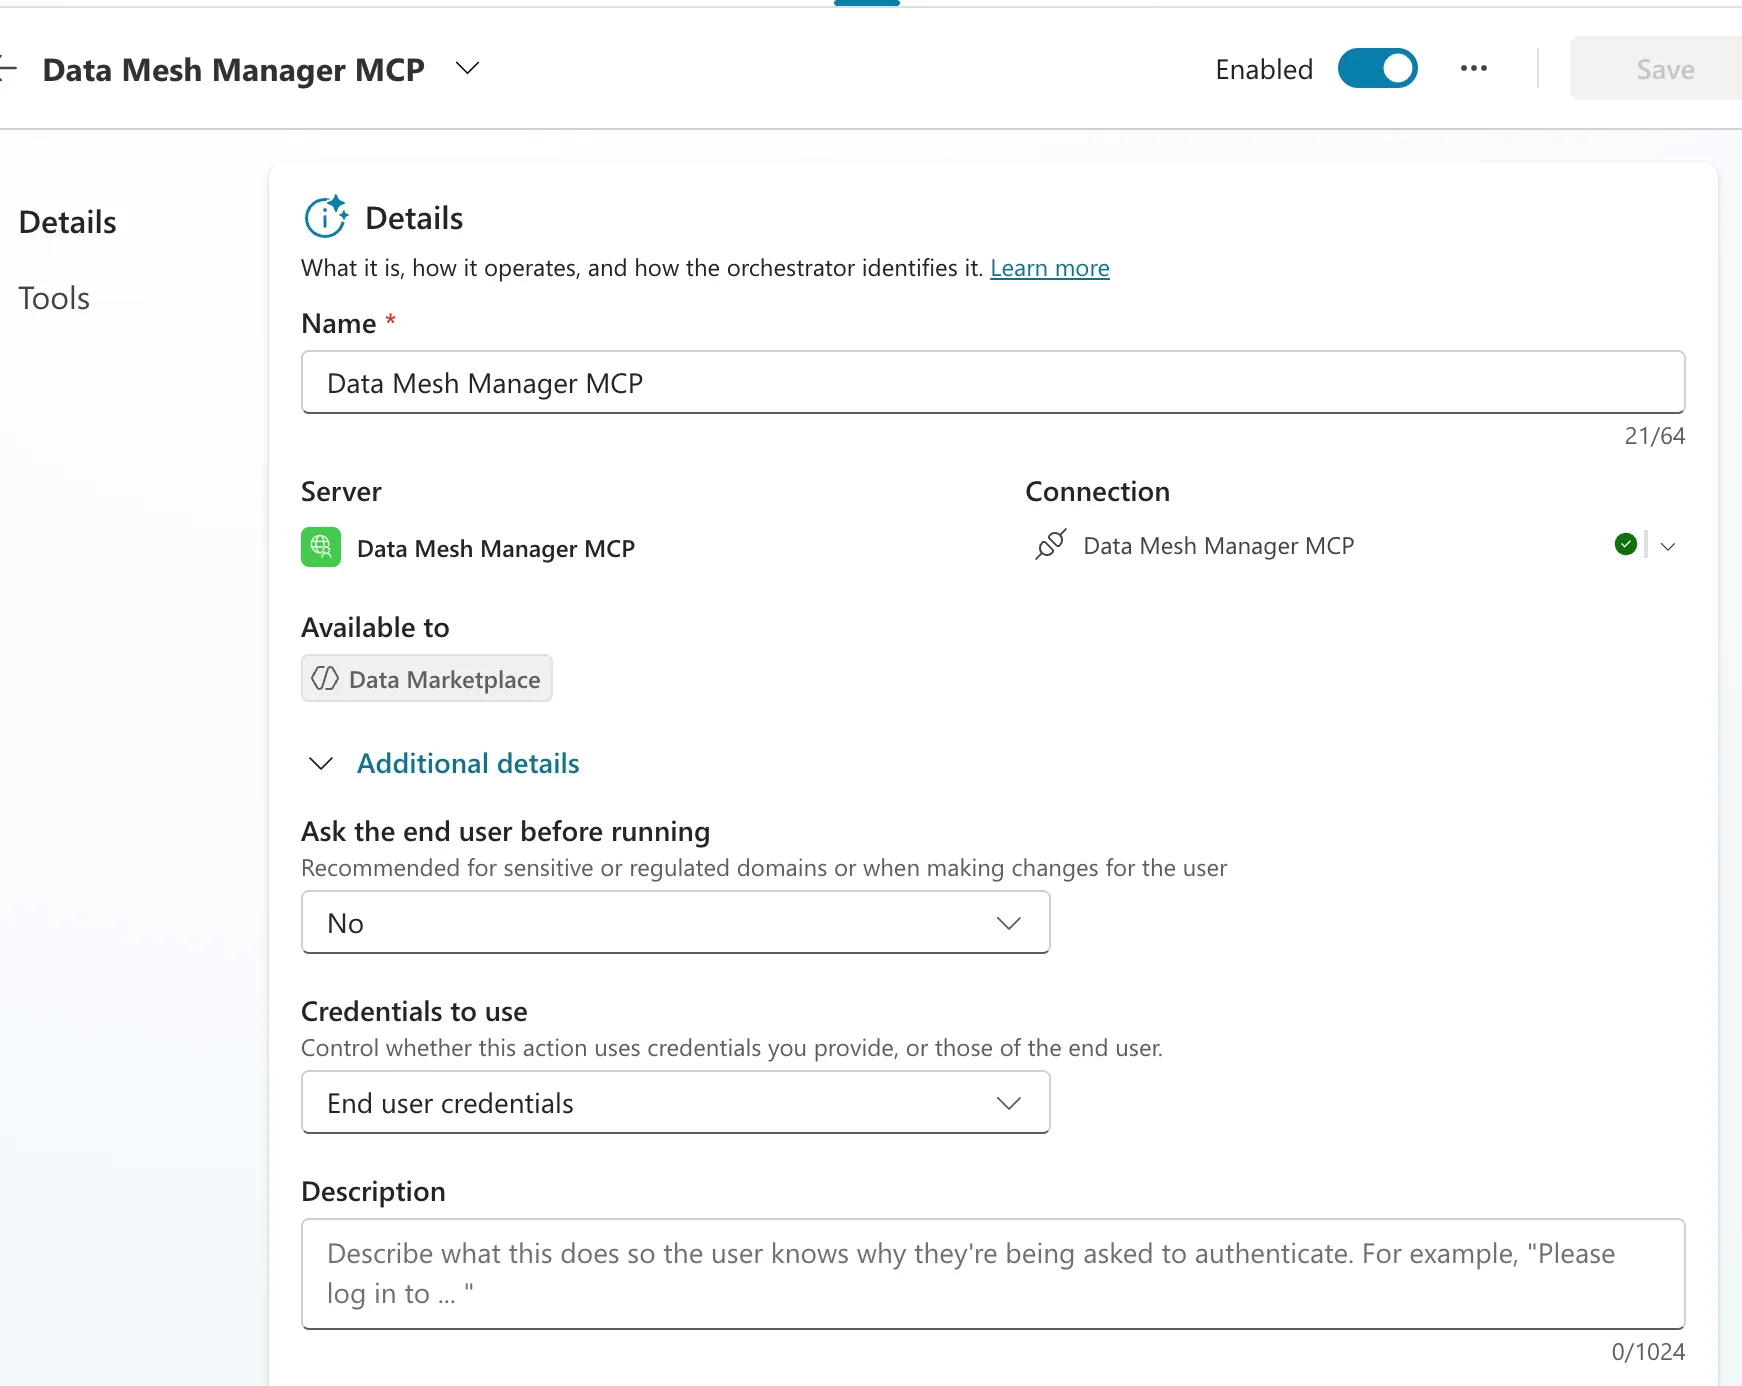
- Select "End user credentials"
- This ensures that each user will authenticate with their own credentials when using the tool
Setup Complete
Your MCP client has been successfully configured and is ready to use.
How to proceed?
1
Test the Connection
Go back to Microsoft Copilot Studio and test the connection to ensure everything is working correctly.
2
Publish Agent
Now you can publish your agent and under "Channels", add it to Teams or Microsoft 365 Copilot.
3
Monitor Usage
Spread the word to your team and monitor how users are leveraging the MCP client to access data products.