
Set up Publish to Power BI
A one-time setup, performed by a platform engineer or organization owner, that enables Publish to Power BI. Once it is configured, analysts follow the Publish to Power BI guide to connect their account and publish semantic models.
Architecture
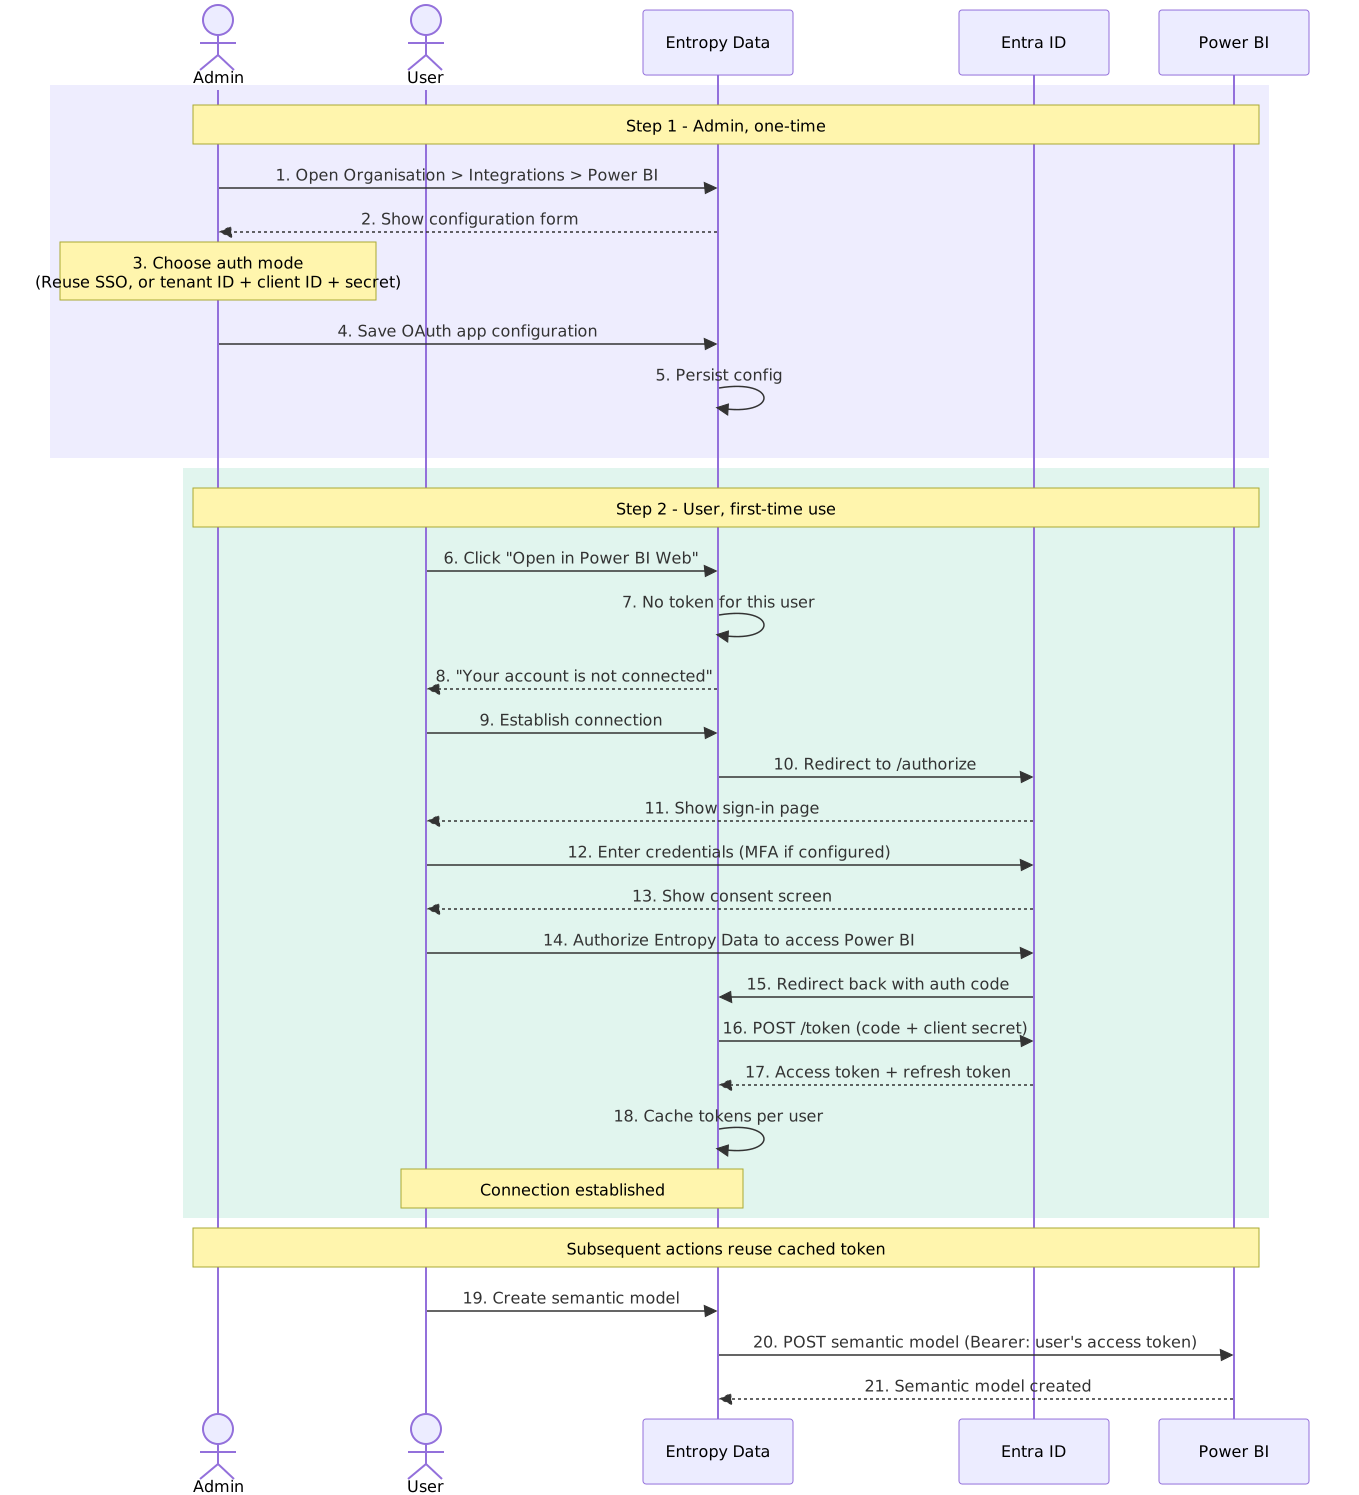
A business or data analyst triggers the publish flow from the Publish to Power BI dialog in Entropy Data. Authentication goes through Microsoft Entra ID (OAuth 2.0 / OIDC). Entropy Data converts the output port's Data Contract into a TMDL definition, POSTs it to the Power BI REST API as a new Semantic Model, and binds it to a Fabric Connection. The resulting model is registered back in Entropy Data as a governed consumer Data Product; at runtime, Power BI reads the underlying data source (e.g. Databricks) via the bound connection.
Authentication flow
Getting the integration working is a two-step process: an organization owner configures the OAuth application once, then each user connects their own Microsoft account on first use. After that, cached tokens are reused and refreshed in the background.
Prerequisites
- An Entropy Data Enterprise License or the Cloud Edition.
- A Microsoft Entra ID tenant with either:
- Option A — SSO-based credentials. Your organization's members sign in to Entropy Data via Entra ID / Microsoft SSO. The existing SSO application is reused for the Power BI user-delegation flow.
- Option B — Custom Entra application. A dedicated application registration in your Entra tenant with the permissions and redirect URI described below.
Cloud Edition
Encryption and signing keys are already configured and managed for you. No environment variables to set — skip straight to Option A or Option B to register the Entra application.
Self-hosted
Publish to Power BI has no global feature flag — it becomes available for an organization as soon as an organization owner saves its Power BI credentials (Option A or Option B). The only environment variable to set beforehand is the encryption key. See Configuration for the full reference.
| Variable | Purpose |
|---|---|
APPLICATION_ENCRYPTION_KEYS | 64-hex-character key; encrypts stored client secrets and user tokens at rest |
Option A: SSO-based credentials
If your organization already uses Microsoft Entra SSO to log in to Entropy Data, the same Entra application can be used for Publish to Power BI.
- In the Entra portal, open your Entropy Data SSO application and add the following redirect URI under Authentication → Web:
https://entropy-data.example.com/powerbi/callback
Only the host changes — the /powerbi/callback path must be exactly as shown.
- Under API permissions, add the delegated permissions listed in the Required permissions section below.
- In Entropy Data, navigate to
Settings>Power BI(as an organization owner) and select Use SSO credentials. - Save. The settings page displays the resolved application name from Microsoft Graph so you can confirm you are pointing at the right app.
Option B: Custom Entra application
When Entropy Data SSO does not use Microsoft, or you prefer a dedicated application for Publish to Power BI, register a new Entra application (see https://learn.microsoft.com/de-de/entra/identity-platform/quickstart-register-app).
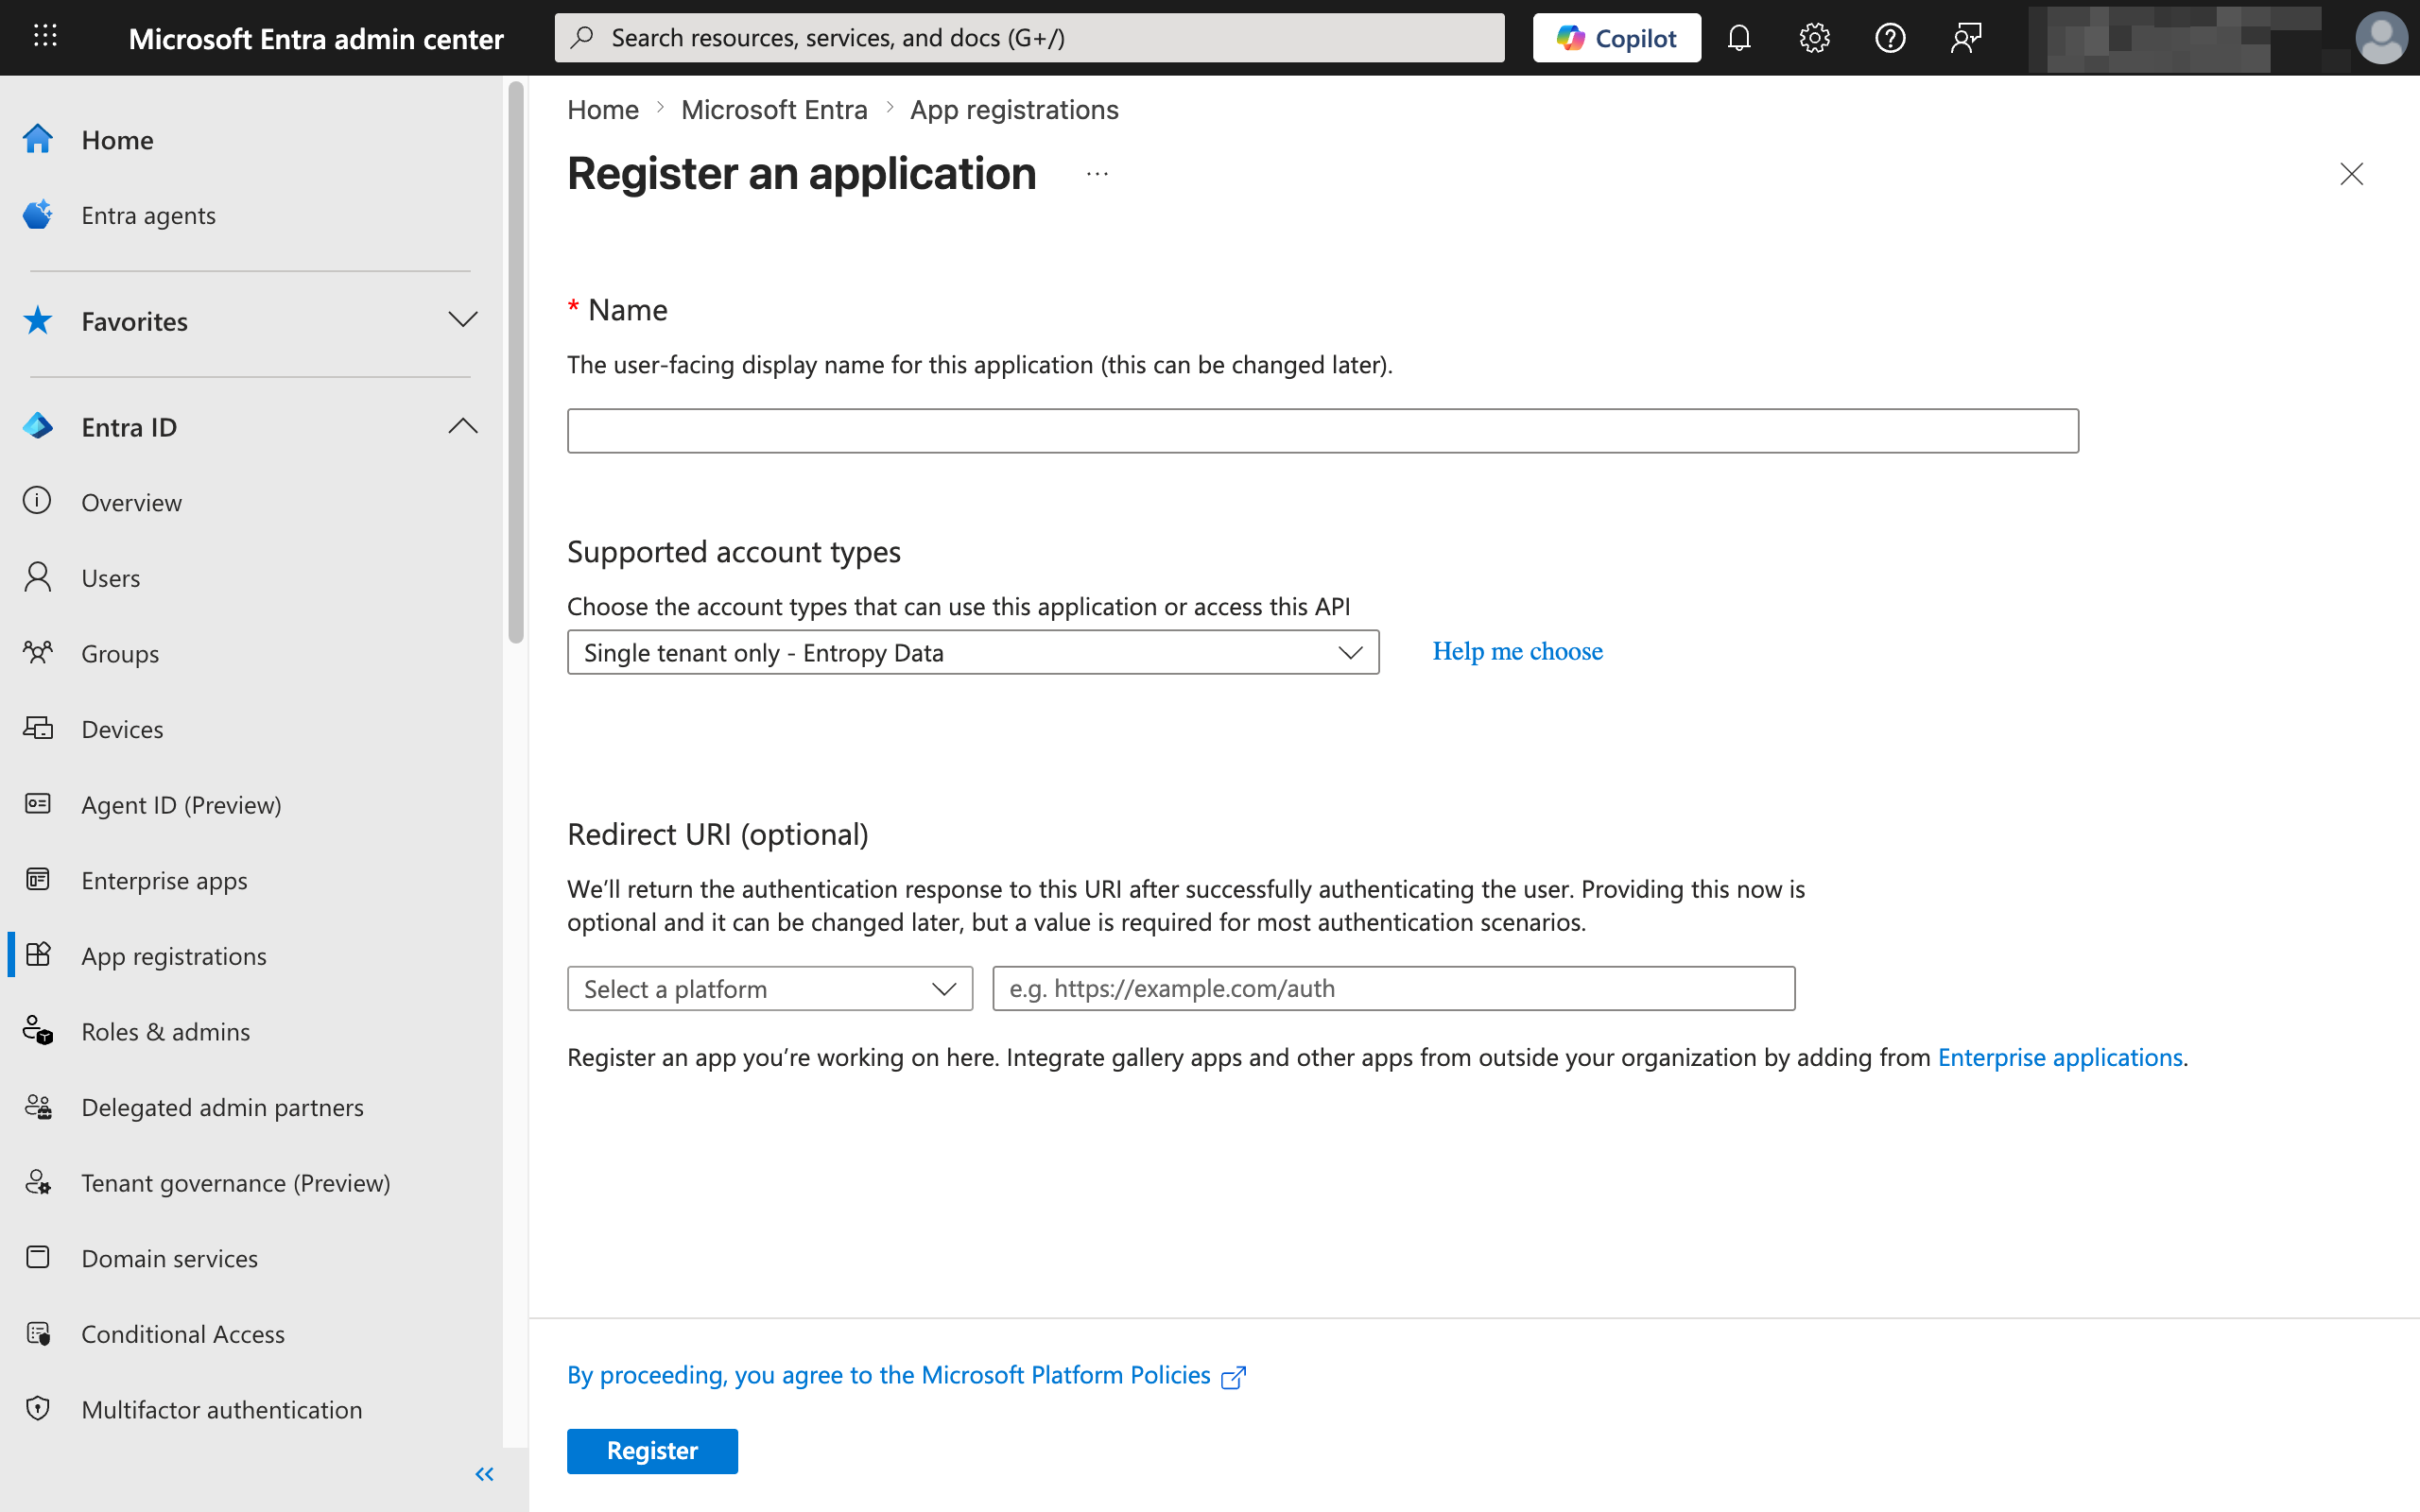
- In the Entra portal, Register a new application. Give it a descriptive name like Entropy Data — Power BI.
- Under Authentication → Web, add the redirect URI:
https://entropy-data.example.com/powerbi/callback
Only the host changes — the /powerbi/callback path must be exactly as shown.
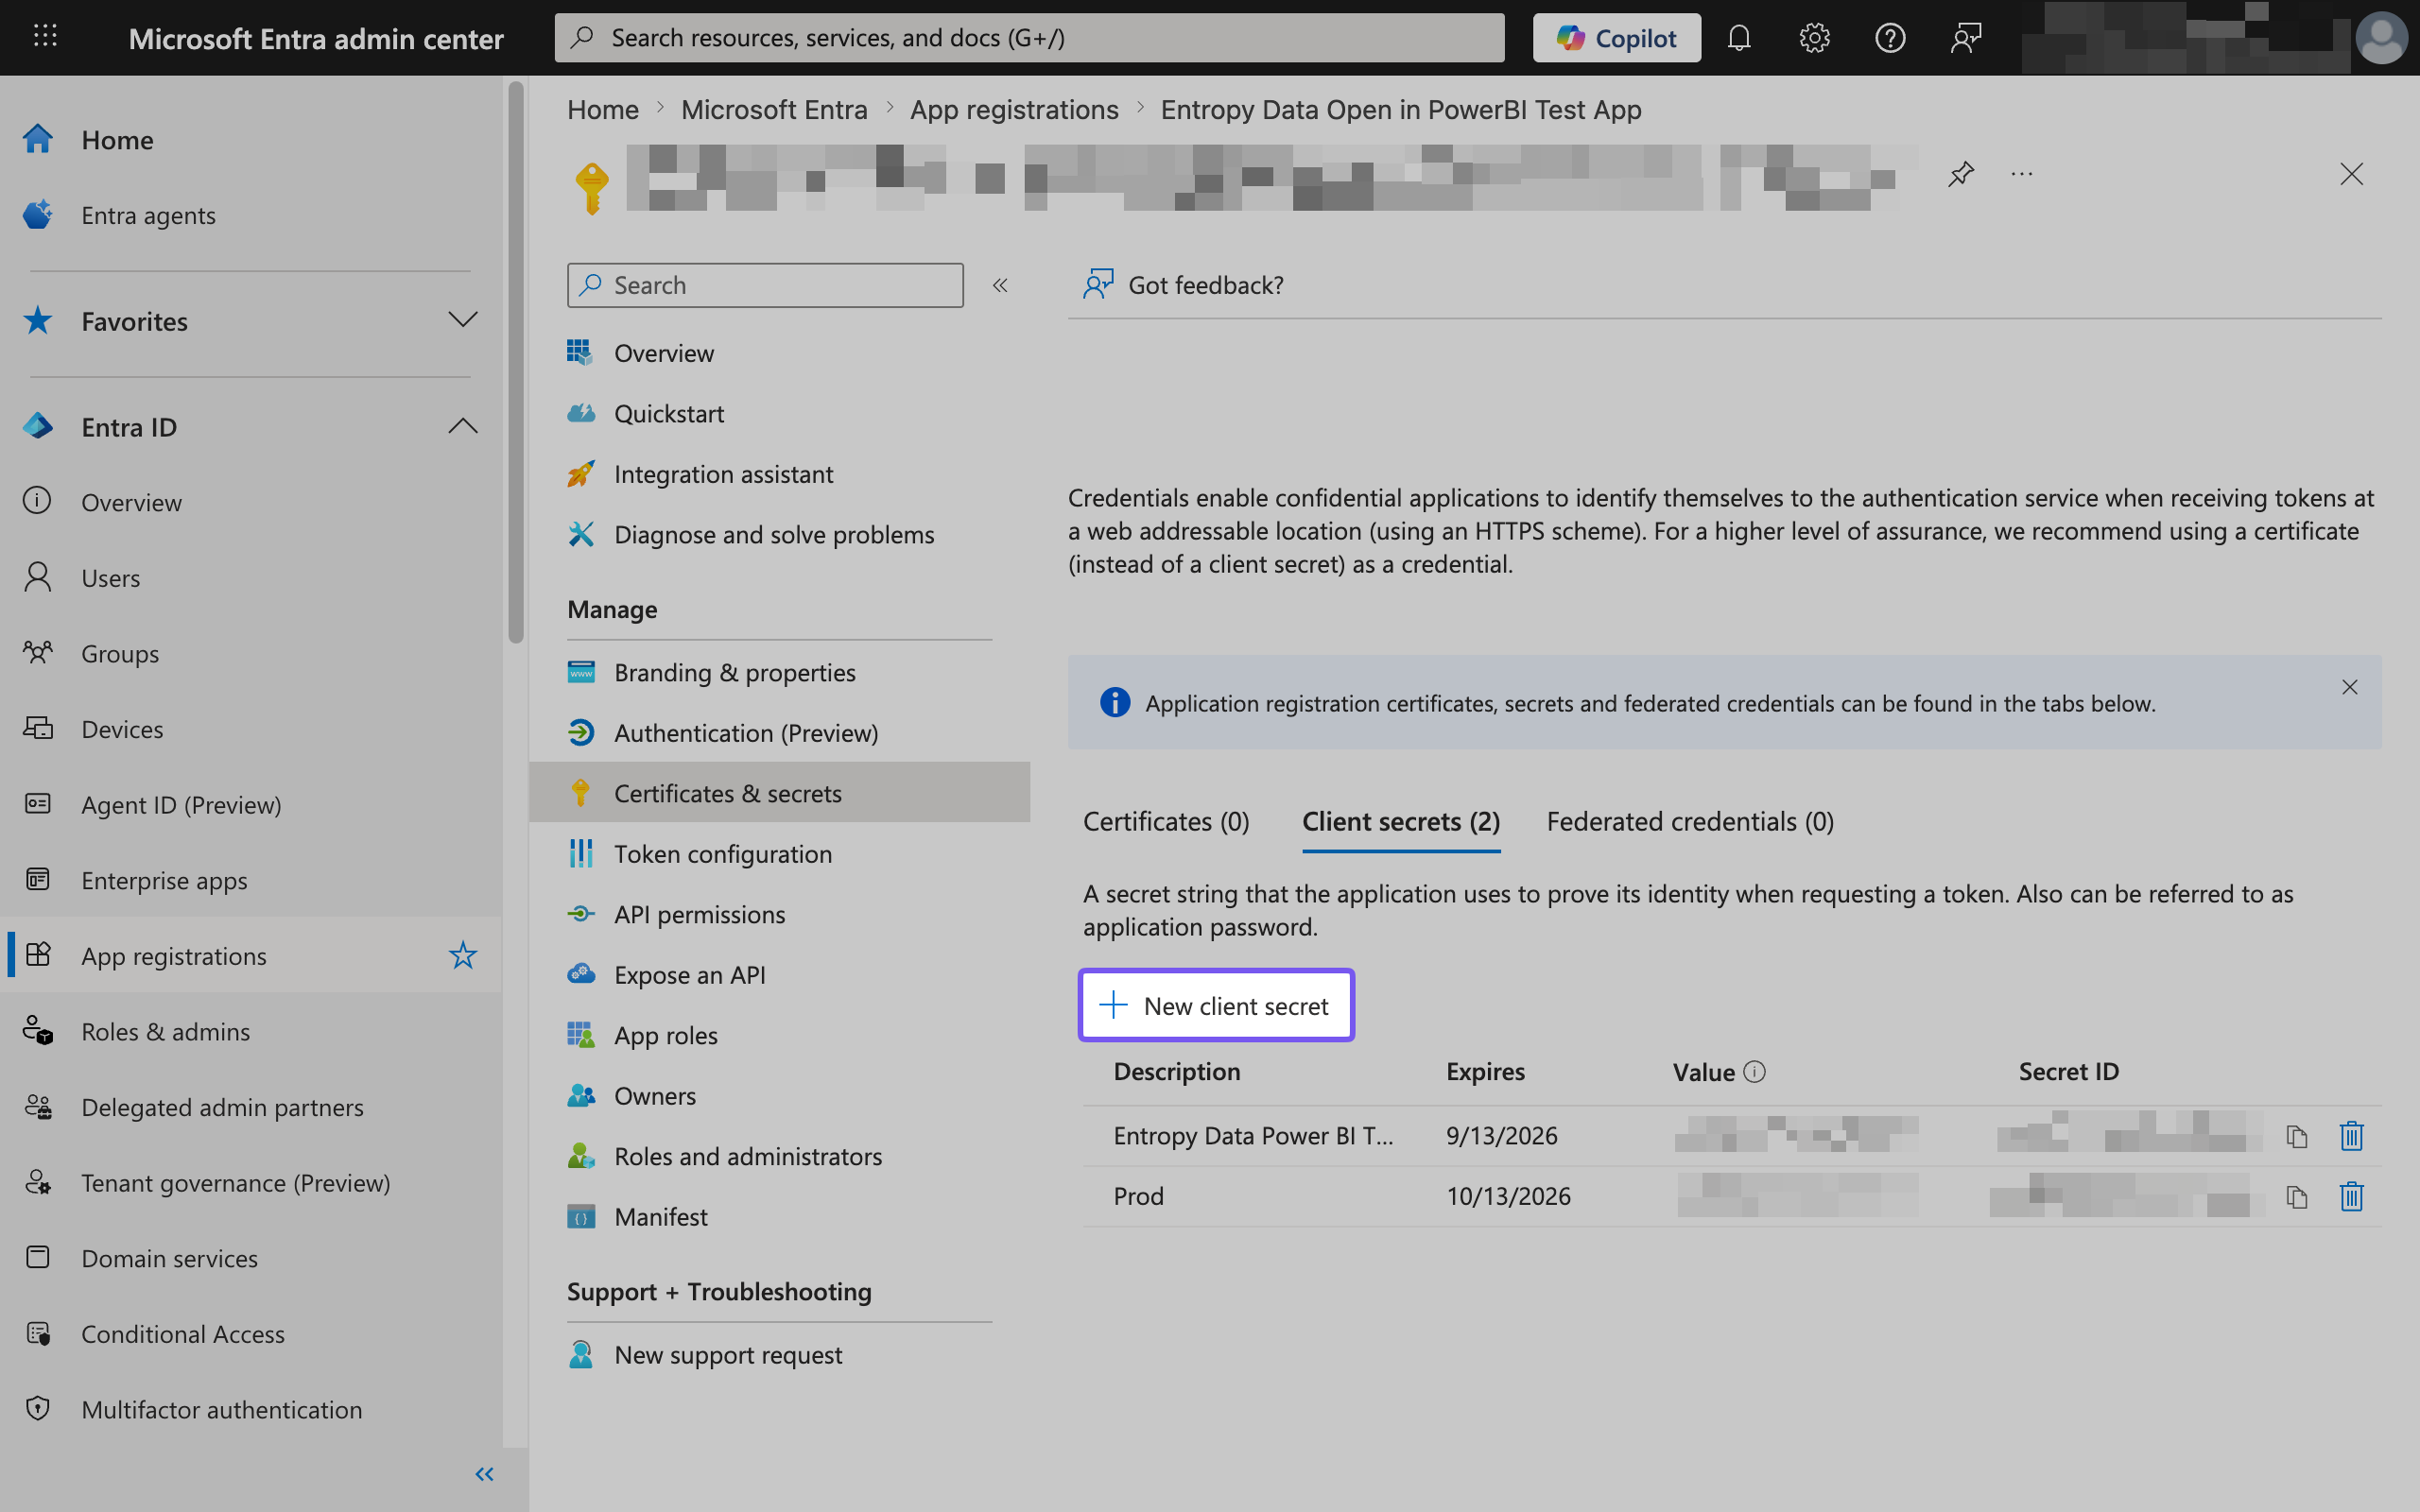
- Under Certificates & secrets, create a new Client secret and note the value — it is shown only once.
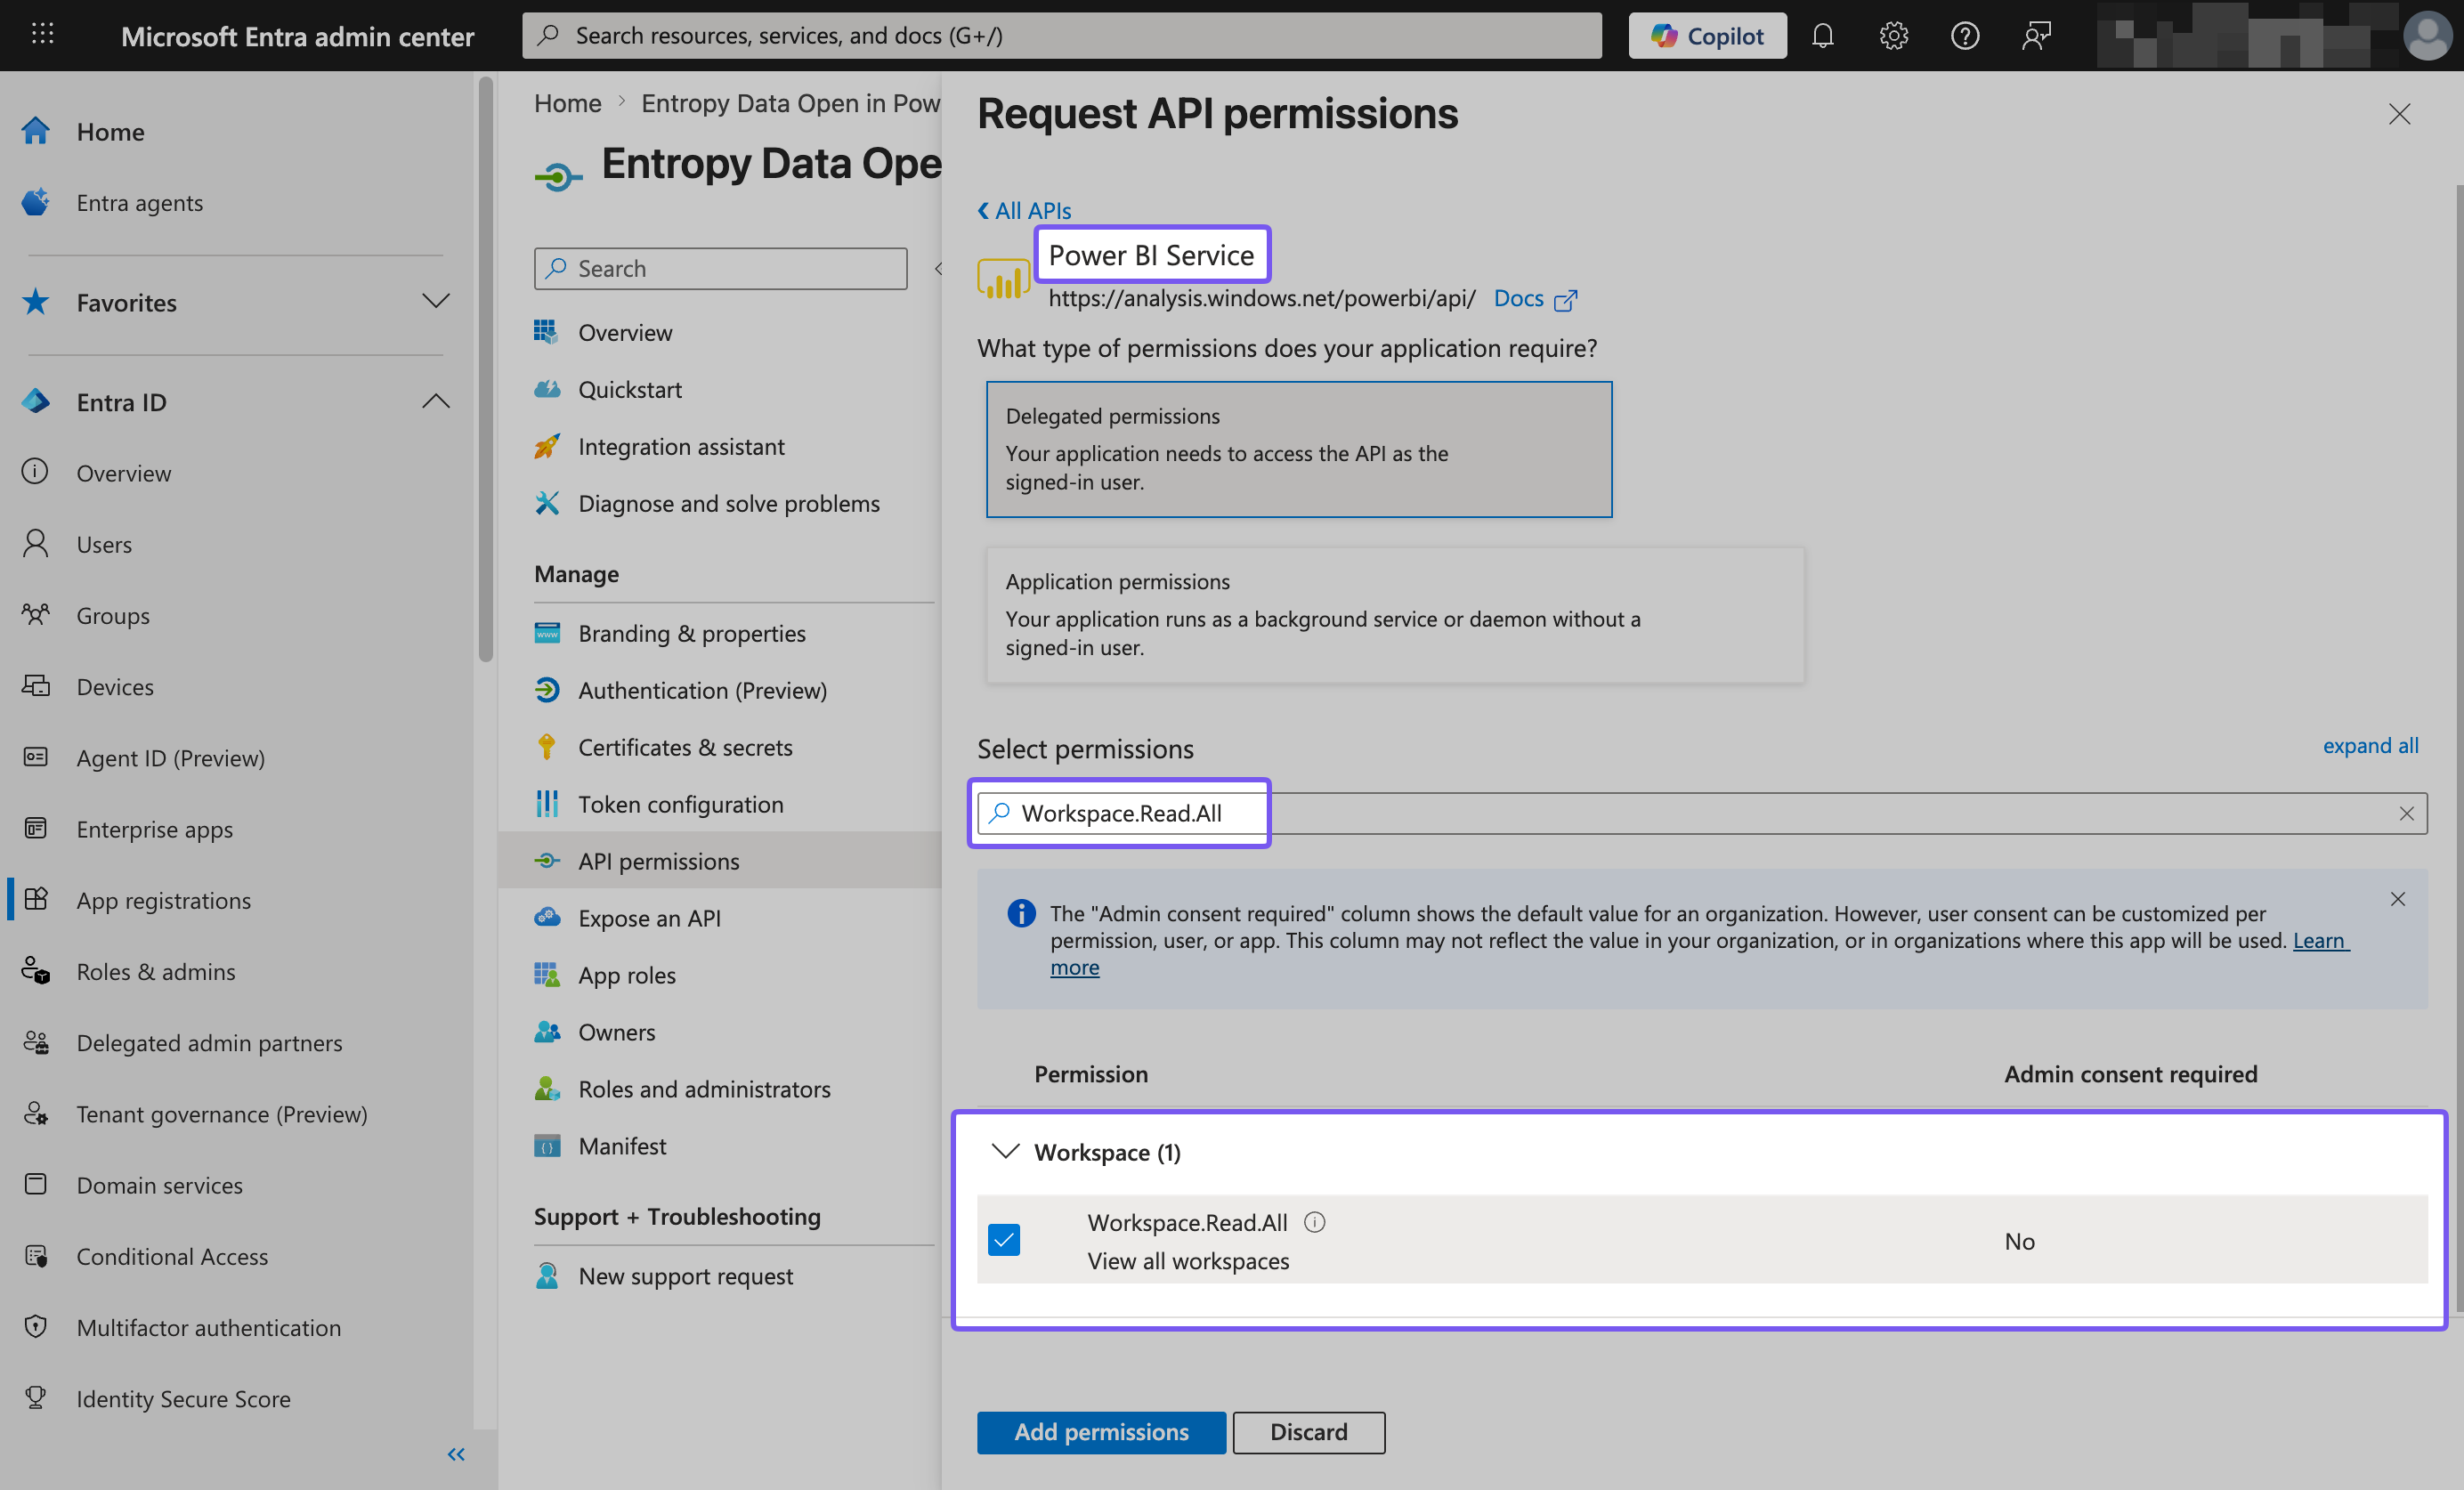
- Under API permissions, add the delegated permissions listed below and grant admin consent for your tenant.
- In Entropy Data, navigate to
Settings>Power BI(as an organization owner) and select Use custom credentials. Enter the Tenant ID, Client ID, and Client Secret of your new application, then click Test connection to verify. You find your Tenant ID and Client ID on the overview page of the Entra application:
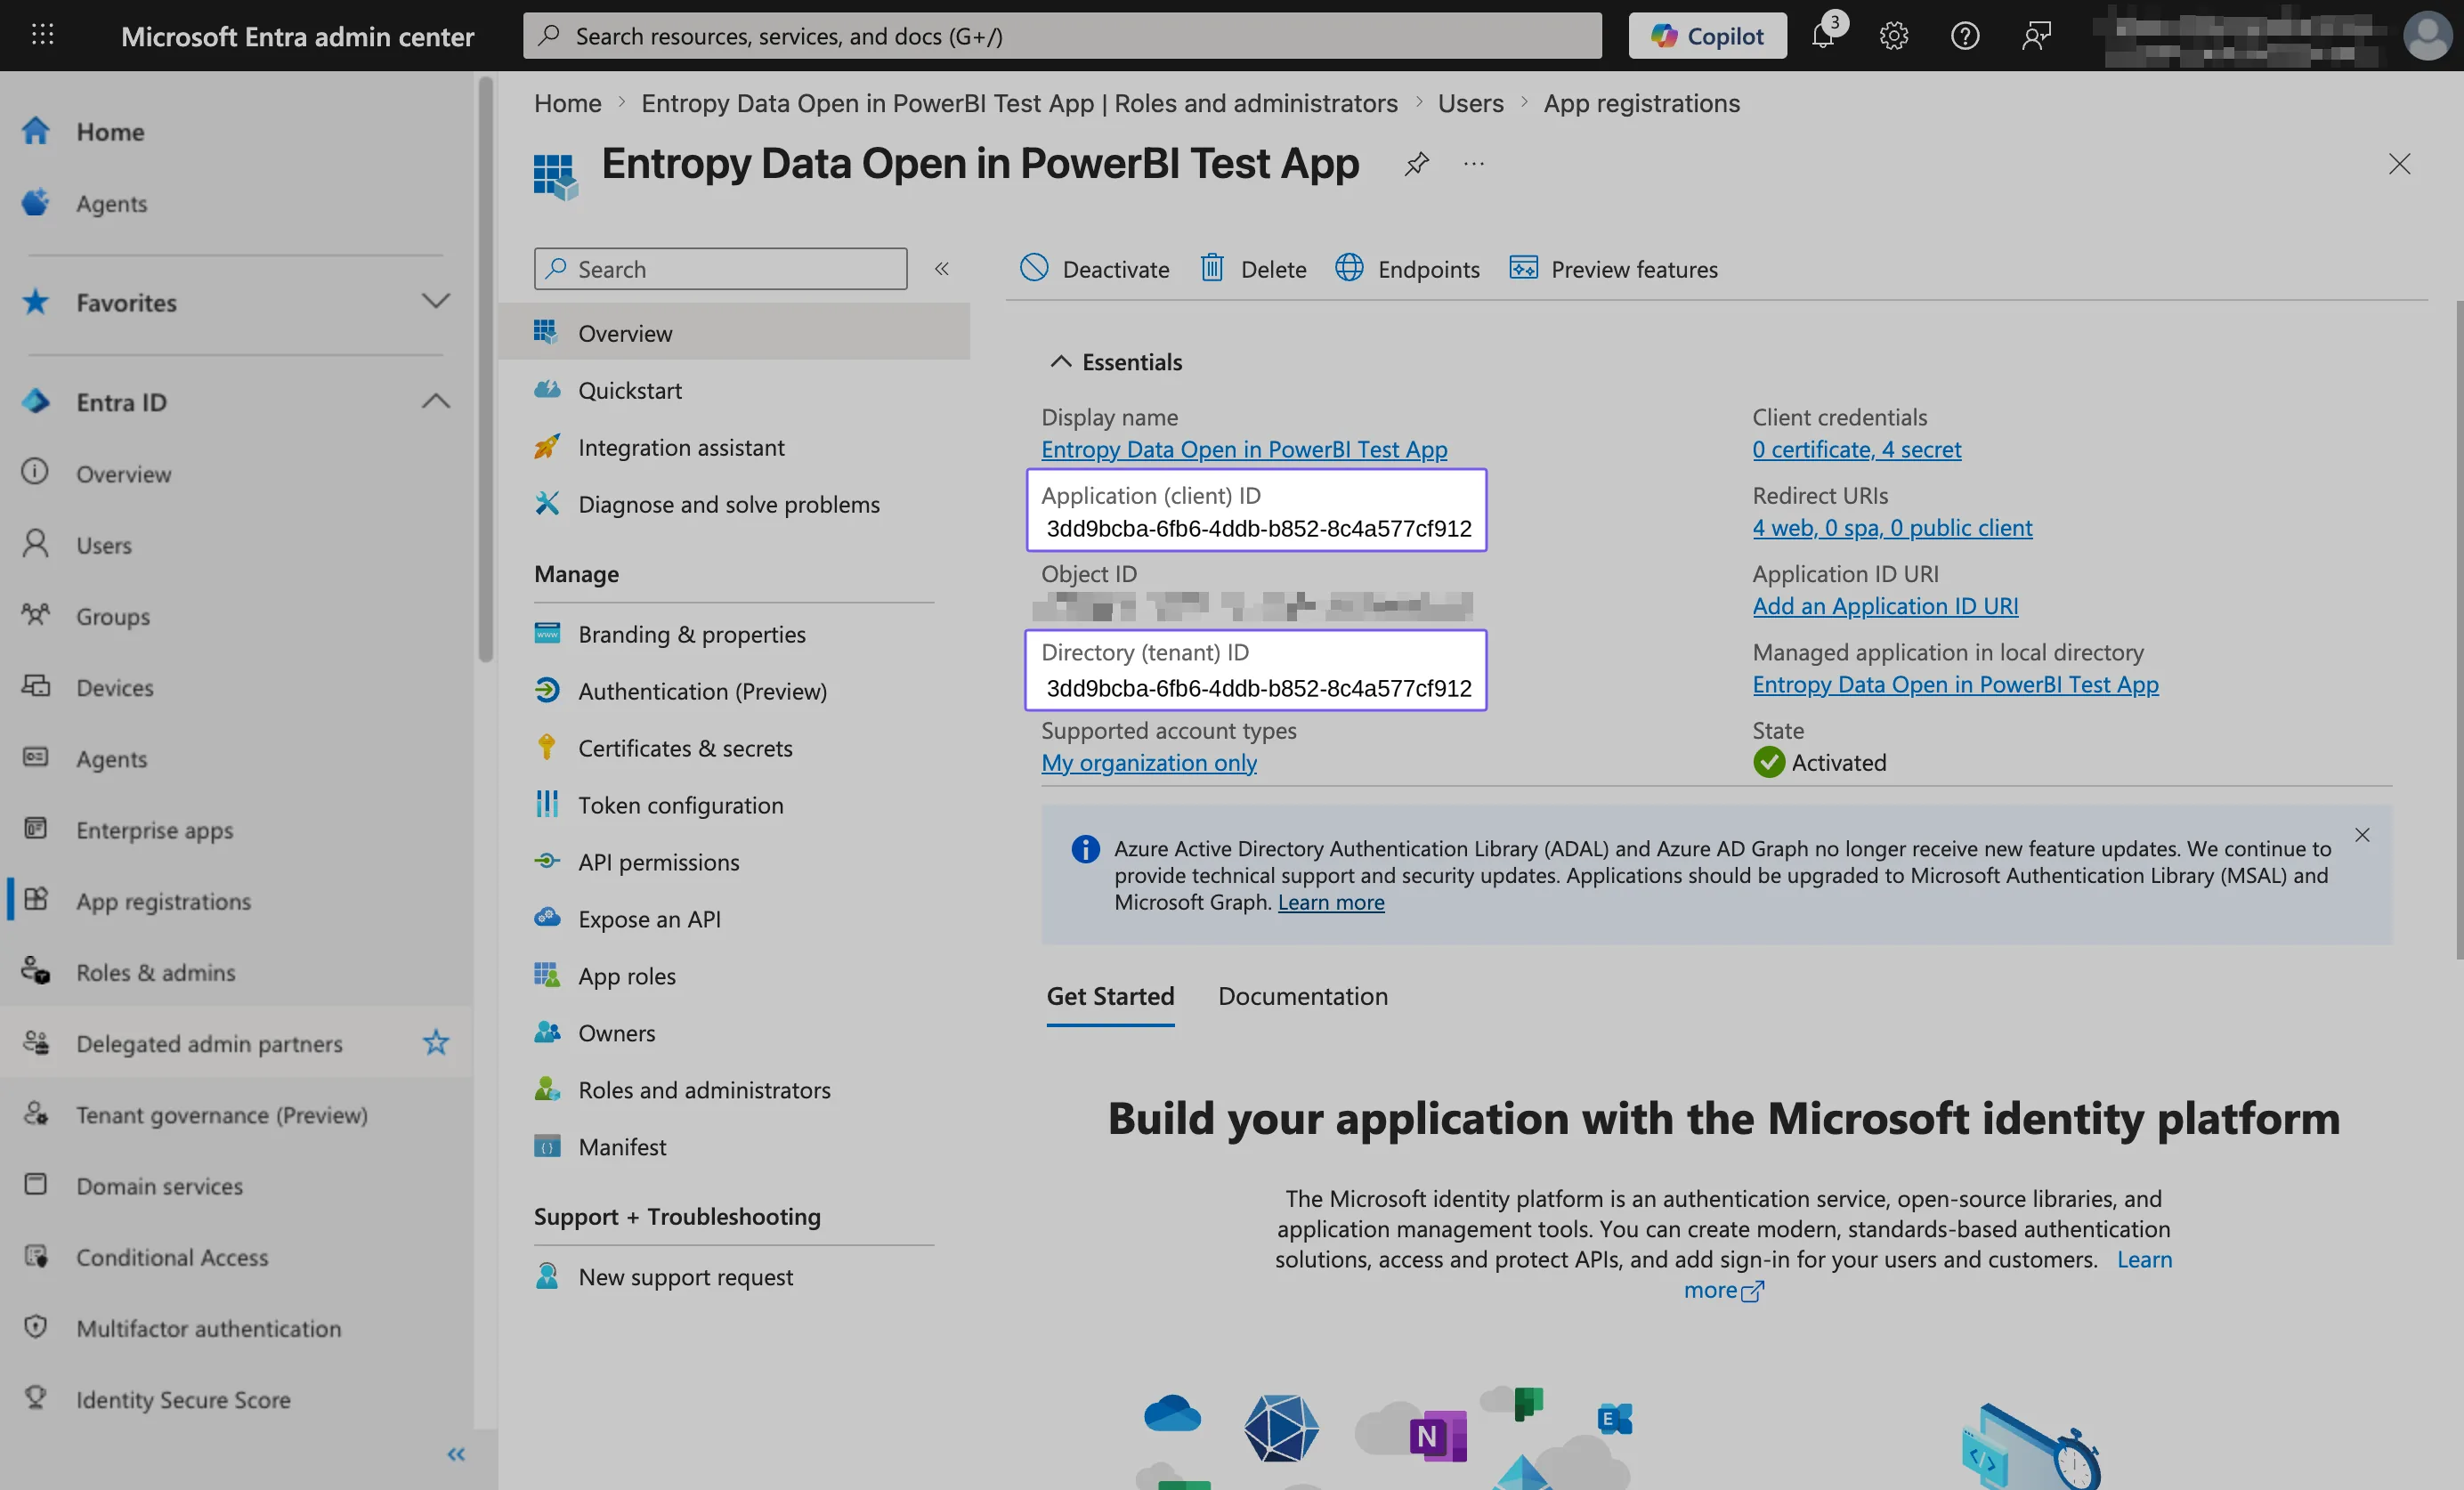
Note that the Client ID is the Application (client) ID shown on the overview page — not the Secret ID listed under Certificates & secrets. The Secret ID only identifies the secret entry in Entra; the value you need for Client Secret is the secret value you copied when creating it in step 3.
- Save. Credentials are encrypted at rest and the client secret is never returned from the API after save.
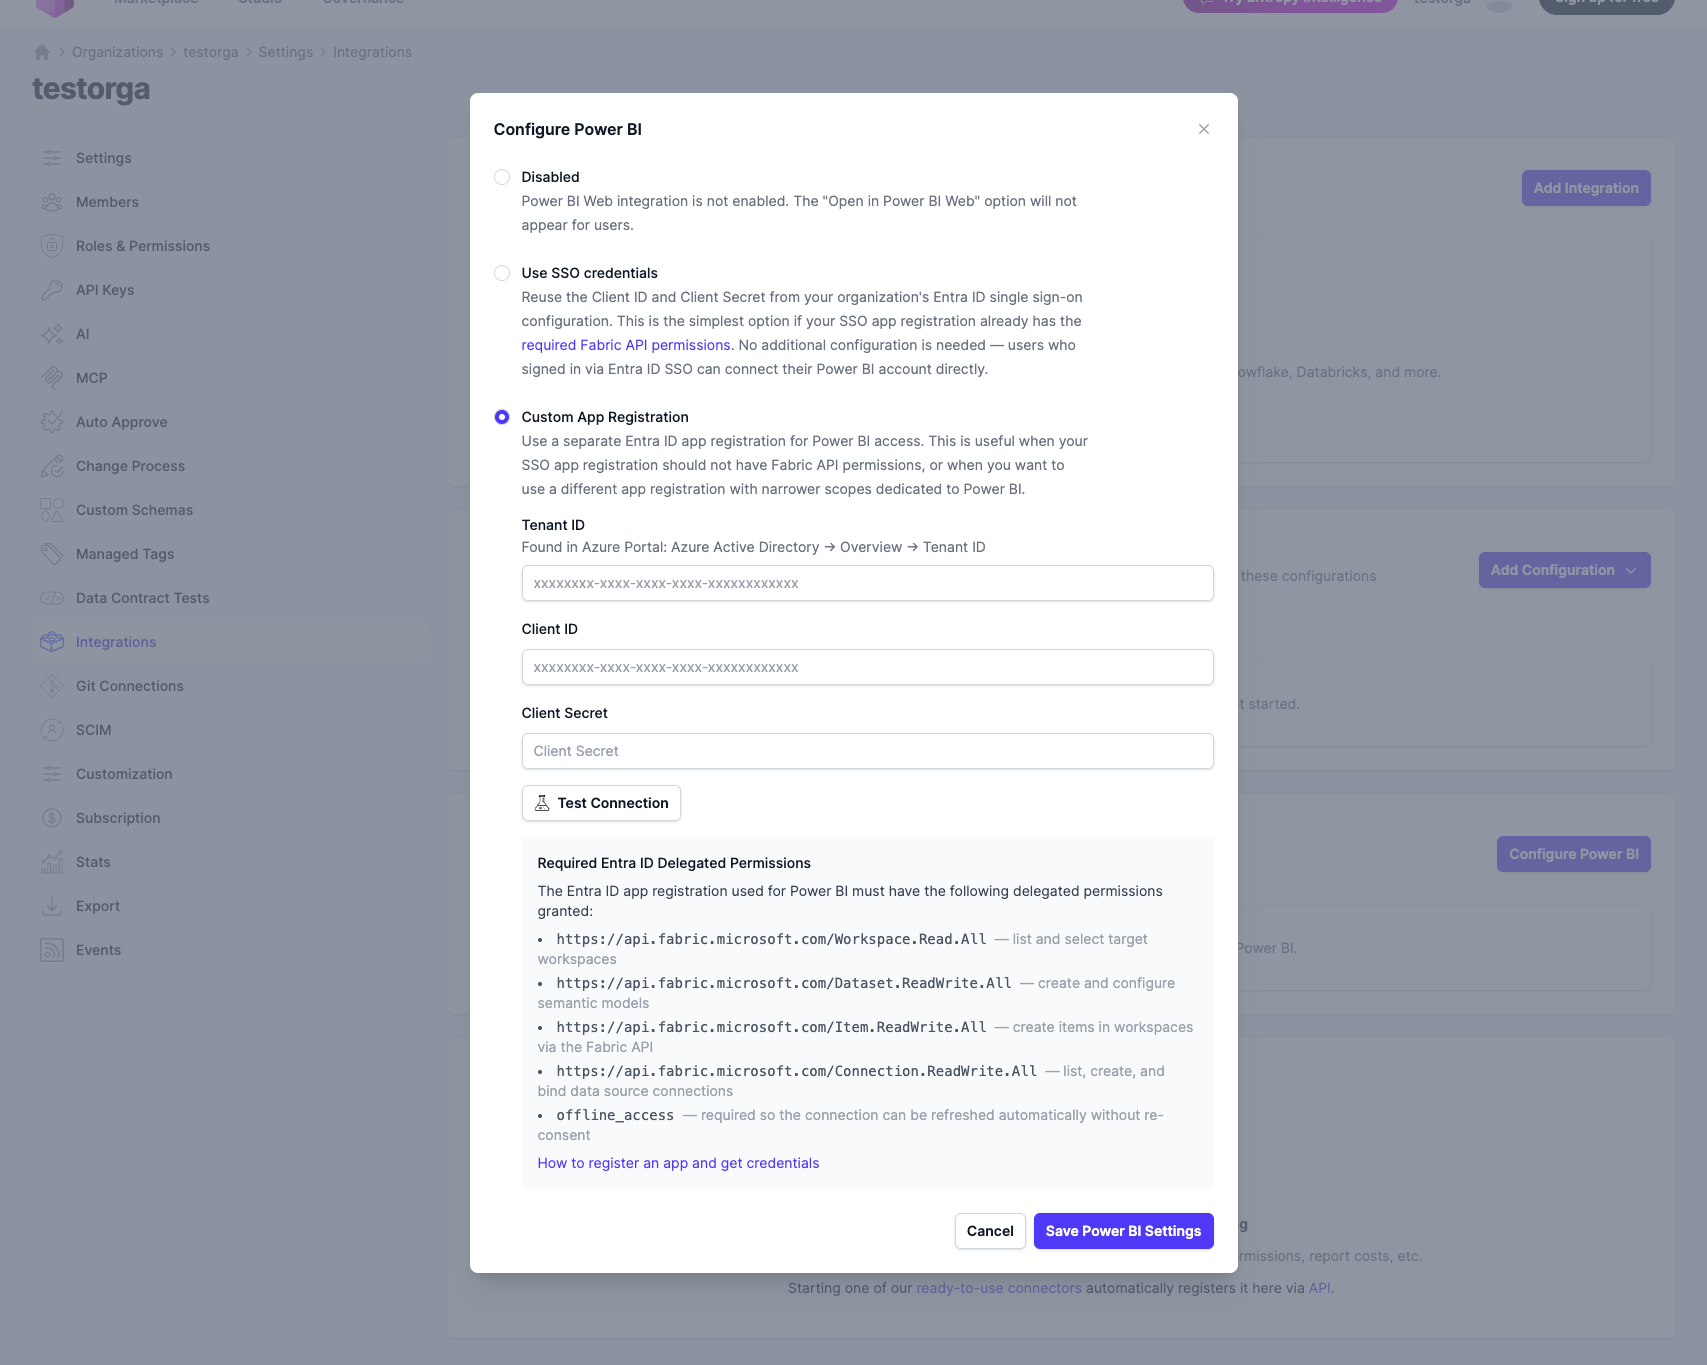
Required permissions
The Entra application needs the following delegated Microsoft API permissions:
| API | Permission | Purpose |
|---|---|---|
| Power BI Service | Workspace.Read.All | List the user's Fabric workspaces |
| Power BI Service | Dataset.ReadWrite.All | Create and update semantic models |
| Power BI Service | Item.ReadWrite.All | Create Fabric items (semantic models as Fabric items) |
| Power BI Service | Connection.ReadWrite.All | Create Fabric connections for new data sources |
| Microsoft Graph | offline_access | Refresh tokens so users do not need to reconnect every session |
offline_access is required so Entropy Data can refresh the user's access token in the background. Without it, publishing works for the first few minutes after connect and then fails.